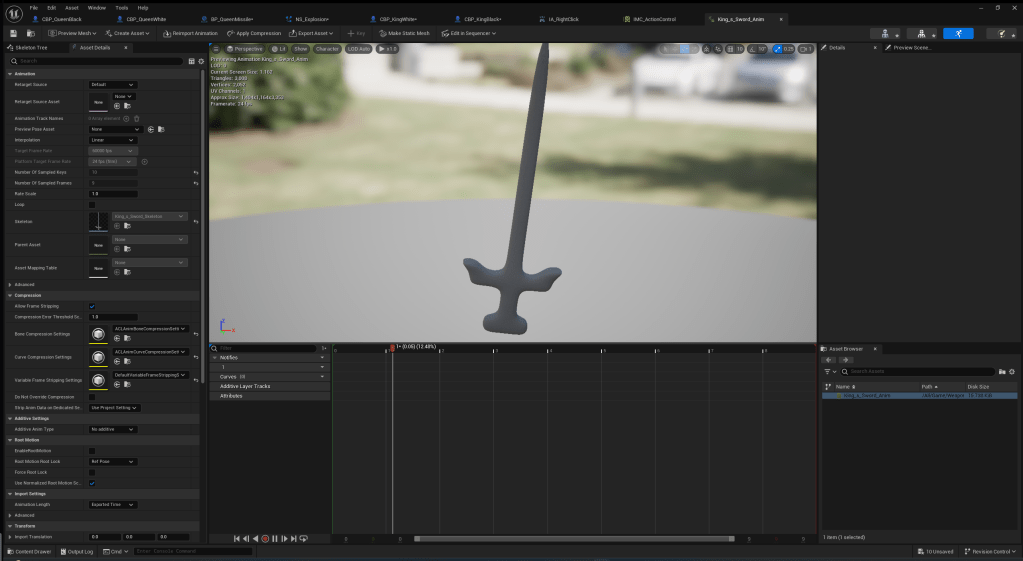
Modelling the player character(s)
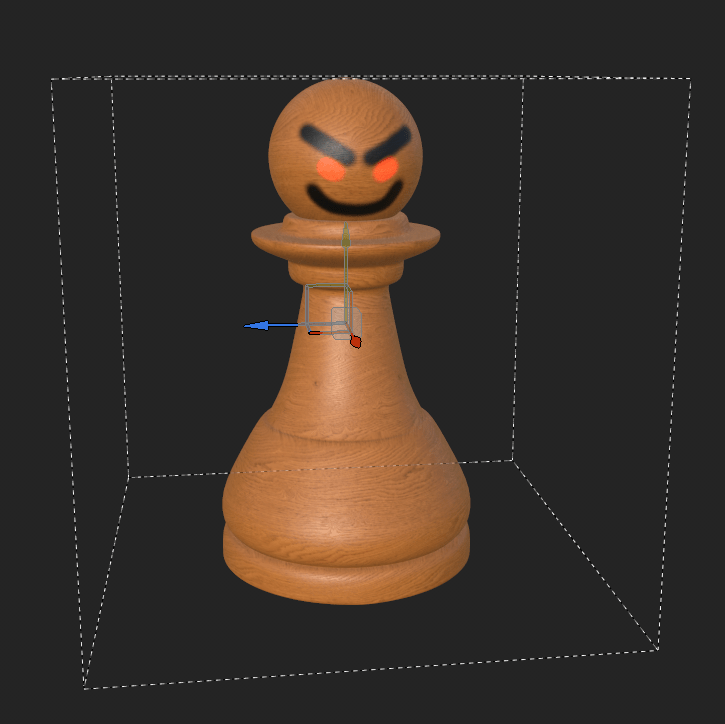
I have planned to create my player character as chess pieces.
To begin production, I used blender.
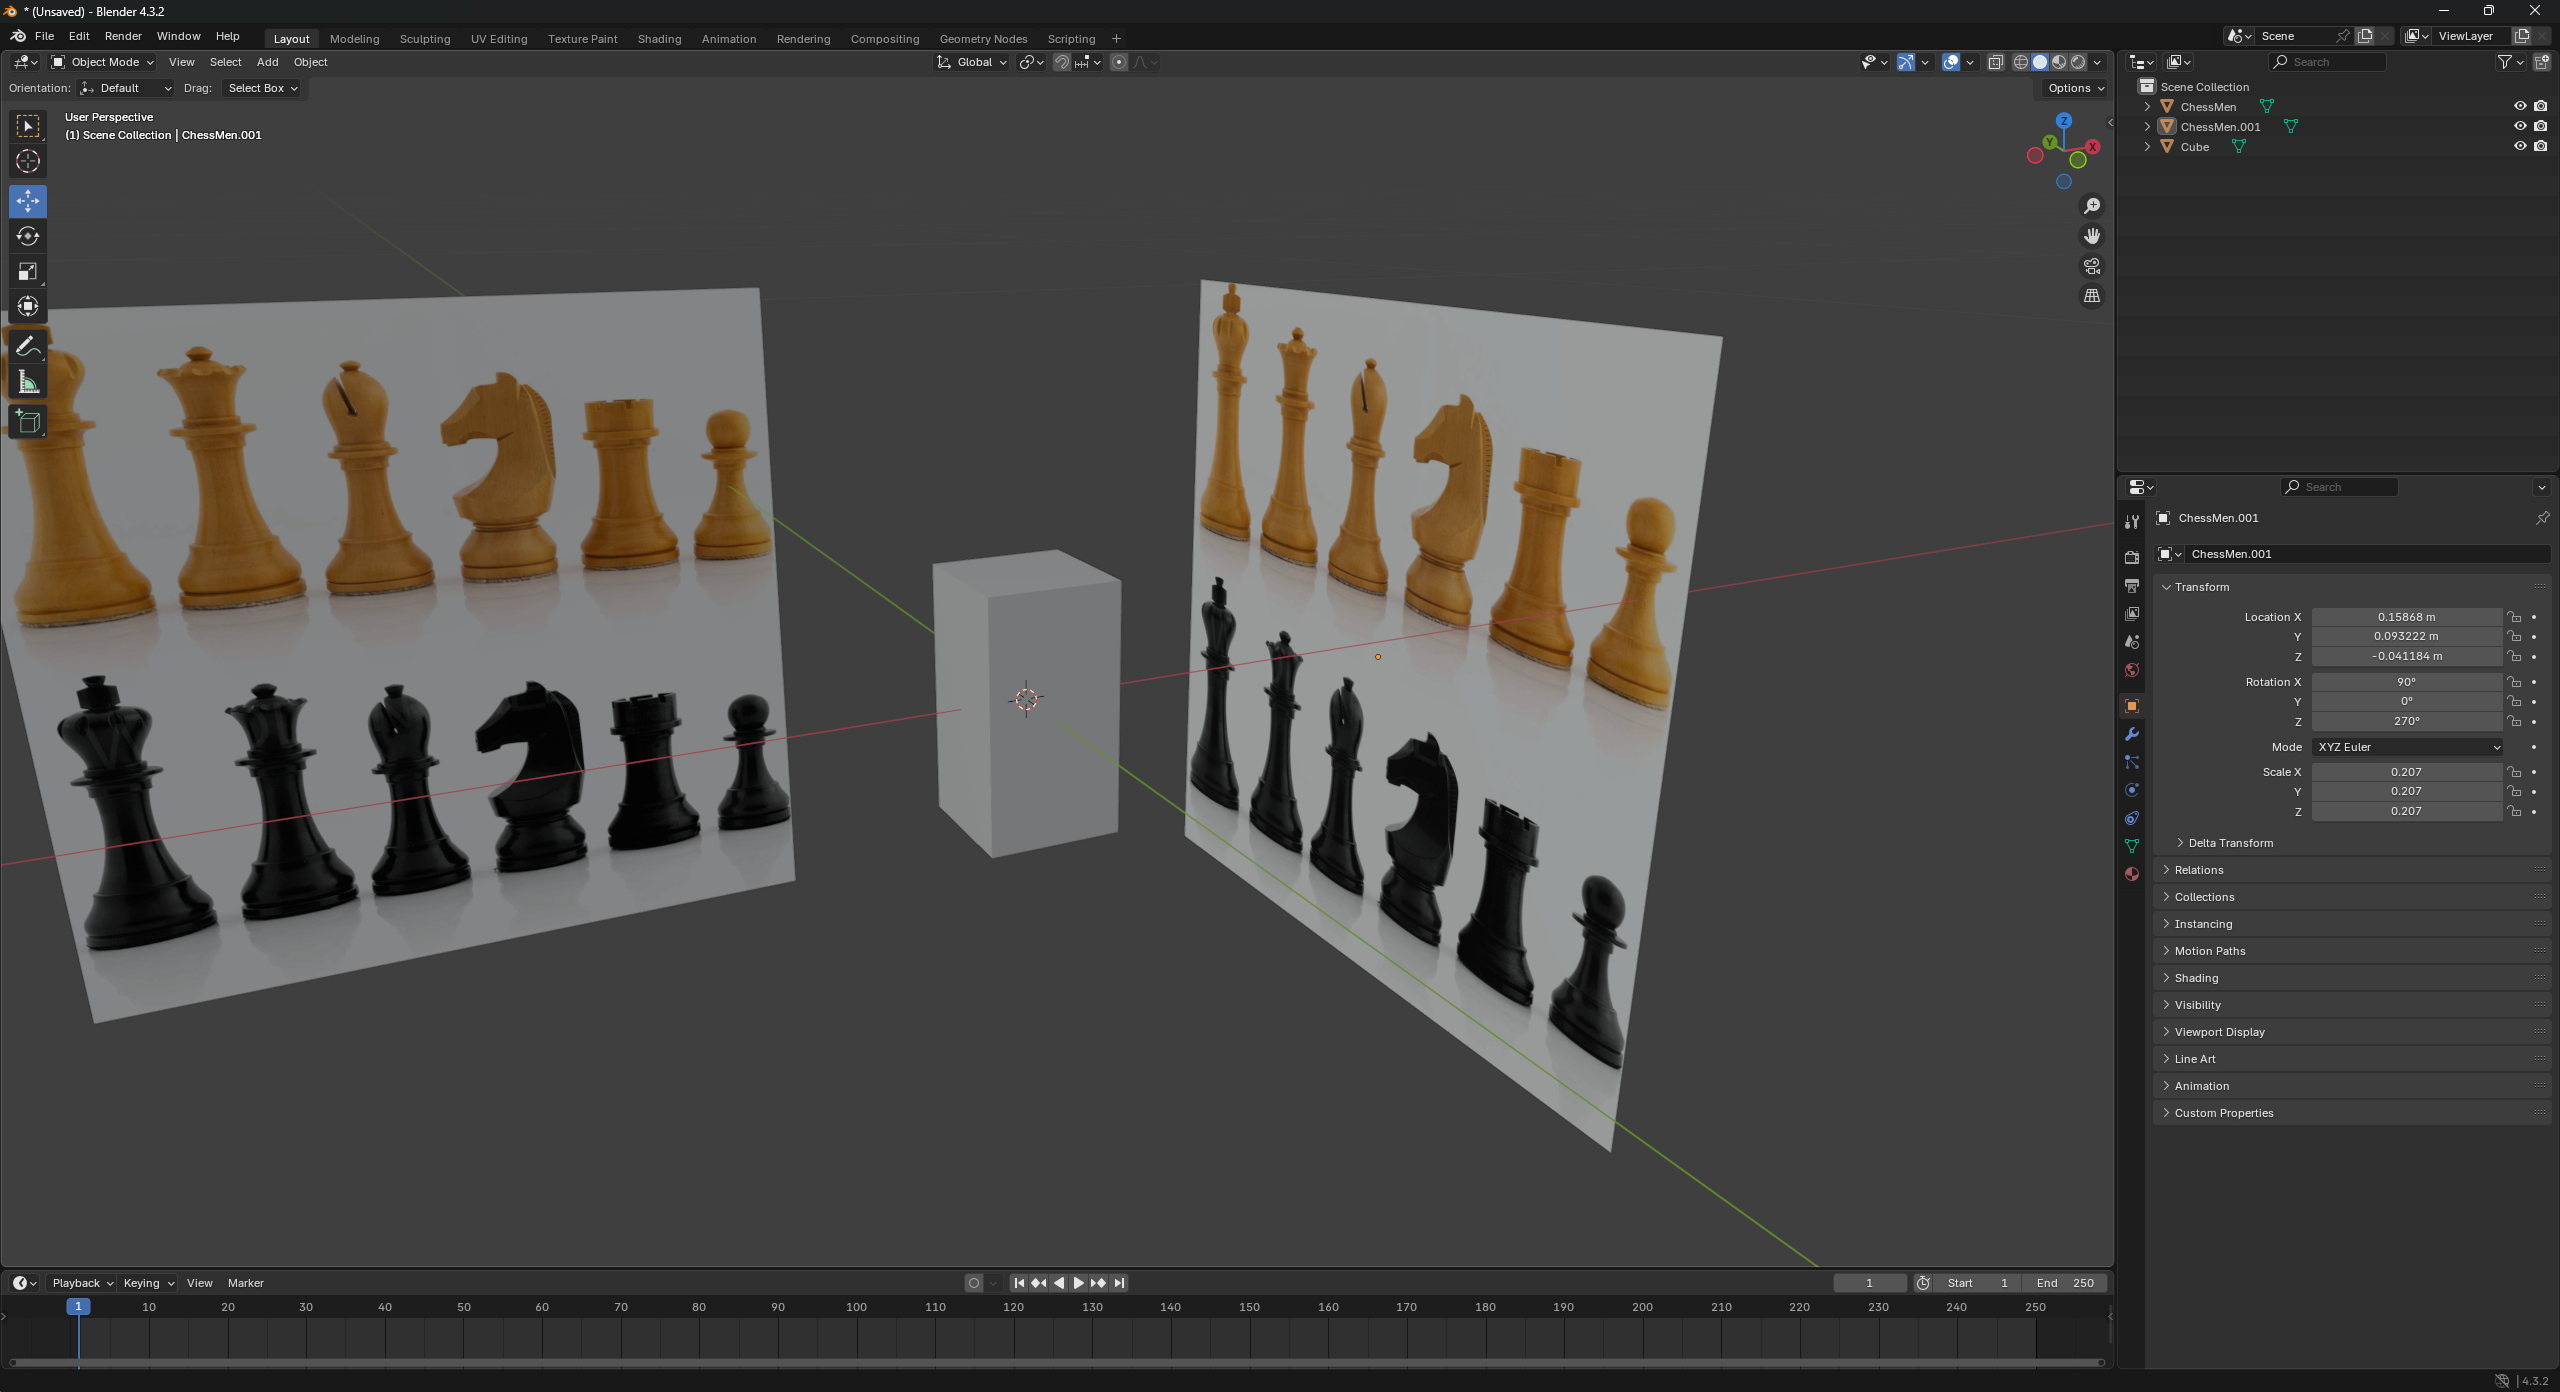
To assist with modelling, I found a reference image. This reference image was from a listing of these chess pieces on Ebay. The reason I used this is because it was the only good photo I could find which included all the pieces at a side view at the correct angle.
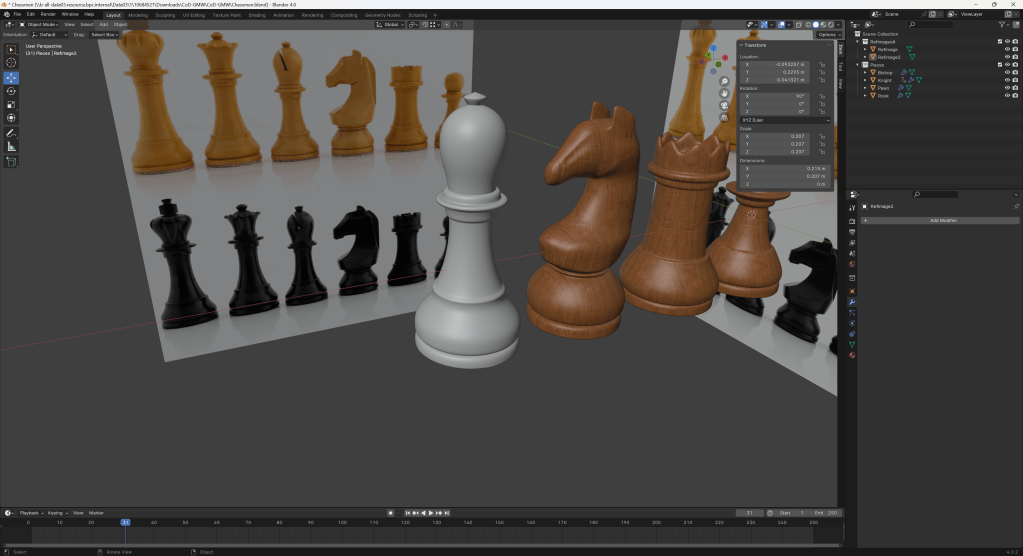
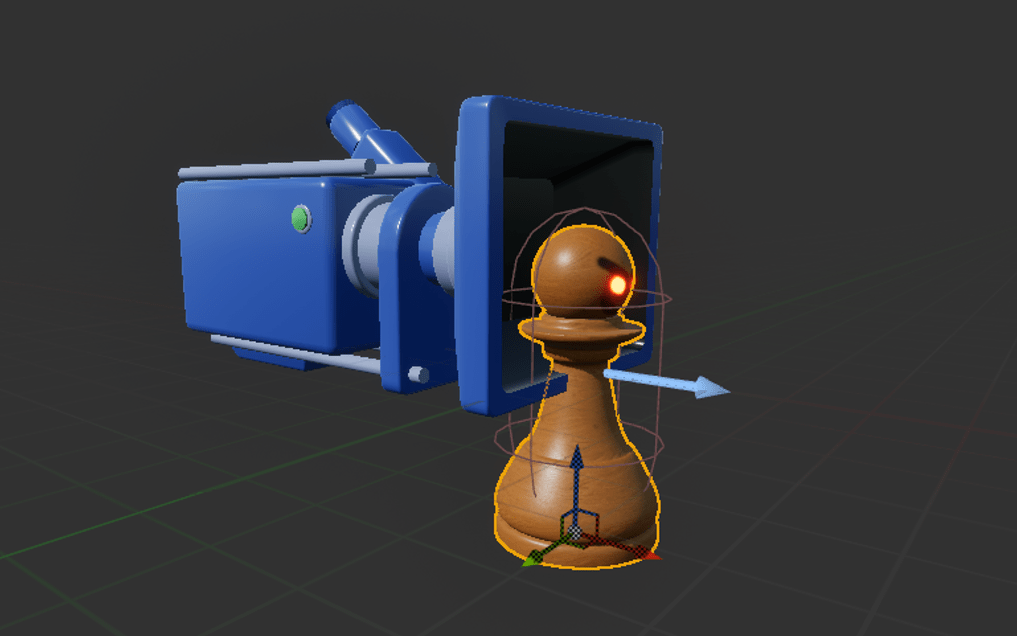
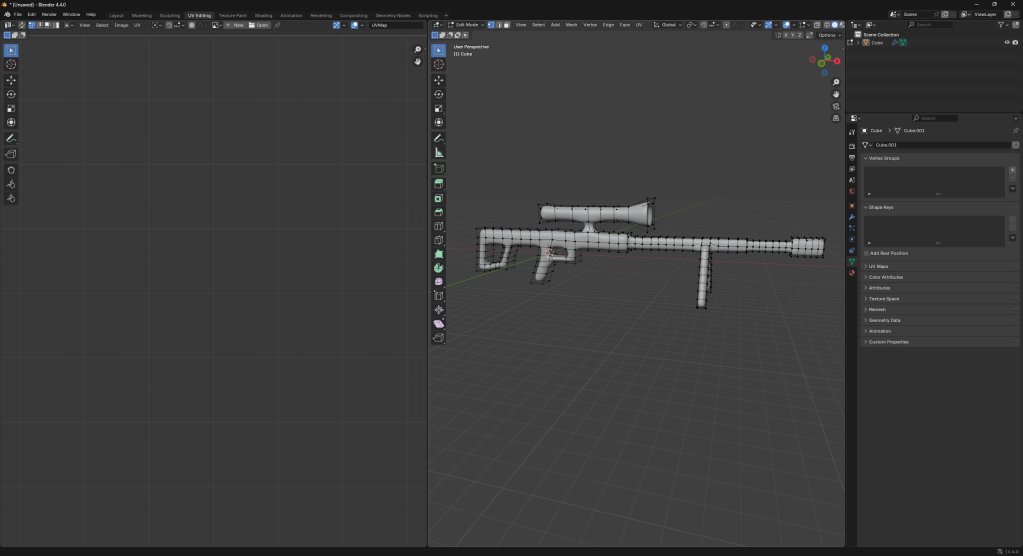
The technique I used for most of the models was subsurface modelling. Here is an example of my modelling with the pawn.

This process worked perfectly for me for all of the pieces except the bishop. I couldn’t get the cut in the top without the topology being all messed up.
In the end, I finally found a way to do this using a shrink wrap modifier which projected a sphere with a cut in it onto the shape of the bishop head. This method kept a nice topology and didn’t mess up the placeholder texture.
After creating the bishop in this shape, I decided that I preferred a more pointy bishop and made a new one because of complete personal preference.
This is the bishop I ended up creating, I like the pointy top a lot more than the rounded one.

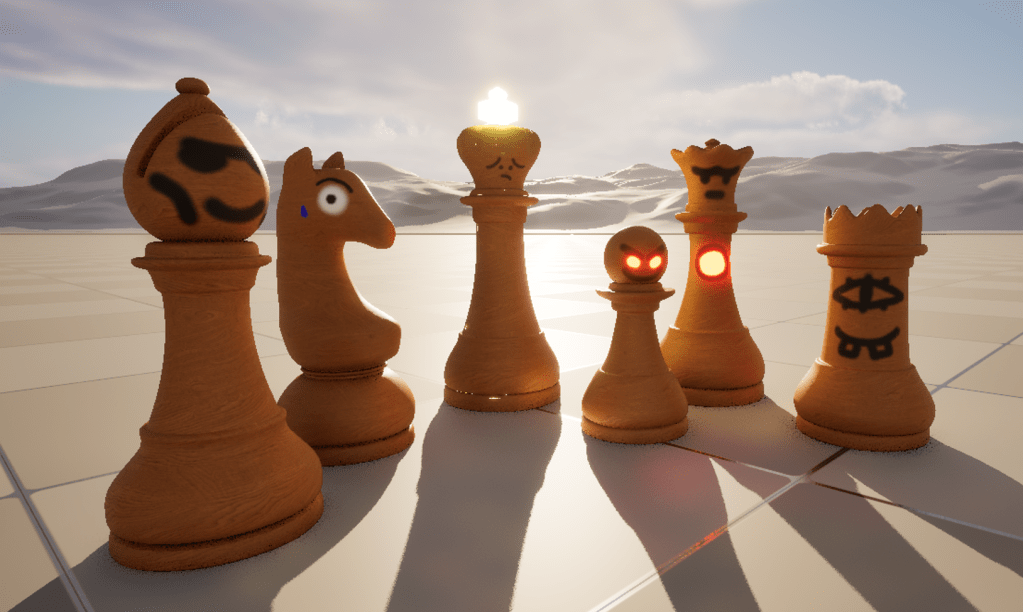
These are the final results for my pieces. To see the research behind these pieces, click here.
Texturing the player character(s)
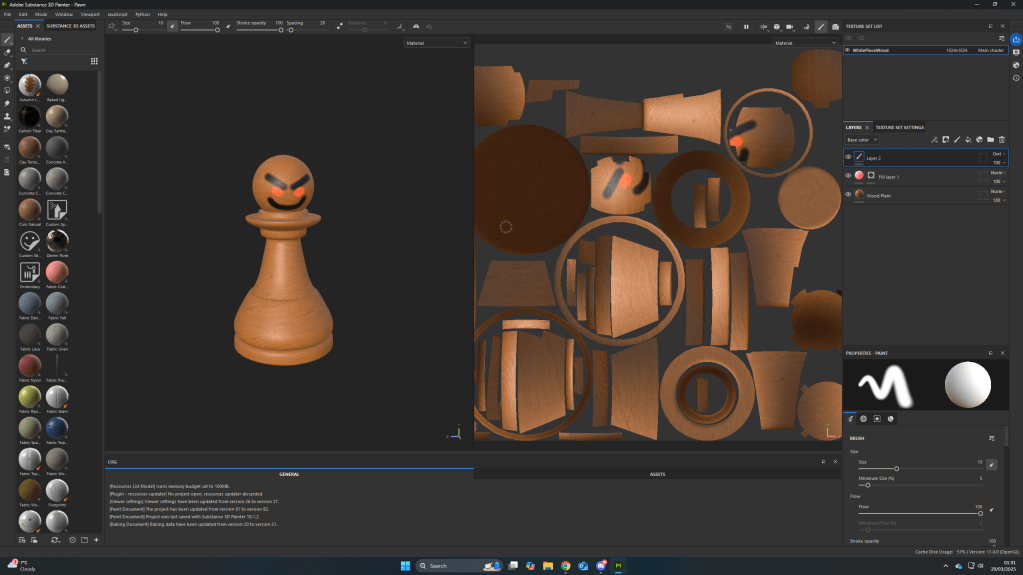
To texture my models, I used Adobe Substance 3D Painter. I enjoyed the workflow from Blender to Painter because it was very seamless. I could import my .fbx straight into my file and it would just work.

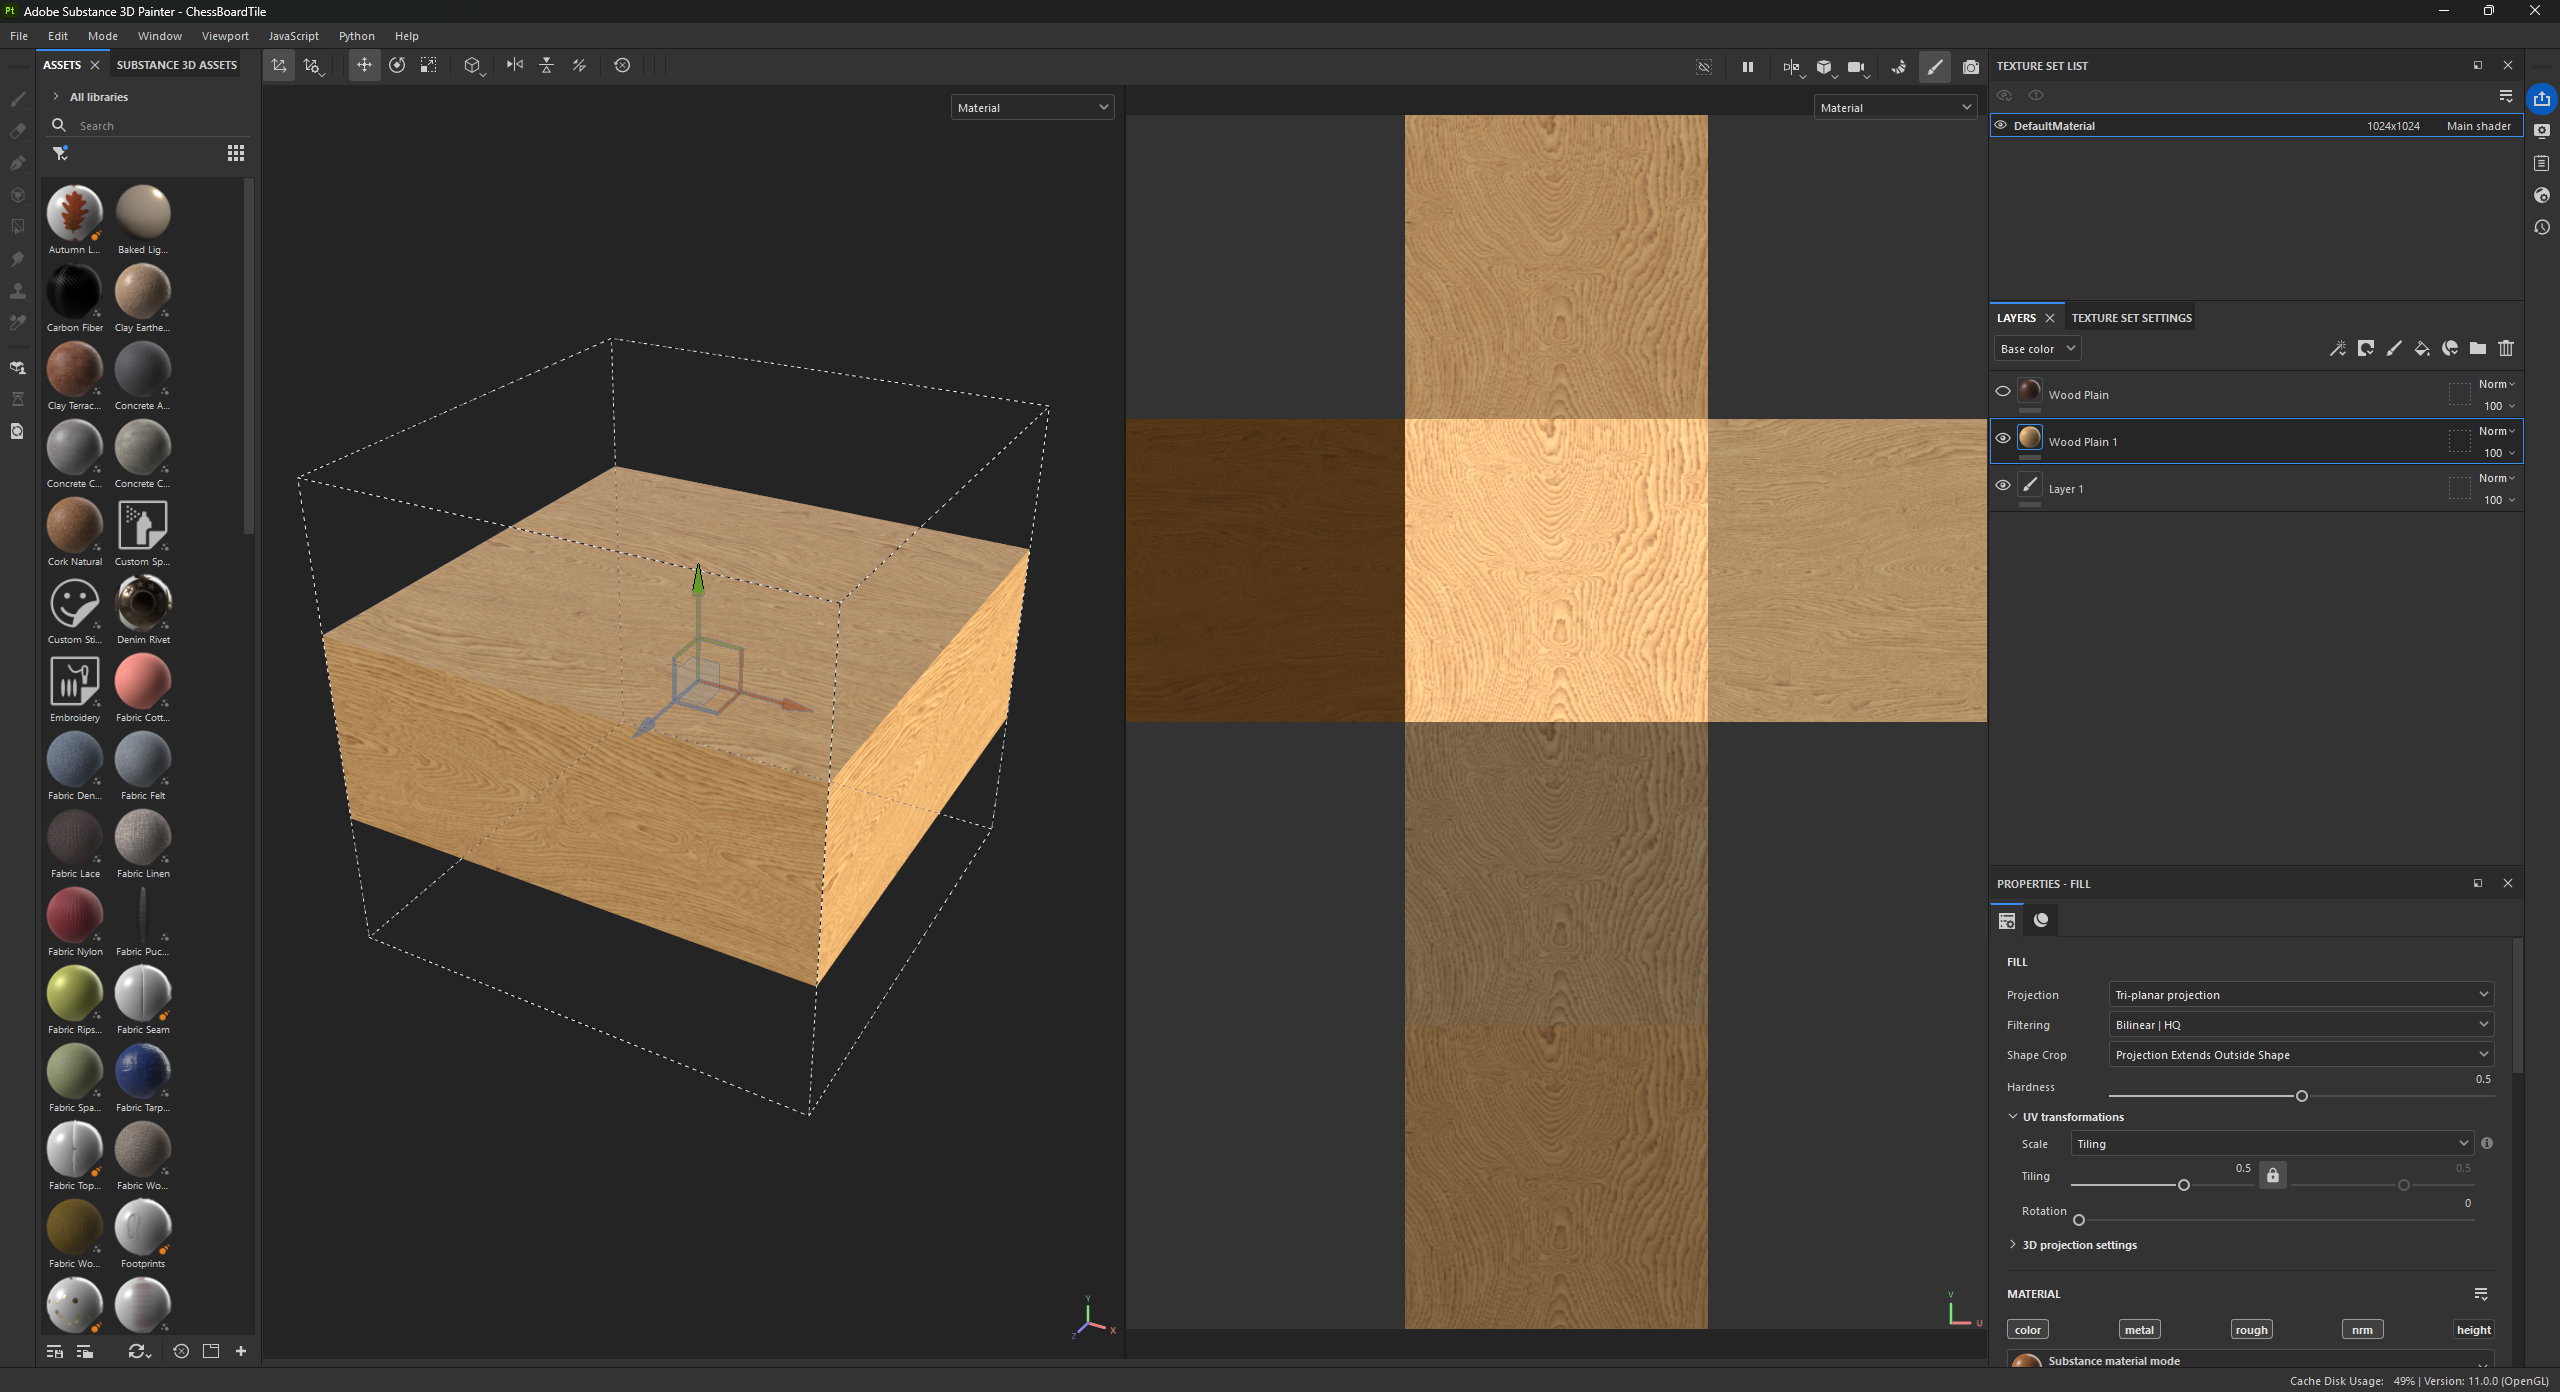
I also found that the best way to apply the texture to my model was a “tri-planar projection”. I found this out after changing all the settings in the model after importing it because at some points in my model the texture would become stretched. This setting fixed everything and now there is no distortion.

This is how the tri-planar projection works, it creates a cube with the texture on each face and projects that texture from the cube on to the model.
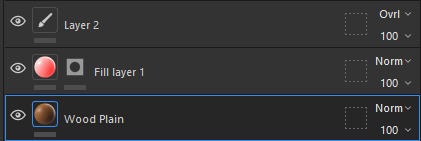
I found that Substance Painter is similar to photoshop, I can just use layers to paint on top of the base texture. I used a mask with the red material to add emission where I painted with the red material.
After I completed this same process with all the other pieces, I exported all of the pieces as an FBX into unreal engine.
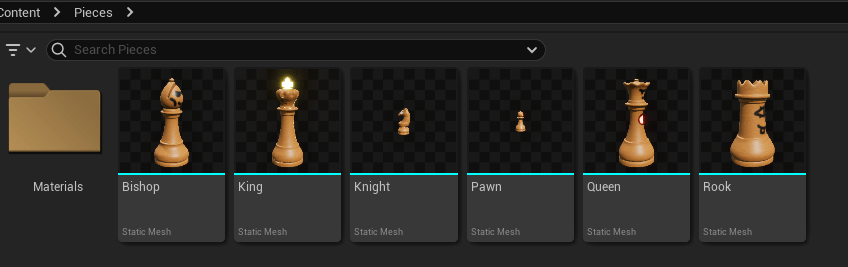
I created folders to separate the models from everything else to stay organized.
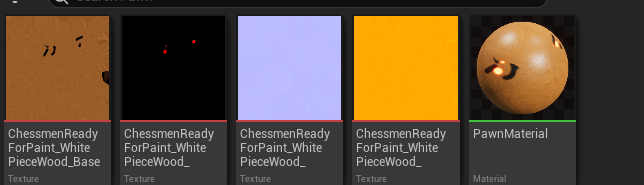
In Substance Painter, I needed to export the textures separately into Unreal. It has a very useful feature where you can select an Unreal Engine export option and I could just import the textures into Unreal pre-formatted.
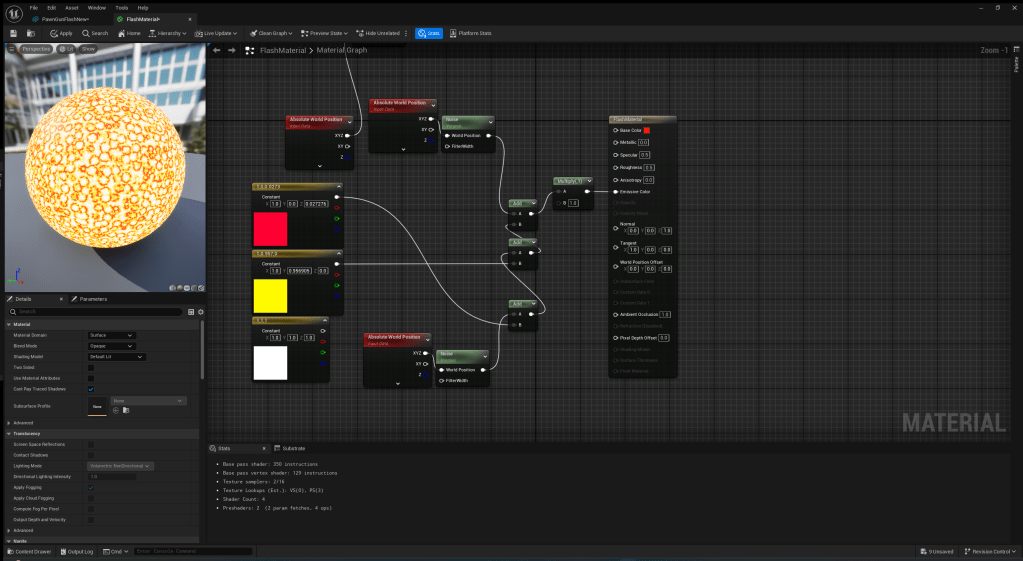
Next, all I had to do was link up the textures to the correct nodes in the material blueprint, I created an emission intensity parameter which I can change from 0 – 100 in the material so I can change how much the emission mask glows.

This is the final result of all of the chess pieces I have created. Overall, I am very happy with how it turned out.
Creating character movement
The first thing I thought that I should add to my game is movement. I wanted to create a very simple, modular system that I could easily change once I create the more complex mechanics.
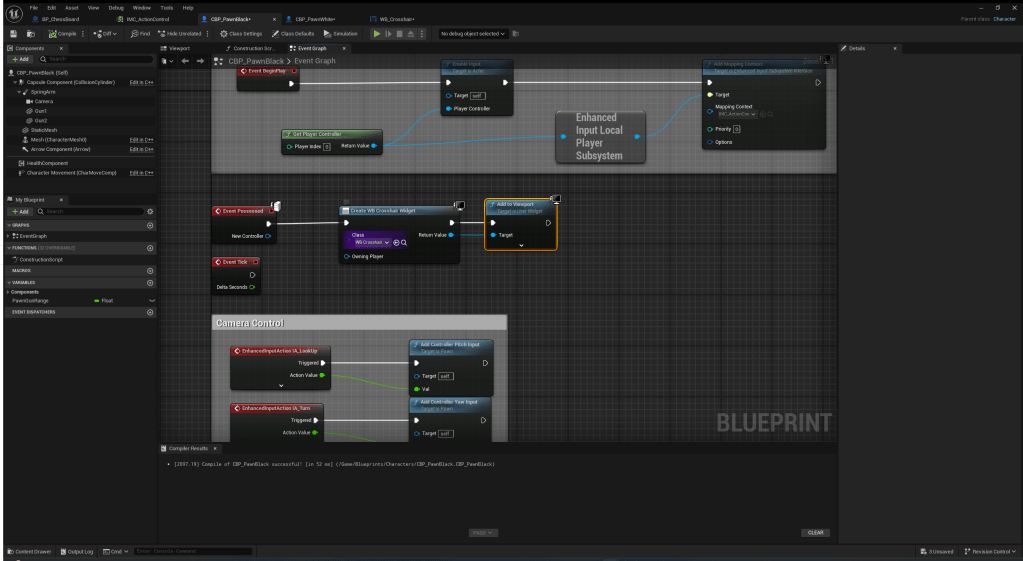
To begin, I created “Input Actions” decided to use these because they are more modular and I can give each input a value and context.
I abbreviated the type of asset each asset is before the name for ease of development.

This is inside the mapping context. This is where I assigned the key bind to the input action.
I decided to use the pawn as a base for the movement so I can copy the code to the other pieces and change the values based on their stats.
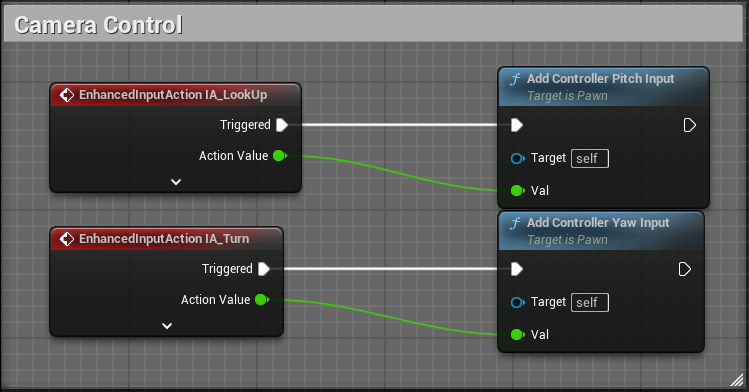
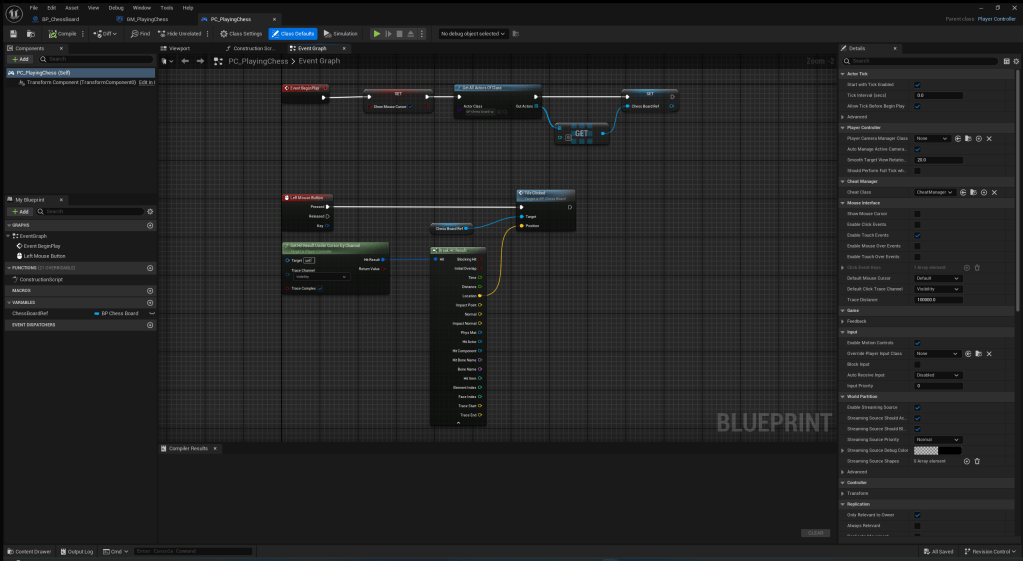
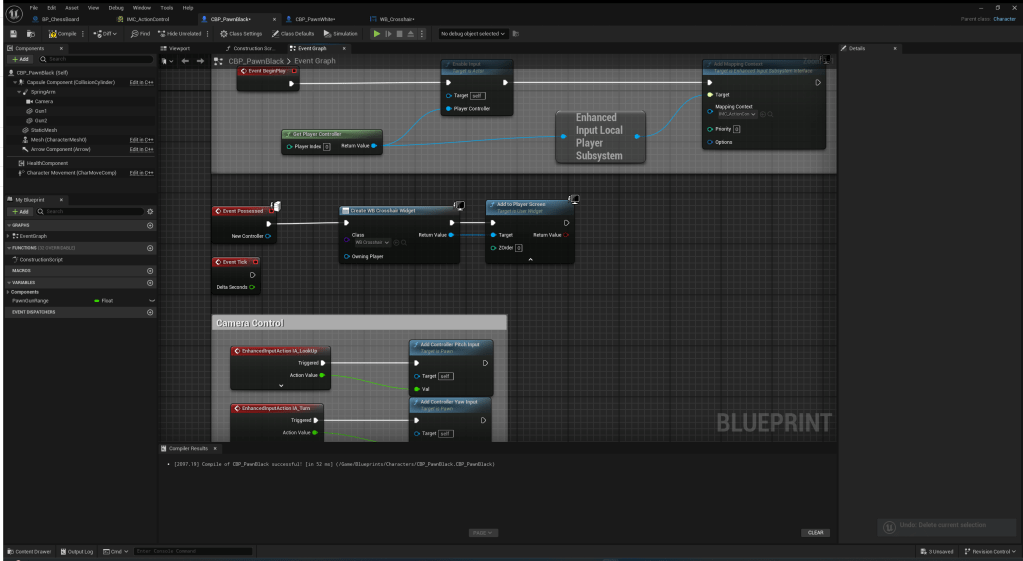
In my pawn blueprint, I created two events from the input actions I made earlier. Then, I used the built in movement component in Unreal Engine’s functions to add yaw and pitch movement for the camera. The pitch and yaw is added from the value of the input actions; when the mouse is moved, it gives a value to the input.
I added the pawn model to the blueprint and set “owner no see” to true so when I play, I can’t see my own piece, but I can see the others.
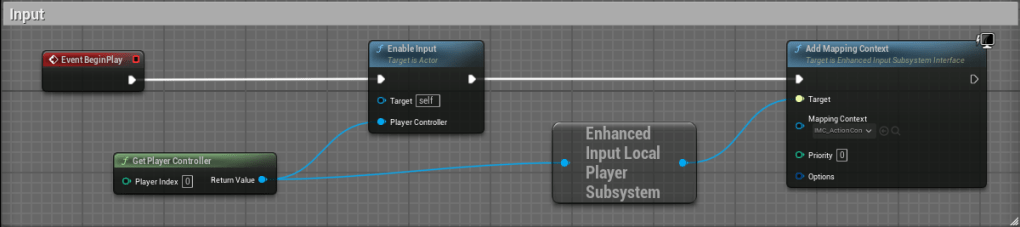
The first time I tested the camera movement, it didn’t work. After some minutes, I realized that I never actually “assigned” my mapping context in the blueprint.
I made it so when the game begins, it adds the mapping context so that I can control the pawn.
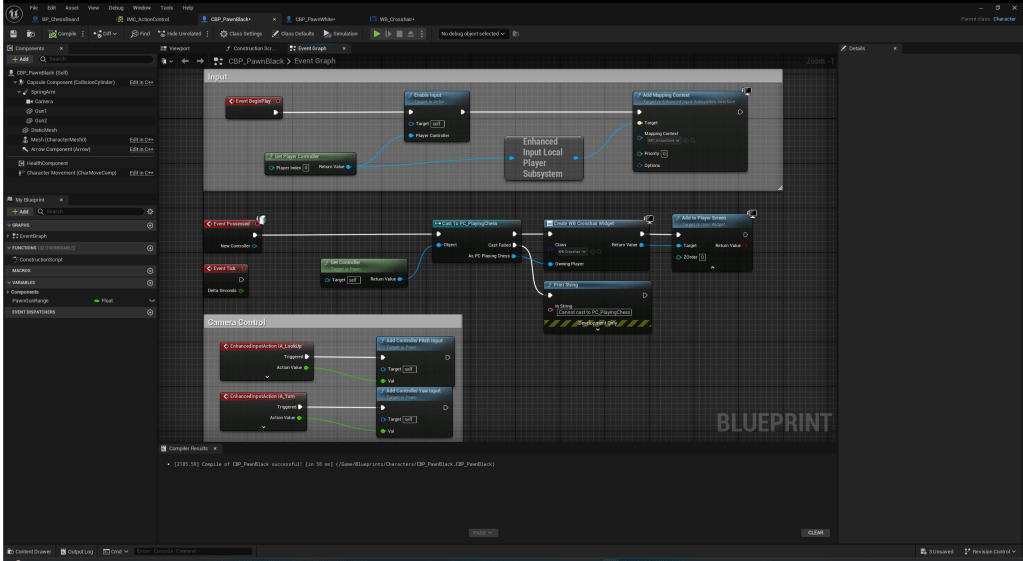
I may need to change this later when switching between the chess part and the action part. I will need to add the context only when the pawn is possessed and remove it when de-possessed. However, for now I am only trying to create groundwork for my mechanics so I will change it when it gets to that part.

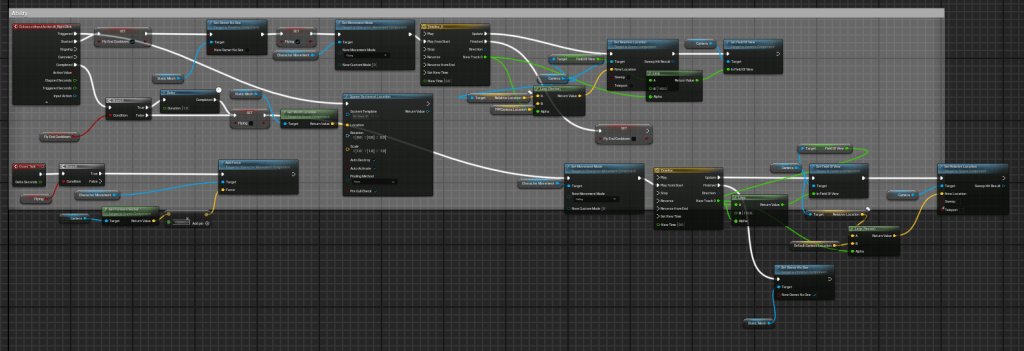
I used a similar process with the movement as I did to the camera control. I used the events from the input actions and called functions from the movement component with them. I tested it after and it worked perfectly. I really like the simplicity of using these nodes as I can make so many fun mechanics quite easily just by adding some nodes in-between.
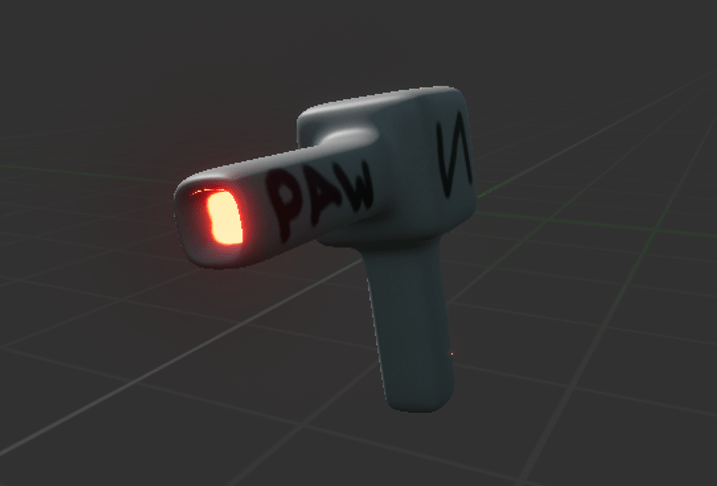
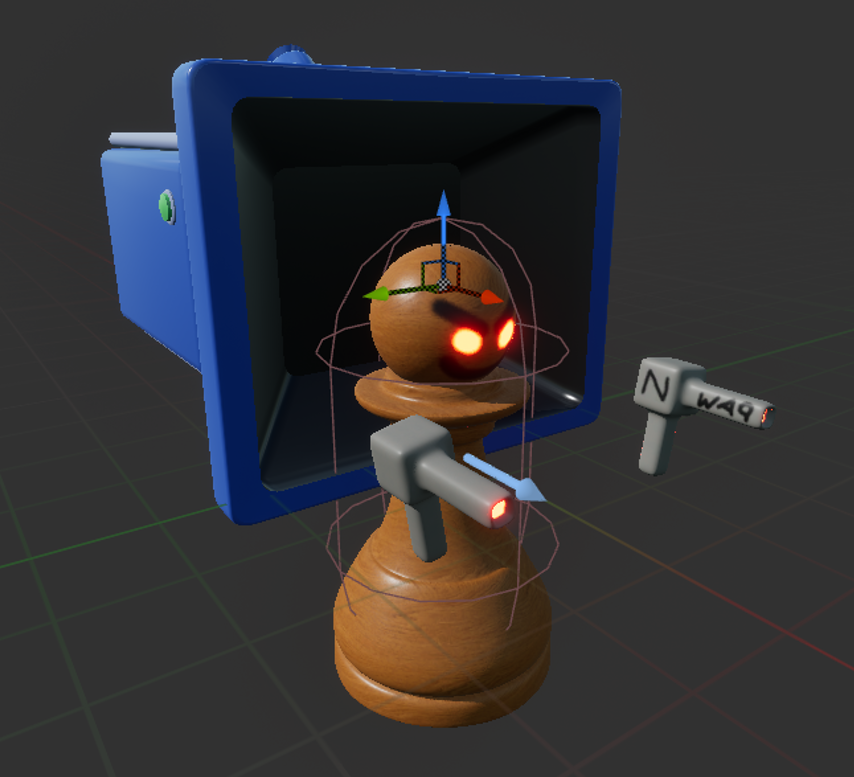
I had some spare time left over so I created a placeholder gun so I can use it to test with making a way to move the gun wherever I look.
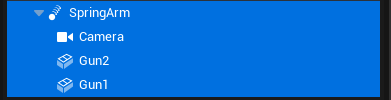
At first, the gun would only move side to side with the model. However, I found my own workaround by parenting the guns to the spring arm that the first person camera is on.
I created a quick video on how I fixed the gun aiming and testing the video. Here it is:
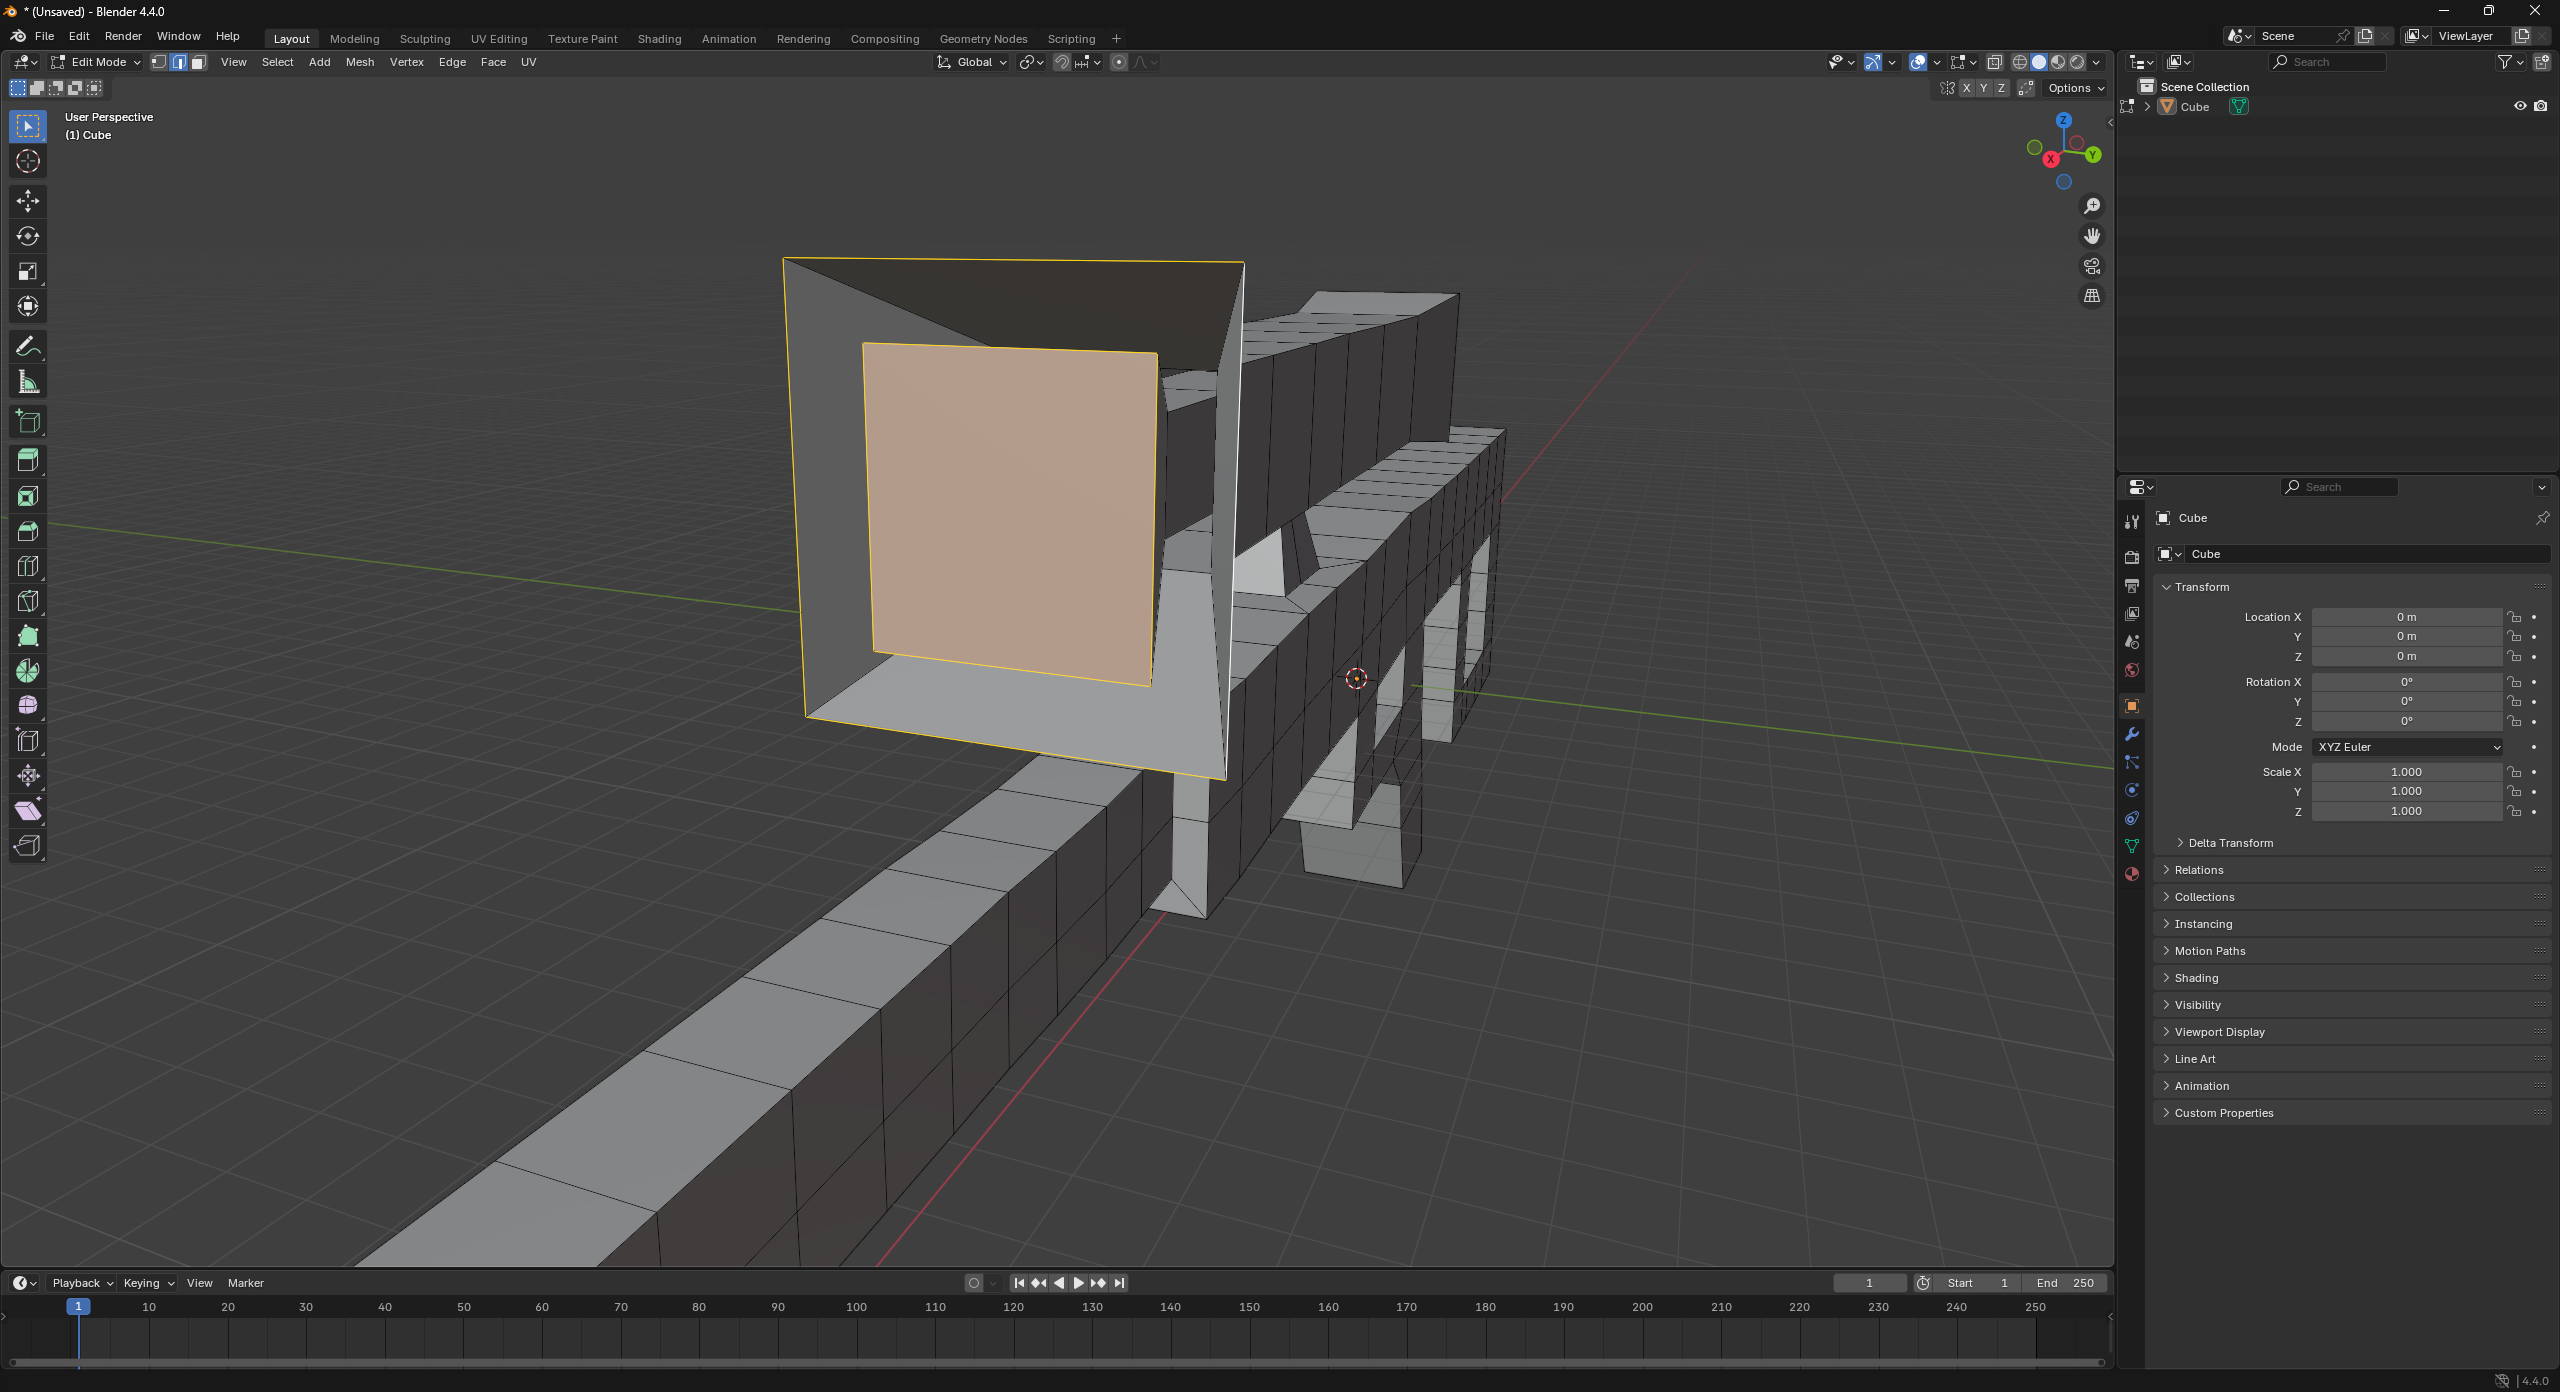
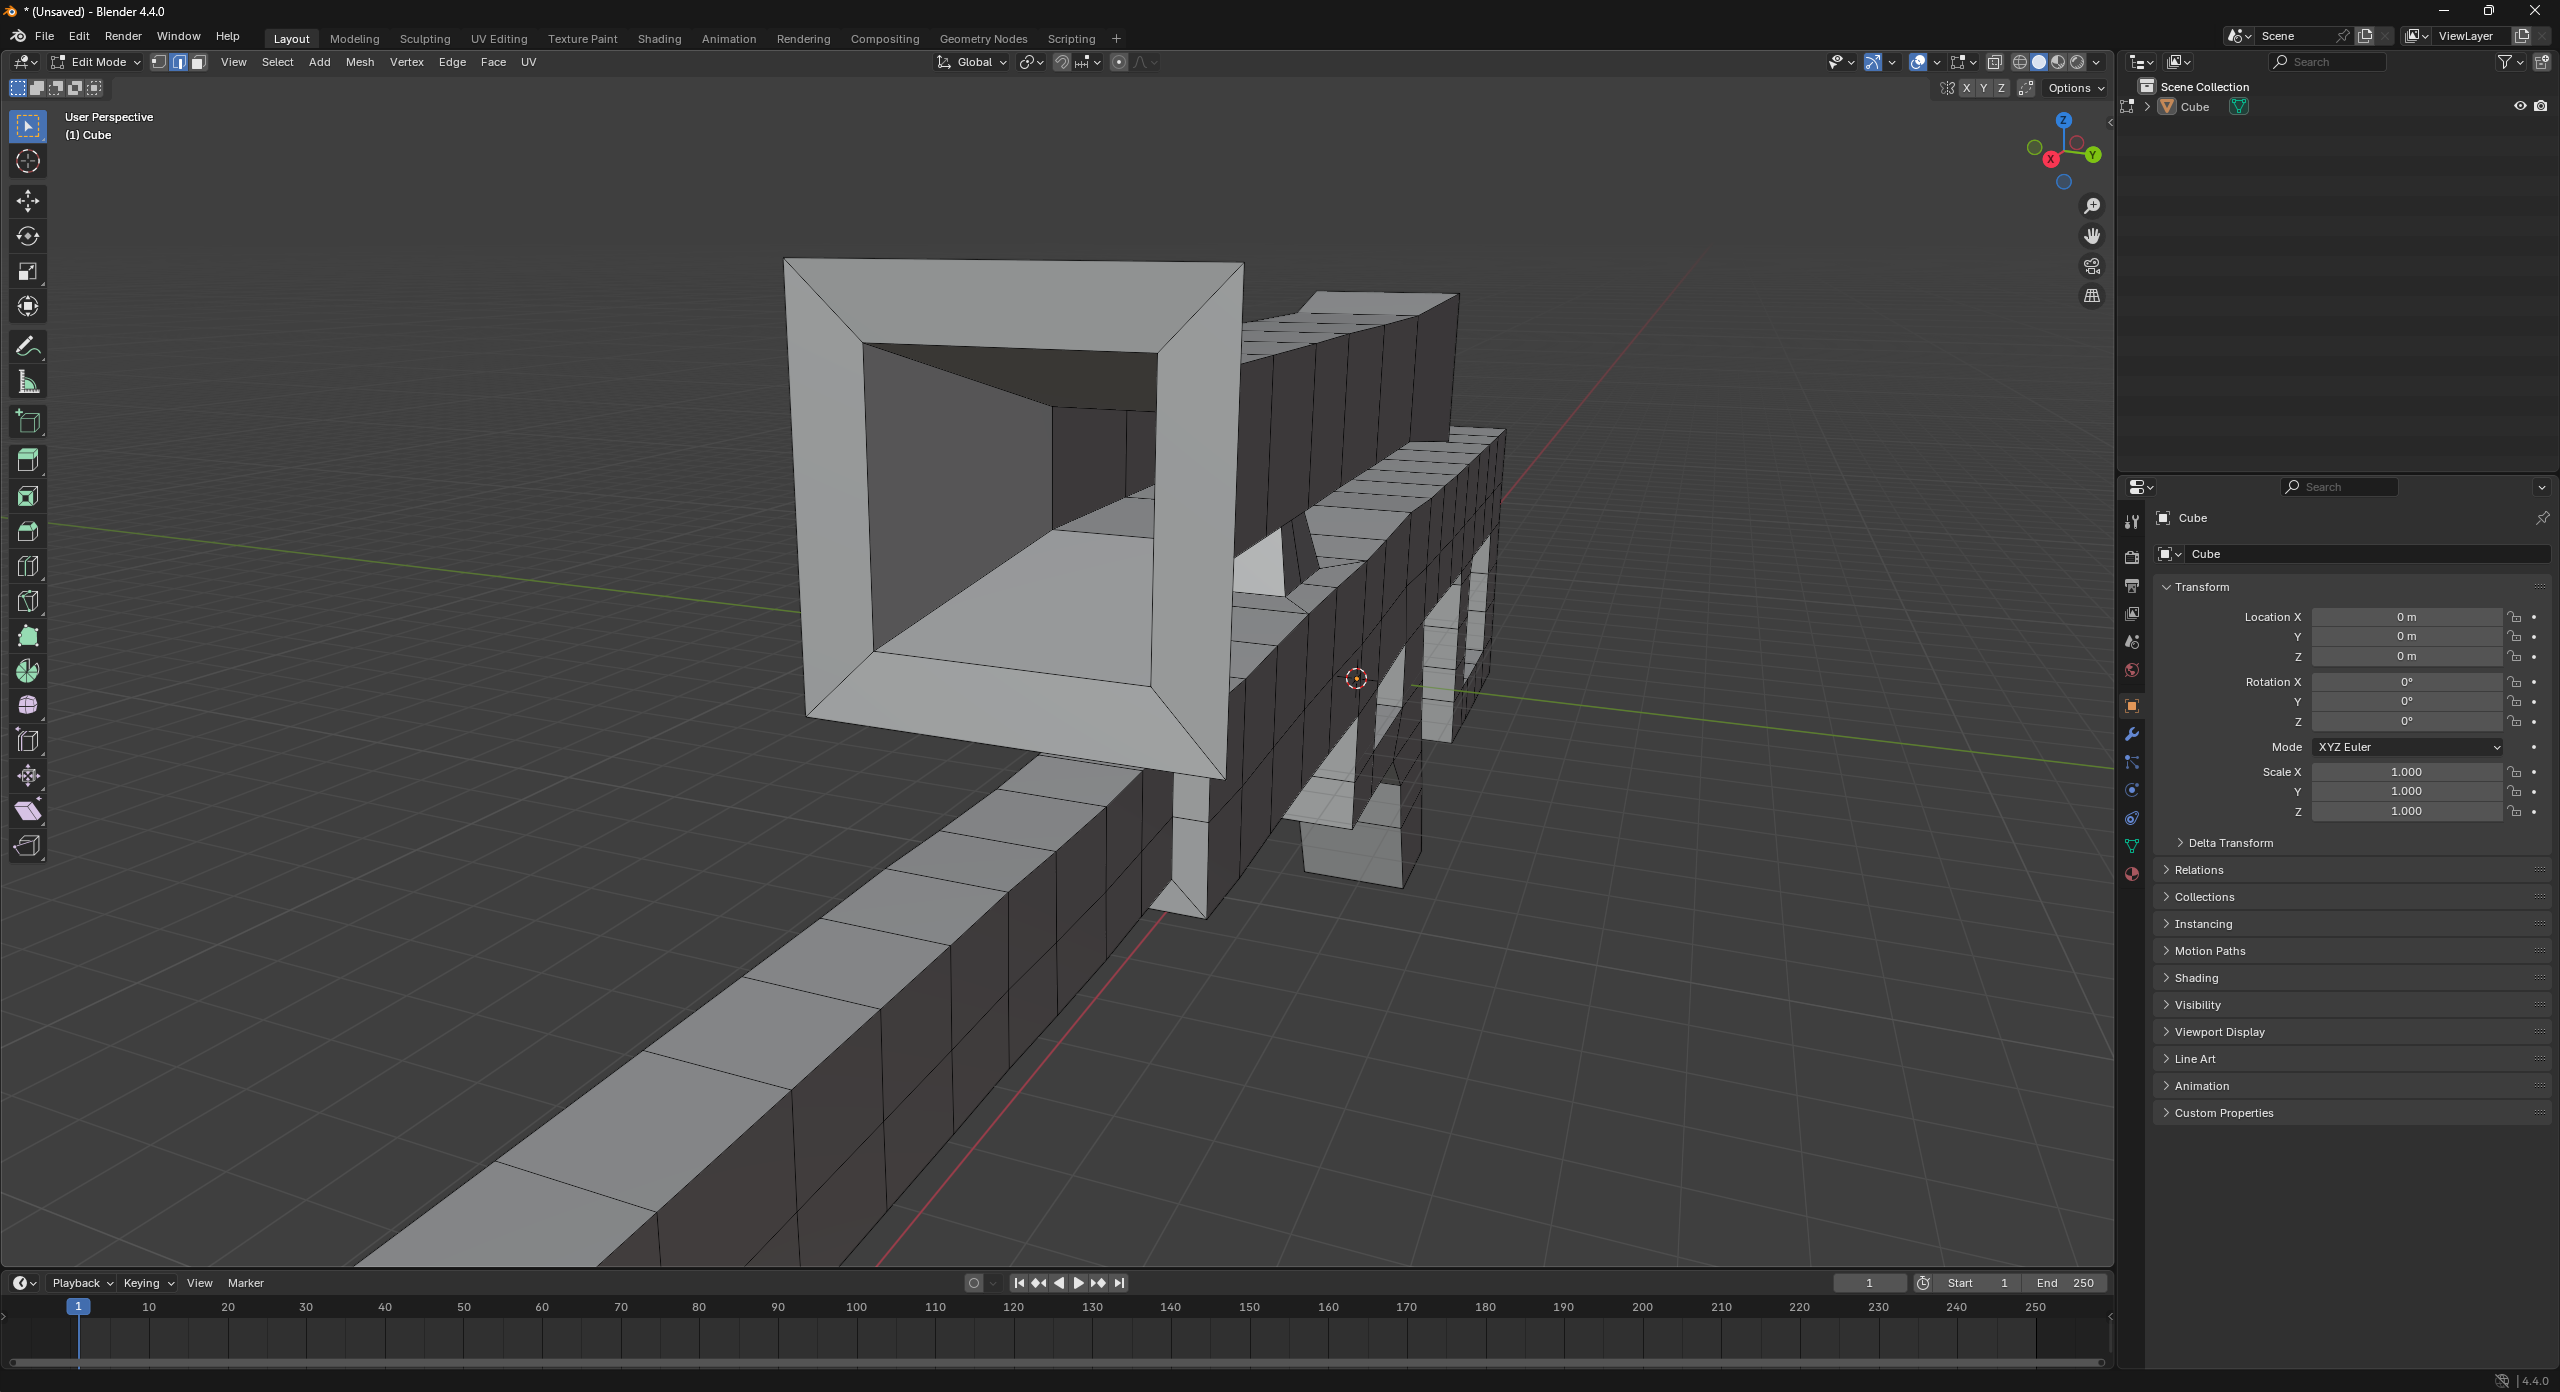
Creating the chessboard
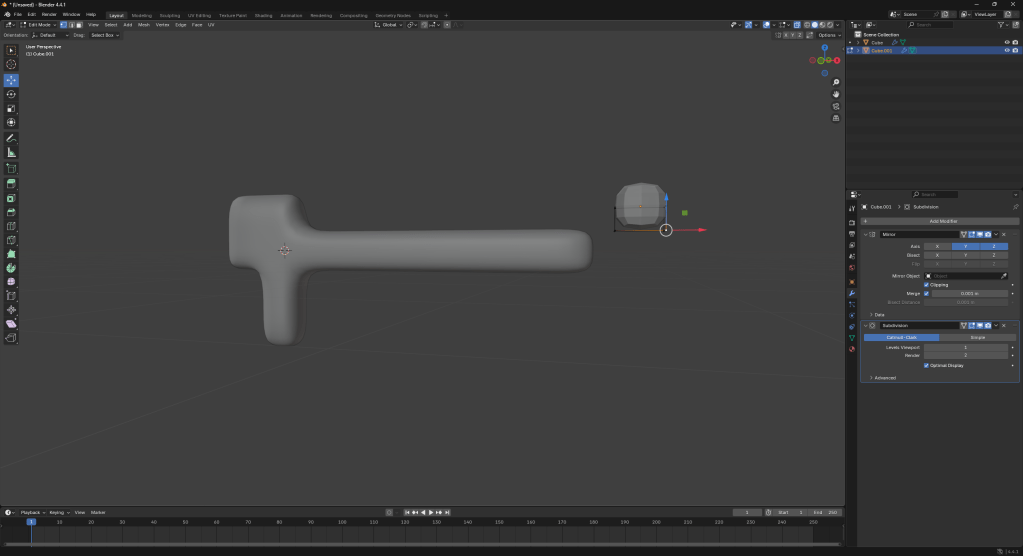
The first part of the process was modelling a tile. I made it 2.5 x 2.5 cm so that 4 pawns could just fit on the square.

The next step I took was texturing it. Use the slider to see the light and dark squares.

Here is what they look like once I exported them into Unreal Engine.
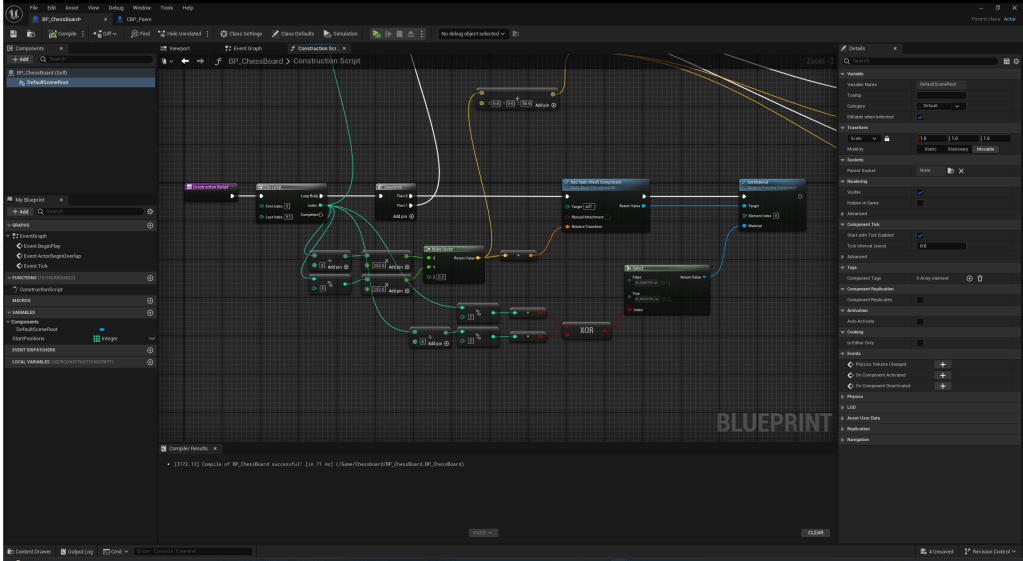
To create a chessboard, I needed to first create an 8 x 8 tiled grid with the white and black squares alternating. This is the method I used from the YouTube tutorial.
Next, I needed to add the pieces as meshes on top of their starting squares. The way I did this was really fun because I could create the array and edit it in Excel and notepad then paste it into unreal engine and it just worked. This part was trickier to figure out because the tutorial is 10 years old and a lot of the things aren’t the same anymore so I needed to think of my own solutions.

This is the code I made to rotate the pieces that needed rotating. I learnt a lot about the “select” node while doing this.


These are my results after the code above.
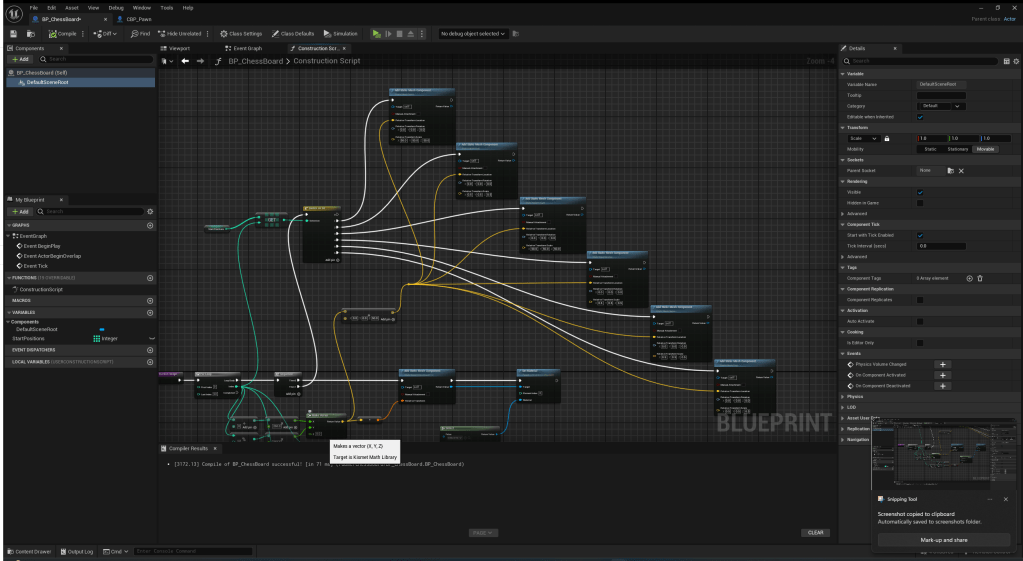
After looking at the chessboard for a while, I realised that I need the other half of the board to be black pieces. So I used a similar method as I did with rotating the pieces, but with just setting the material.
This is my code for changing material.
Creating the mechanics
I created this in the blueprint for my game mode and it sets up the mouse so I can click the pieces for when I start coding the movement.
I set up a pawn I posses when the game begins which is just a camera which orbits the chessboard.
This is what it will look like in game. I coded the pawn to rotate when holding RMB + dragging.

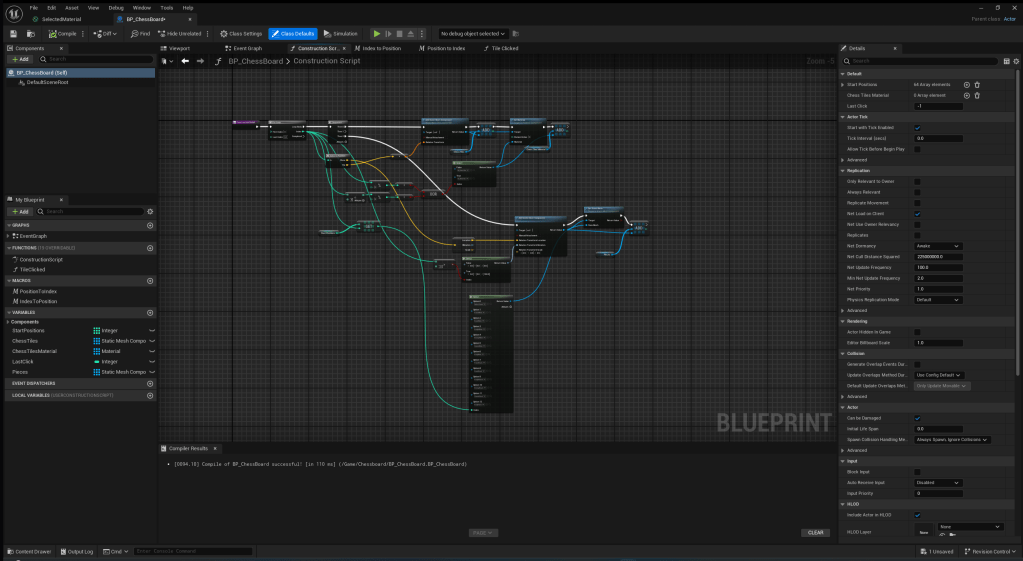
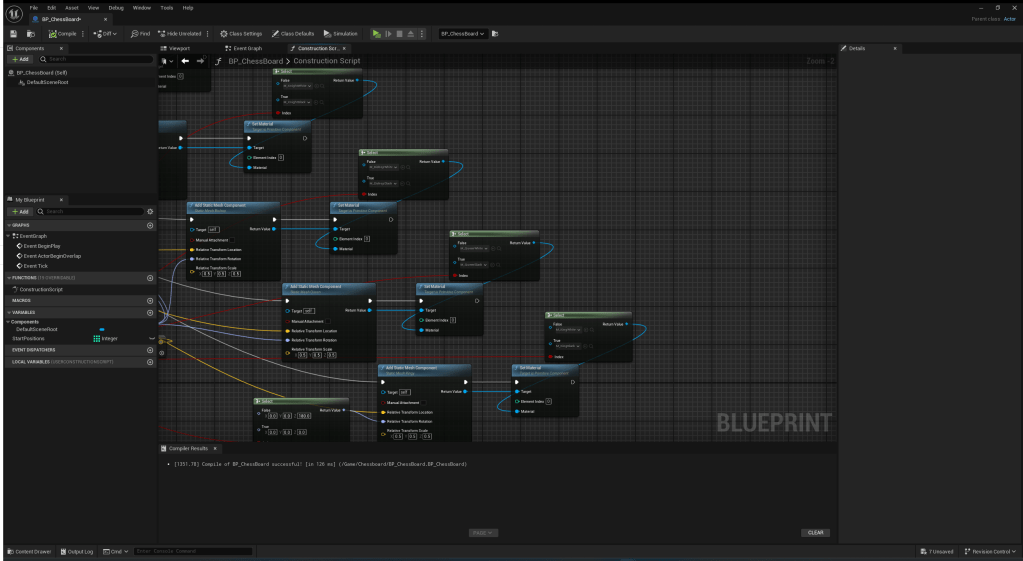
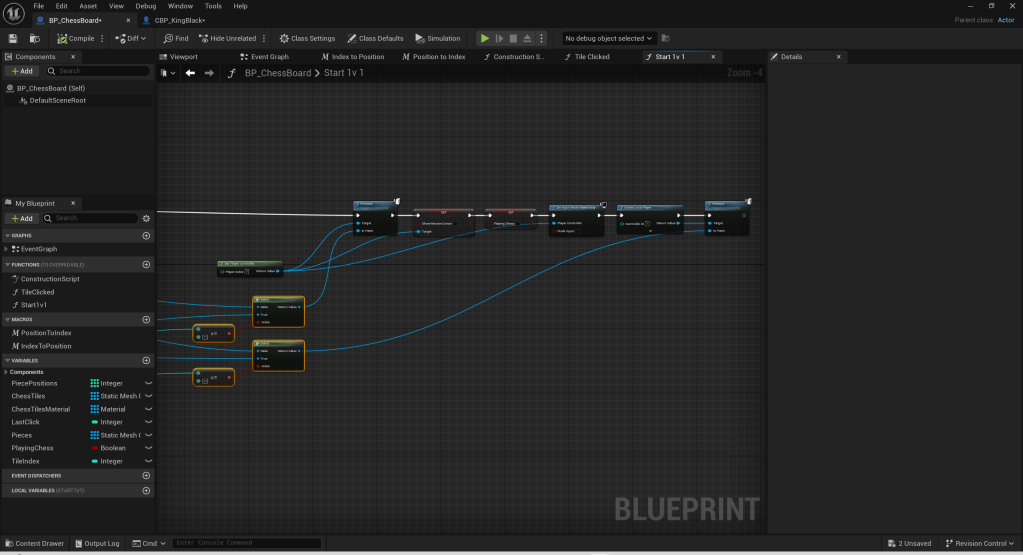
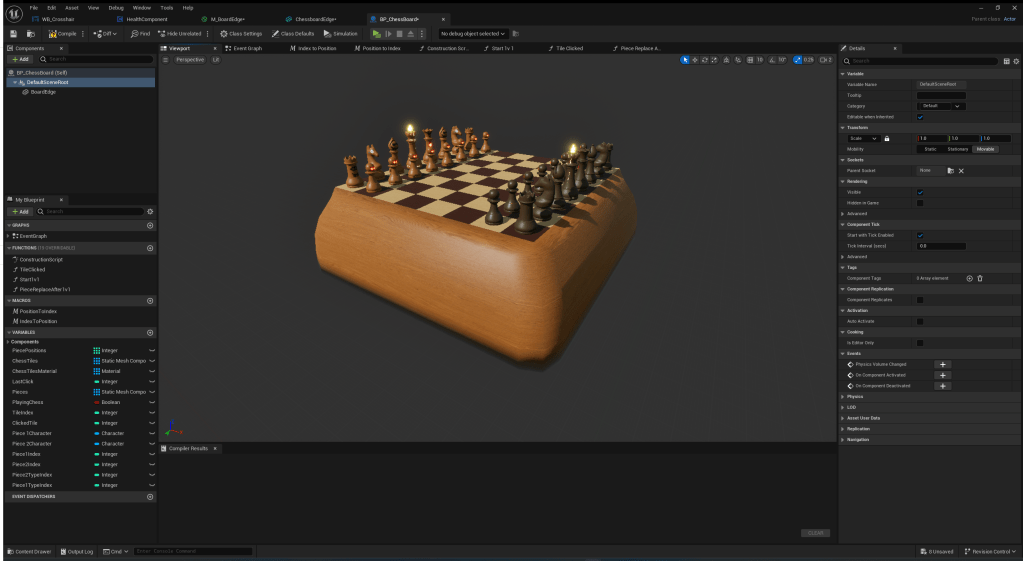
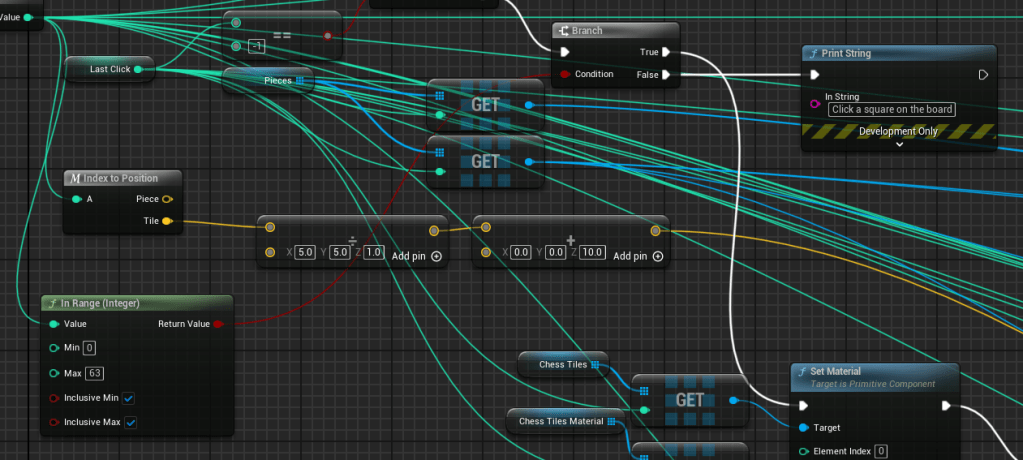
To make my chess pieces moveable, I needed to revamp my construction script for the chessboard. I also make the black pieces and white pieces separate objects to make work easier for me in the future. I assigned each white piece type a number from 1-6 and black piece type 7-12. The empty tile will have a value of 0. This is what I will base my piece movement on.
This is the first rendition of my movement function. It worked… Kinda.
After a long few hours of trying to figure out how to fix this, I managed to create a system to move the pieces properly.

It spend a lot of time, but I found the perfect values I needed. There was probably more efficient ways of doing this. However, the best way I could come up with was trial and error.
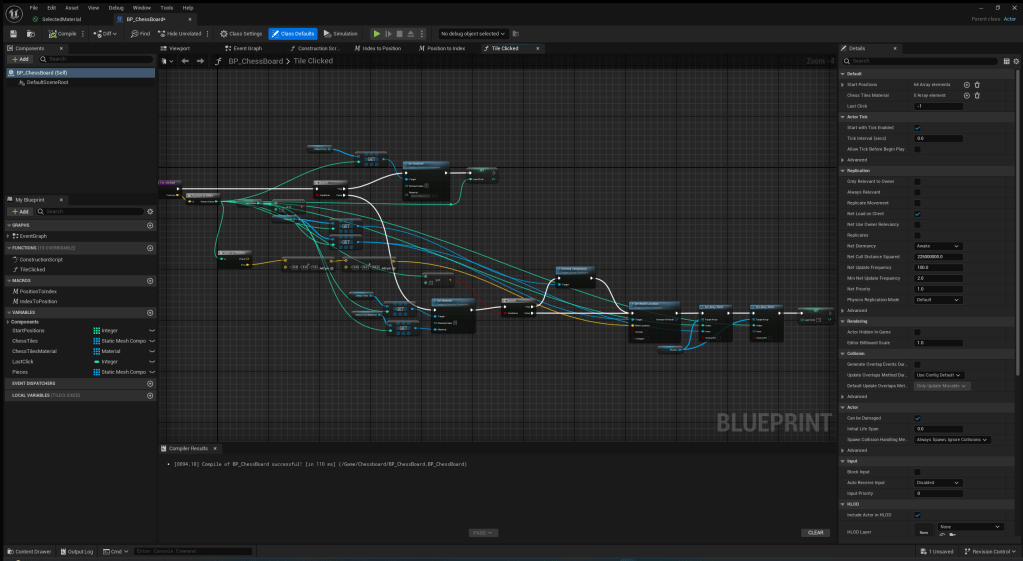
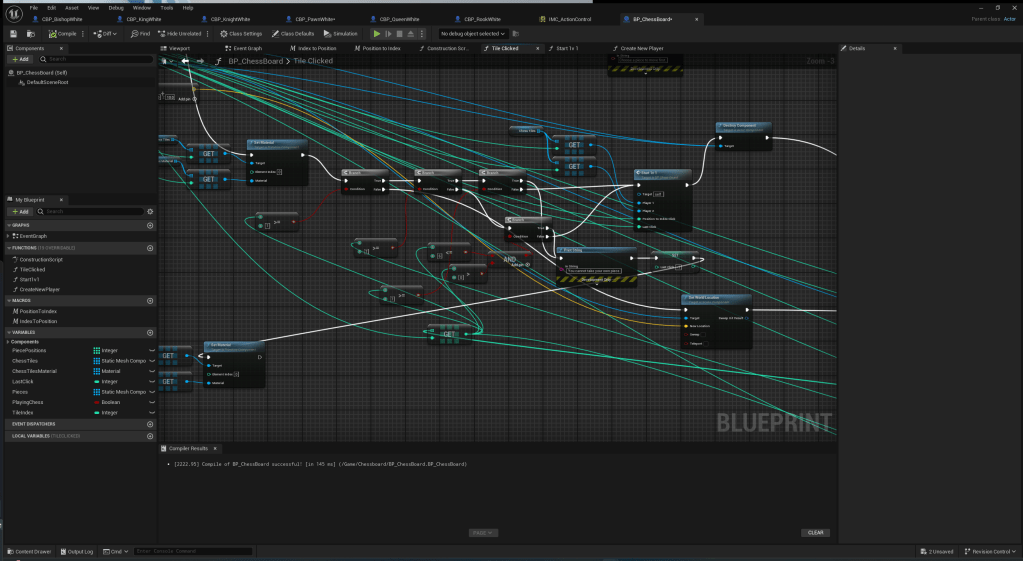
This is how my chess worked after I fixed the code. It works however there was still problems with it. I could click empty tiles and “take” pieces with an empty tile. There was also a bunch of errors that would pop up when selecting empty tiles.

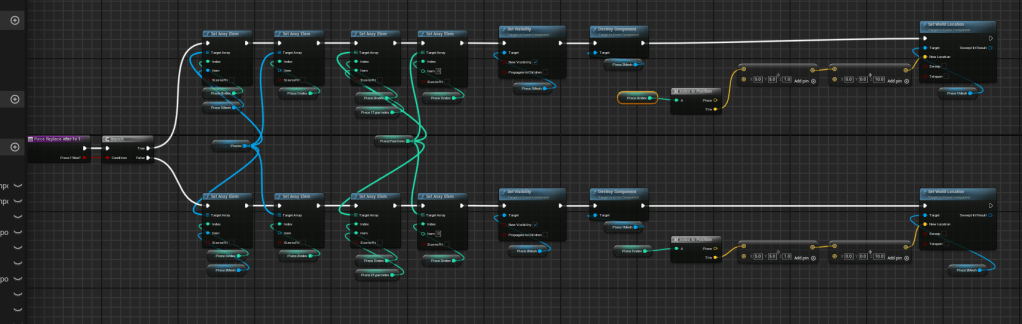
After a lot of playing around with different solutions and some help from my teacher, this is what I came up with. I created an “invisible” grid that keeps track of the index of each piece and updates them as they get moved. Doing this makes it easier to tell whether a tile has a piece on it or not. This also made it possible for me to add a feature which makes empty tiles impossible to select. Which I did and made it print a message telling the player to select a piece.
This is how my chess mechanics work after fixing the array system. I really like how it works now, however, you can perform illegal chess moves (you can move any piece anywhere) and even take your own pieces. I am not sure how to fix this so I will do some research into how other games do this.
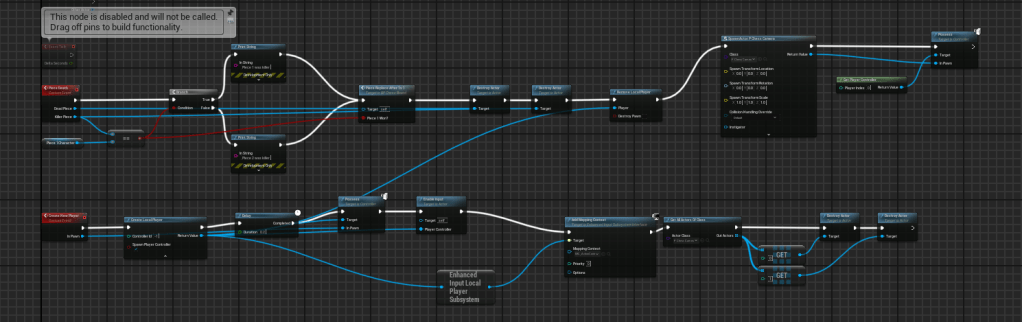
Next, I created a function that starts the 1v1 once a piece is taken:

This is the code for it. Right now I haven’t got the split-screen part working so it just spawns in two characters depending on piece taken. And makes the player possess one of the pieces. This was easy to make because of the array system I created previously because it lets me save values so that I can reuse them for the logic in spawning the pieces.
This is a quick demonstration on how my game works with the 1v1 function started.
Adding split-screen
To make my game playable, the player needs to be playing against someone. So I decided I needed to make split-screen next.
Before I created the actual split-screen part, I needed to make it so that player 1 always possesses the same colour piece. I did this by checking the index number of the pieces being used and selecting which character to possess based on that.
After testing that my last feature worked, I realised that I could take pieces of the same colour (e.g. a black piece fighting another black piece) So I created this code which is just a series of branches which I created in a similar method as the code above.

Next, I created the actual split screen part. I added another player to the game and made it possess the other piece. This was easy to do because of the code I used for player 1 always possessing one colour could be reused for this.
For a while, I couldn’t get player 2 walking around but after a while of just messing around with nodes, I got it working because I realised the nodes which set the input were in the wrong place. I put them in the characters and the code runs when the game begins. But then I realised that the second player doesn’t even exist until a piece is taken. So I moved the input nodes into the function I created for spawning the second player
I also plugged in my controller and got the controller binds working in my game. This was very easy to get working because of the Input Mapping Context feature in Unreal Engine.

This is a clip I recorded of me testing my split-screen mechanic. I am very happy with how it works.
Fighting mechanics
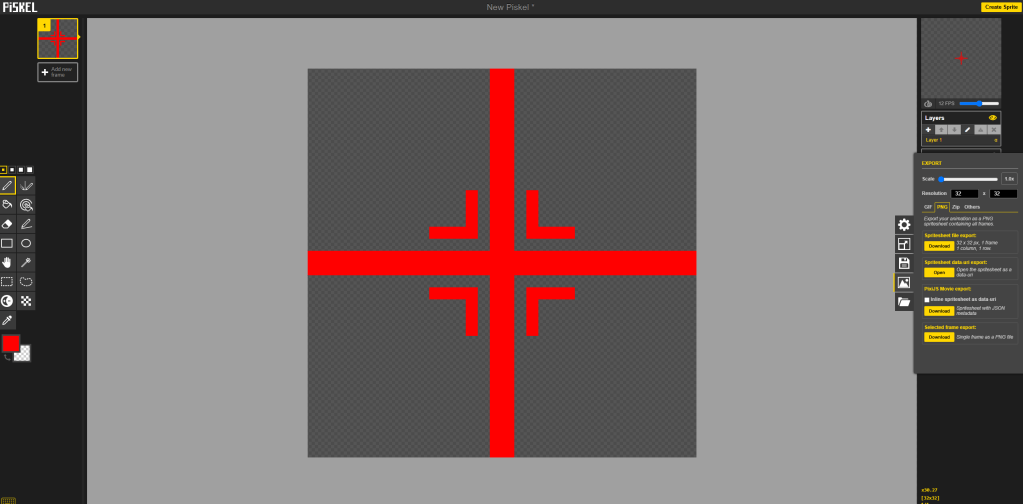
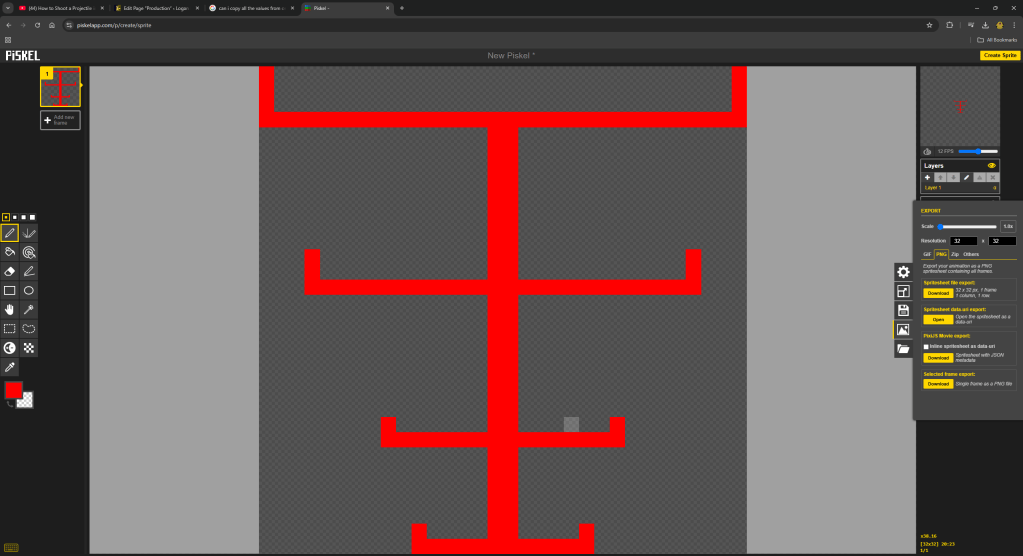
Next, I needed to create a crosshair for my gun because I couldn’t aim properly when I was shooting. I found this free website on google called “PiSKEL” which I used to draw this crosshair:
At first, I tried adding this crosshair to the viewport as each piece and this is how it turned out:

I didn’t think it would go in the middle of both screens so I searched up online for some solutions and on the unreal engine forums I found this node “add to player screen”. Which I learnt is basically the viewport but for the player’s screen. This works a lot better for split-screen.

This is how it looked in-game. It was only on the top player’s screen so I needed to figure out how to fix that.
To fix it, I needed to the the widget’s owning player to the player controller.
This is how my crosshairs look now, I am much happier with them now.
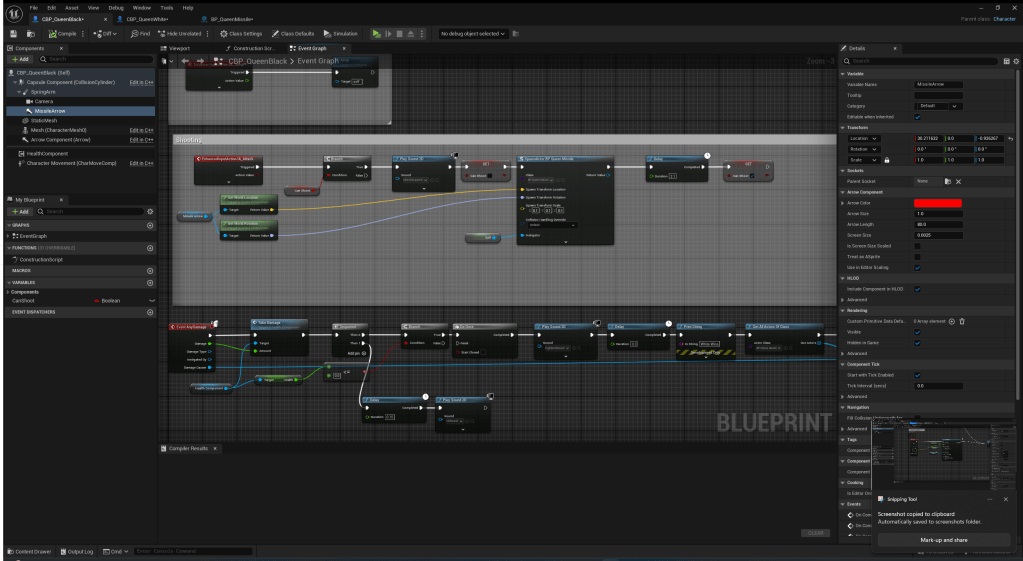
Now, to actually make this part into a game, I created a simple line trace gun which shoots from the camera.

I needed to be able to do damage to the players so I created a health component and added one to every playable character. I learnt about health components and how to use them because they are much more optimised and quicker to use.
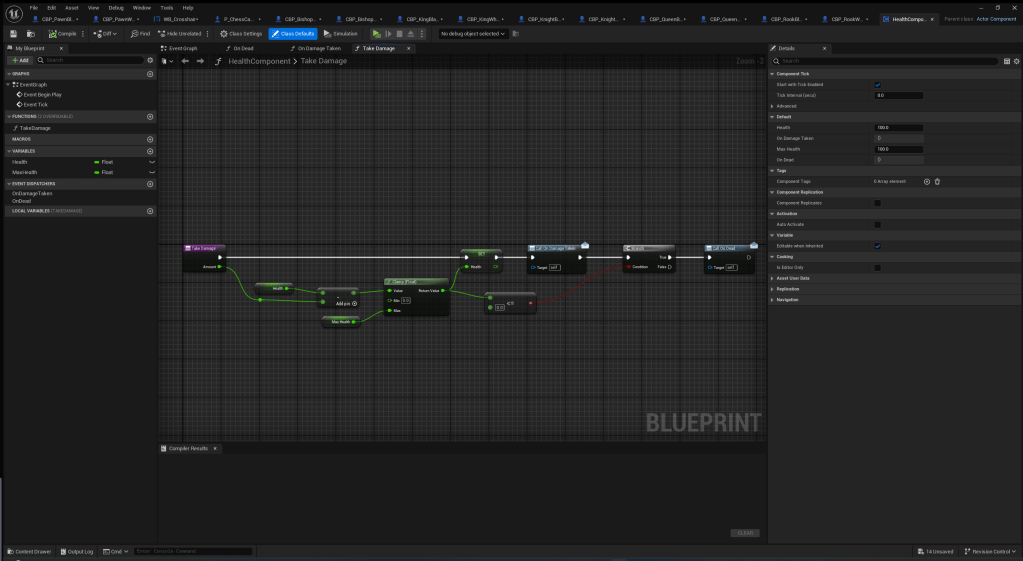
The code for my health component.
This is the code in my player to deal with damage and death.

Next, I needed to create a system on respawning the pieces based on which player wins the fight. This was a pain to do but after about 6 Hours I finally got it working.
Here is a quick showcase of what it looks like now.
Shot / Hit Feedback
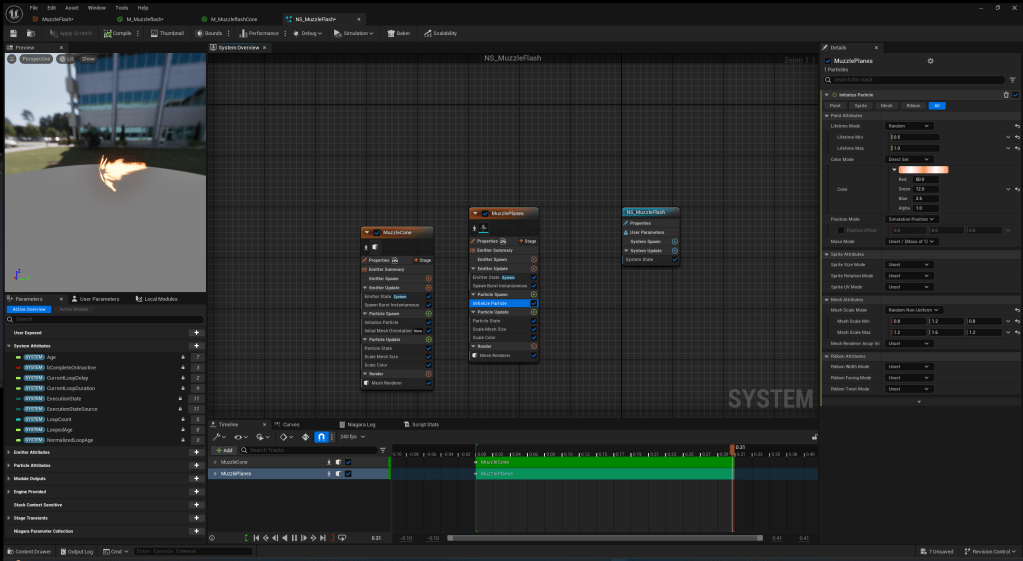
I thought that it was good at first, but after watching the video back, I realised there was no way you could tell when I was shooting. I tried creating a muzzle flash when you shoot the guns. Here is some screenshots of how I made it.

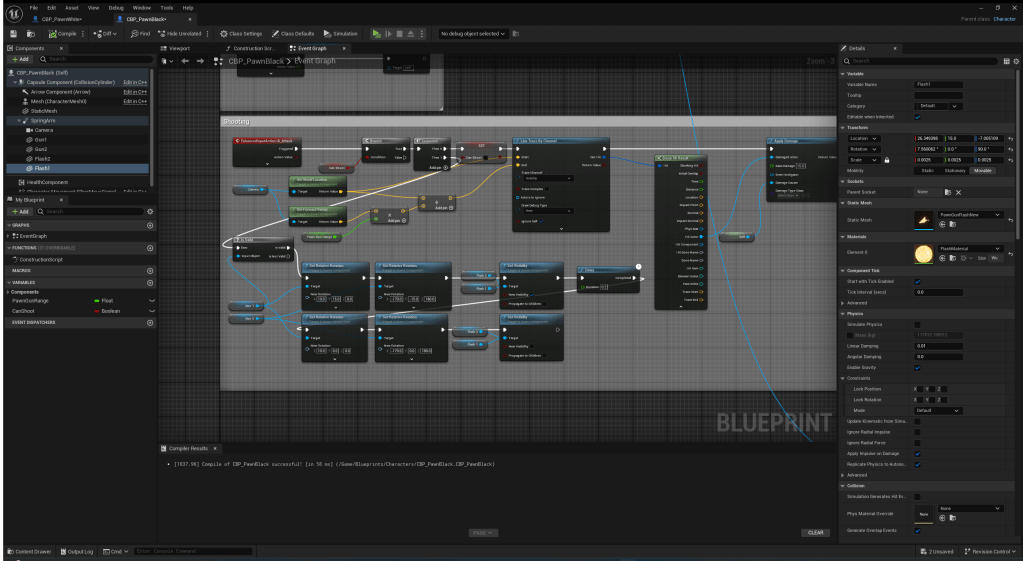
This is what it looks like in-game:
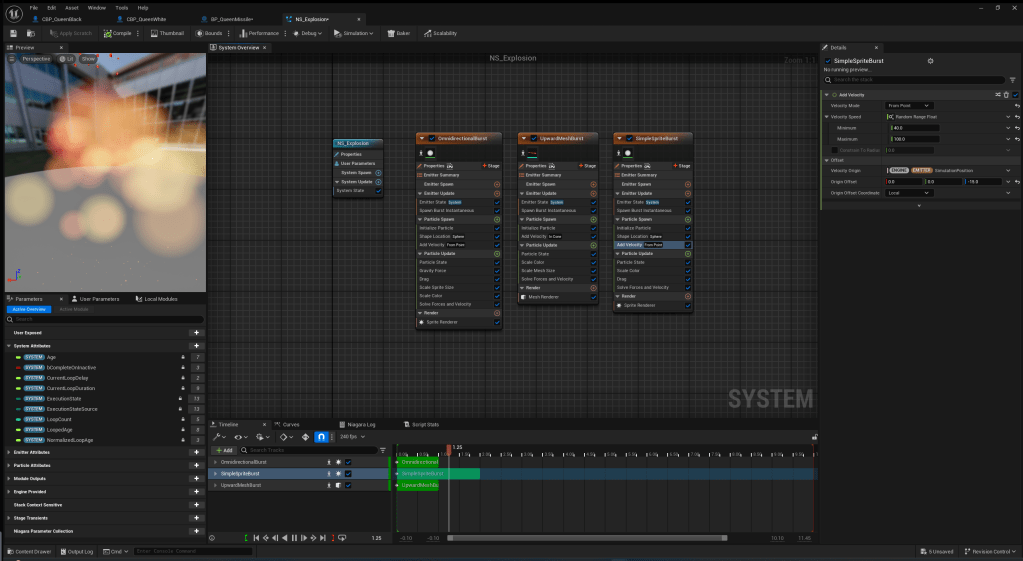
Overall, I thought it looked pretty underwhelming. So I followed a tutorial on how to make a muzzle flash effect. This is the video I watched.
Here is a slideshow of the process I followed from the video to create this muzzle flash effect:
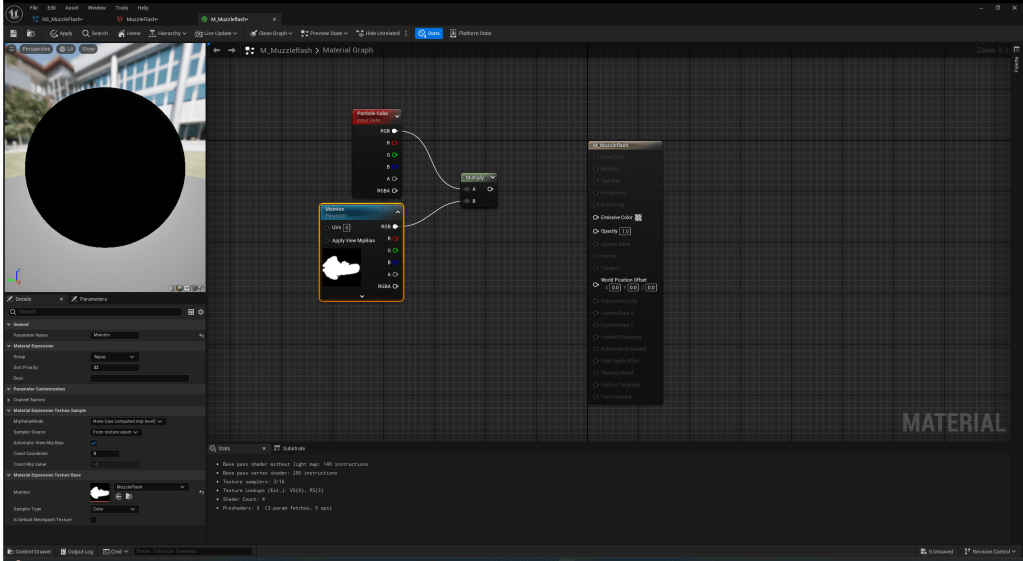
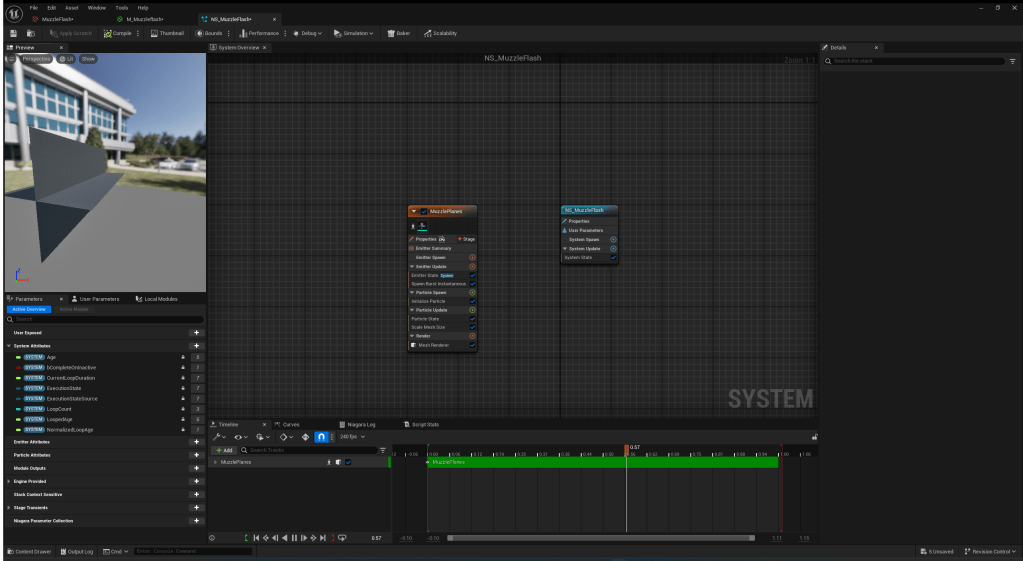
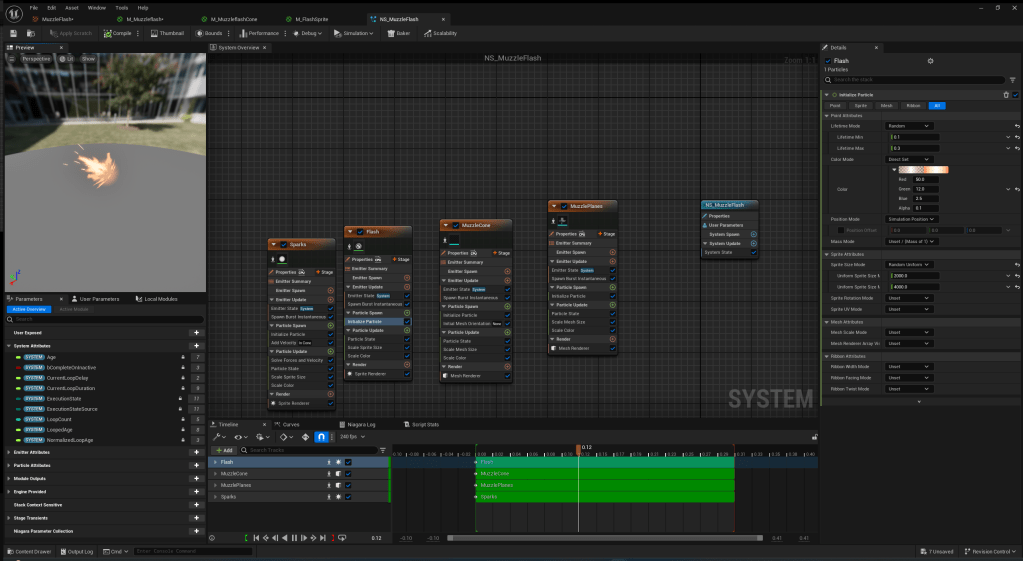
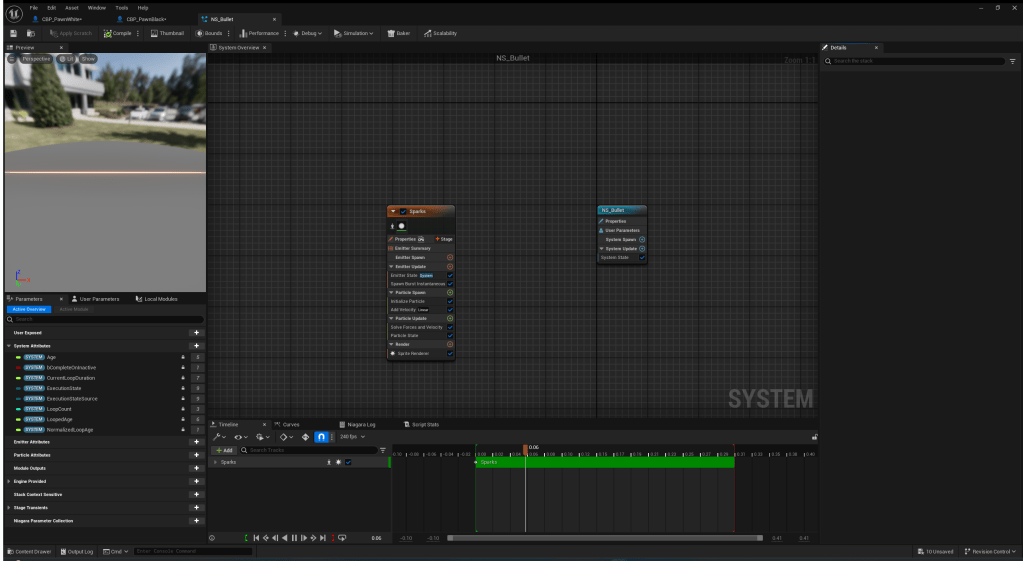
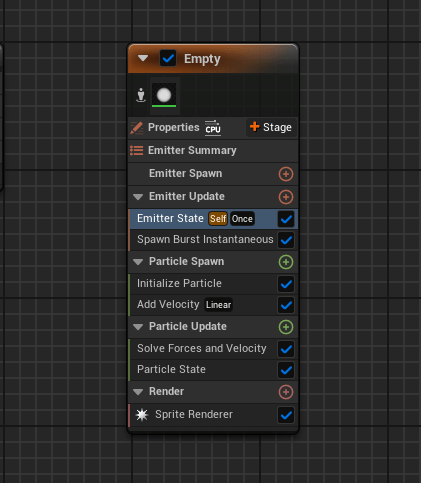
From the video, I learnt a lot about the Niagara System in Unreal Engine and how it can be used. I also created my own bullet effect after the muzzle flash seen in the slideshow above.
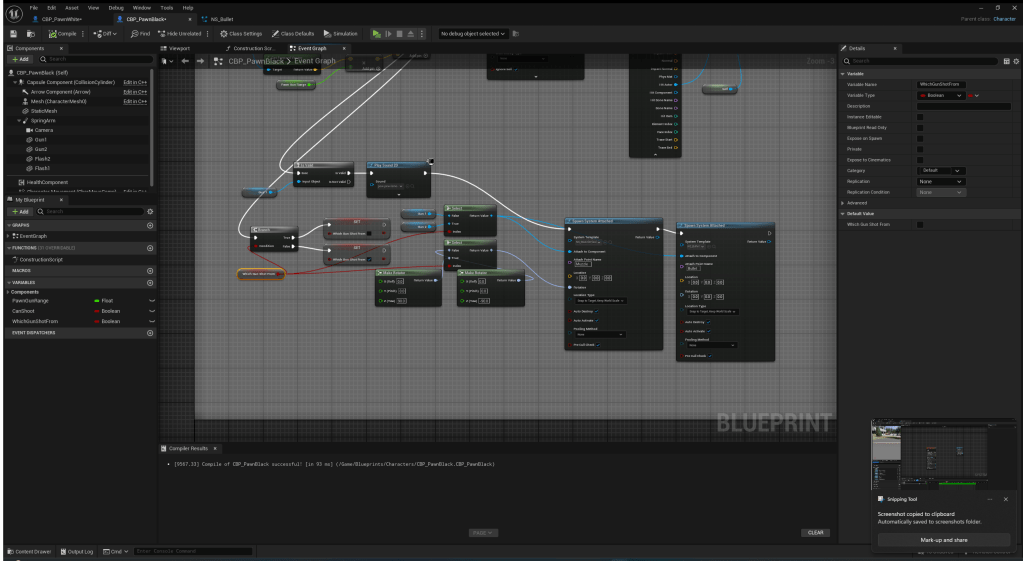
The tutorial was very useful. However, it didn’t show me how to put it into a game so I had to figure it out myself and this is the code I came up with:
This is what my new muzzle flash looks like:
I think this is much better than my muzzle flash before. This also adds a much nicer feel when shooting because now you can tell when you are actually shooting. However, to make it feel even more immersive and responsive, I am going to add sound effects and a hit marker. I think this will give the game a much nicer feel because you will be able to tell when you hit an enemy just from sound and the crosshair.

I found some sound effects online for free. Here are the websites I got them from: https://pixabay.com/sound-effects/search/boom/ , https://freesound.org/people/aruscio28/sounds/322640/ , https://mixkit.co/free-sound-effects/gun/
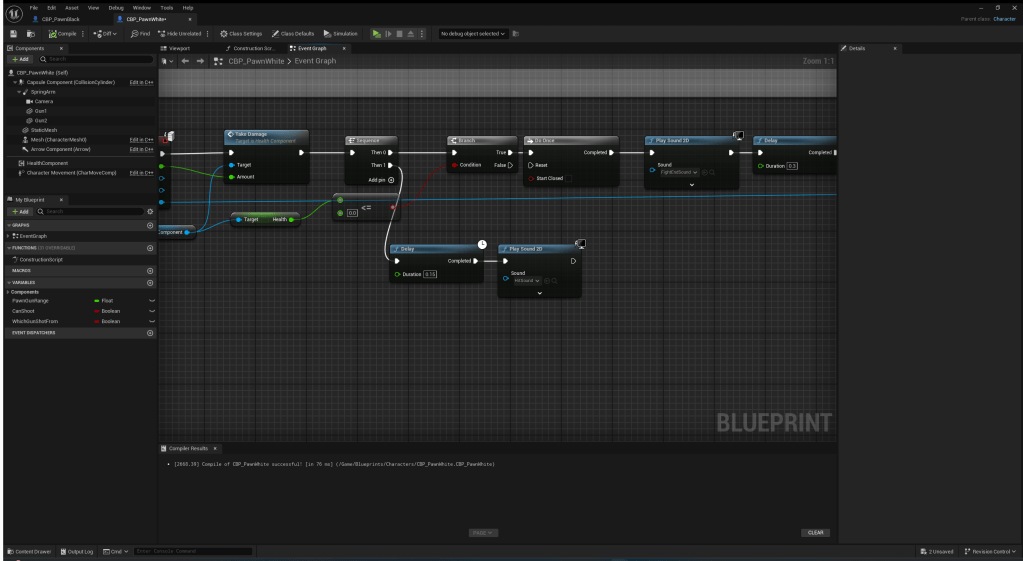
This is how I added the hit and death sound.
I created a cool animation for the crosshair for when you hit someone.
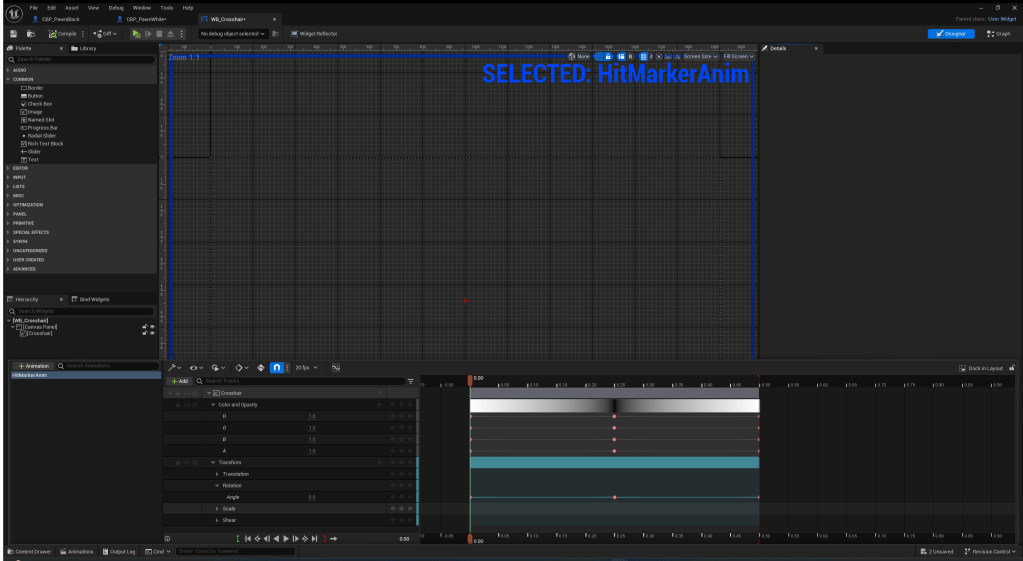

This is the code I used in the widget blueprint to make it play the animation. I hooked it up to a custom event so I can call it from any of the players as long as they have the crosshair active.
This is how I called the custom event. It gets called if the line trace hits a player.

This is my final result for my sound effects and hit feedback for the pawn:
Overall, I am very happy with how it turned out.
Quality of life

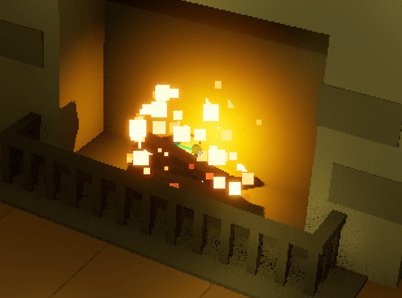
I created an edge part to my chess board in blender.
This is how it looks in Unreal Engine:
I made it so that you can control the chessboard with controller too. I thought this would be a good feature to make the game more intuitive and easy to play.

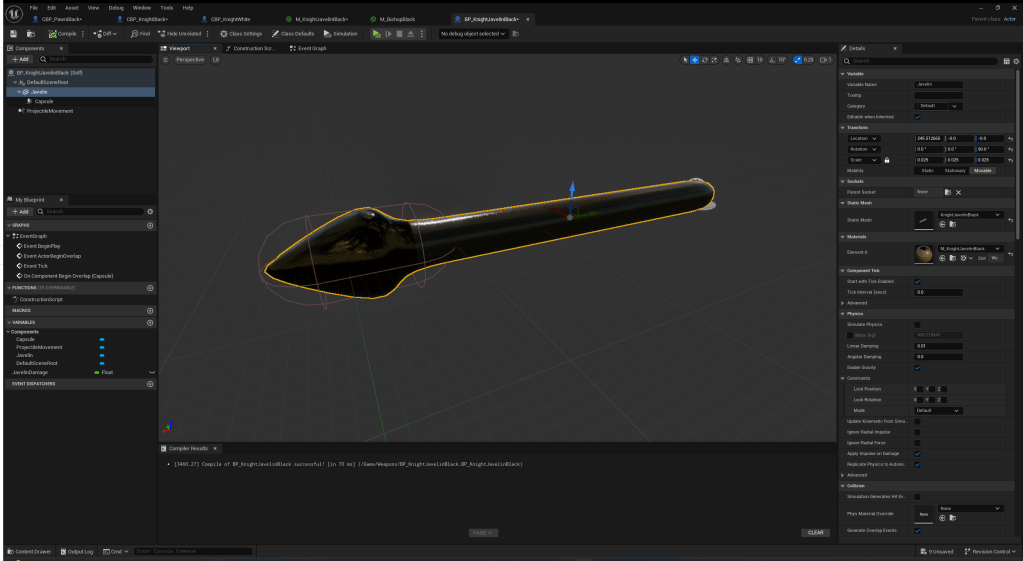
Knight’s Weapon
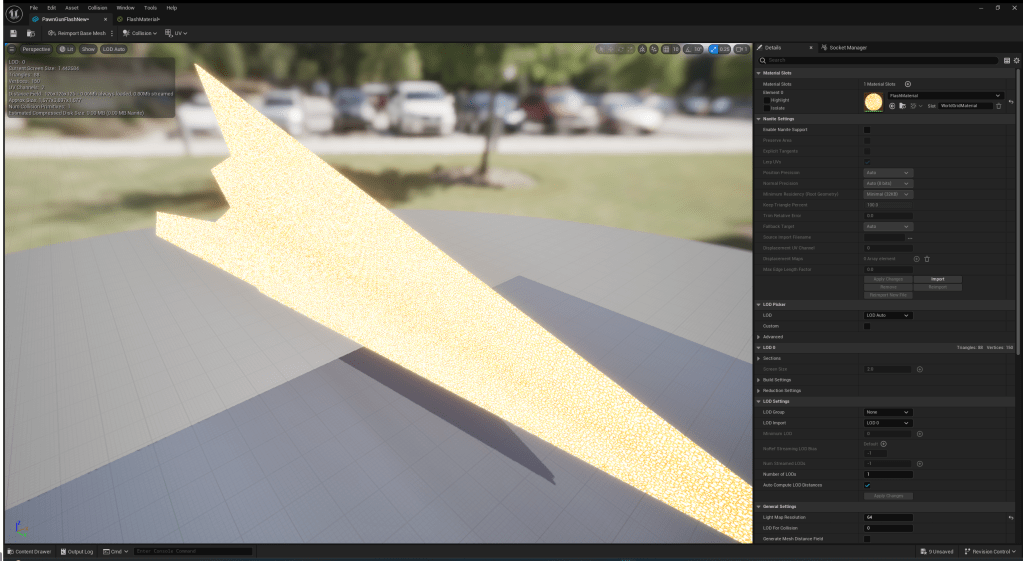
I created a weapon for the knight and decided to create a spear. I used blender to make the model.
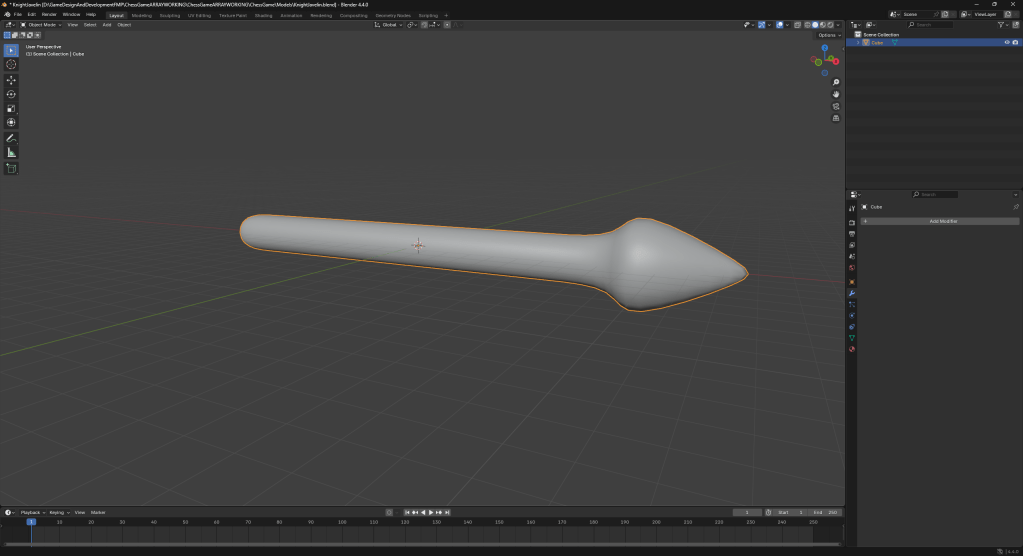
This is the shape I went for. I kept it really simple for now.. This is so I can focus on the functionality first and make it look nicer later if I have time.
I textured it in Substance Painter and this is how it turned out.

After exporting it into unreal, I created a material for the black knight to use because I thought it looked strange for the black knight to be holding a spear made from the white piece’s wood colour.
I created an actor for the spear and gave it the projectile movement component. This is because I wanted it to travel through the air and this was the best way to do it.
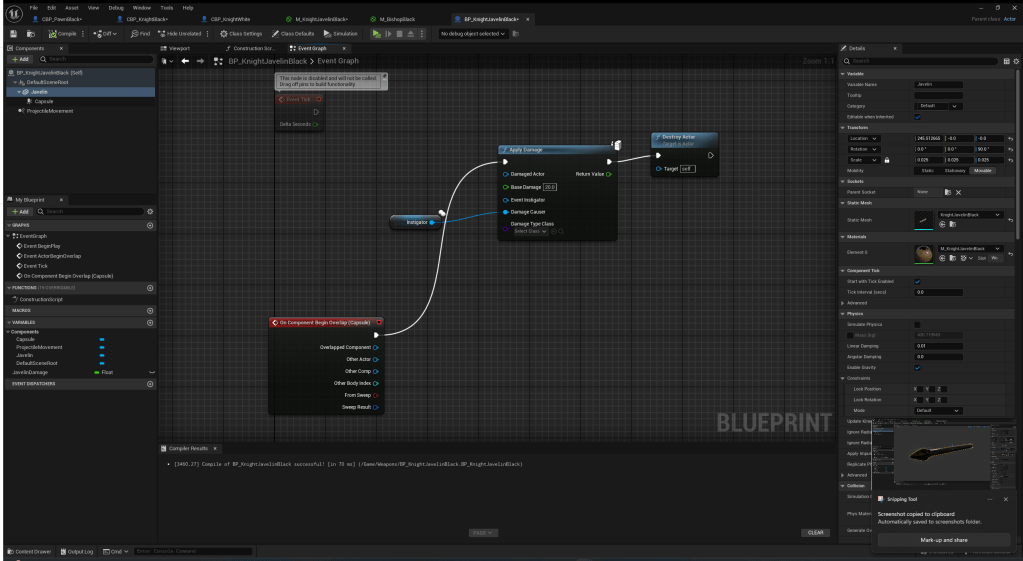

This is the code I made in my character blueprint to spawn the spear when I attack.
This is what the knight looks like with the spear.

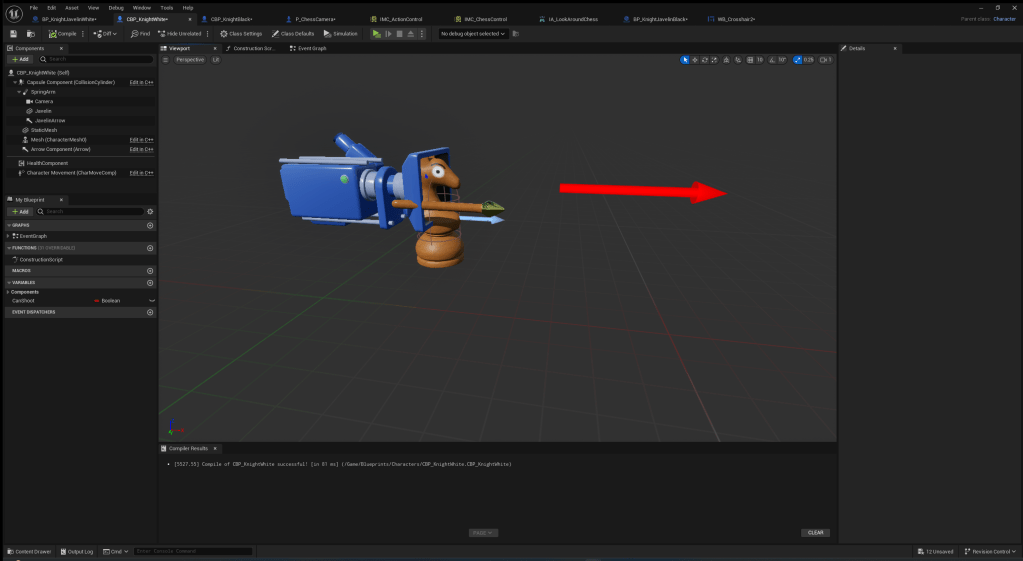
I created another crosshair for the knight. I thought a crosshair like this would be better suited for the knight since it’s weapon has drop on it.
To stop the weapon from clipping into the player when it spawns, I added an arrow component that the projectile will spawn from. I parented it to the spring arm that the camera is on so that it will always face wherever the player is looking.
I got another free sound effect from pixabay to use for the knight throwing the spear:
https://pixabay.com/sound-effects/whoosh-motion-243505/
I also edited the values in the knight’s movement component to make it a bit faster and jump higher.
I recorded a short video on how the knight’s weapon functions:
Next up was the bishop so I started to create the sniper for the bishop, I used the same subdivision method I have used for all of my other models.
This is what my model looked like after I was finished.
I added a simple metal texture to it in Substance Painter.
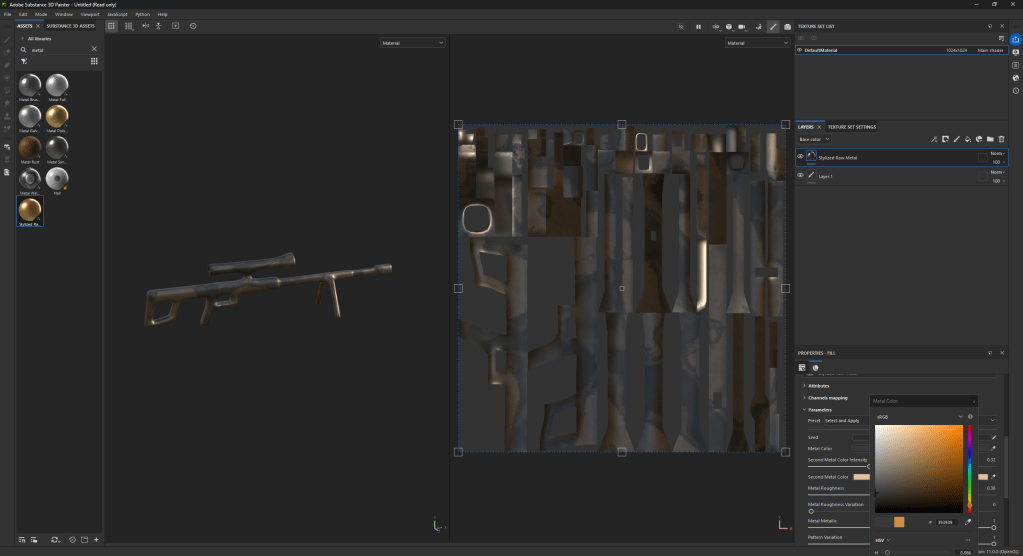

This is what my sniper looks like in Unreal.
I just copied and pasted the code over from the pawn to do the sniper. I also edited the code to better suit the sniper and created a new muzzle flash and found another sound effect.
https://pixabay.com/sound-effects/gun-shots-from-a-distance-7-96391/
This is a video showcasing the bishop’s weapon.
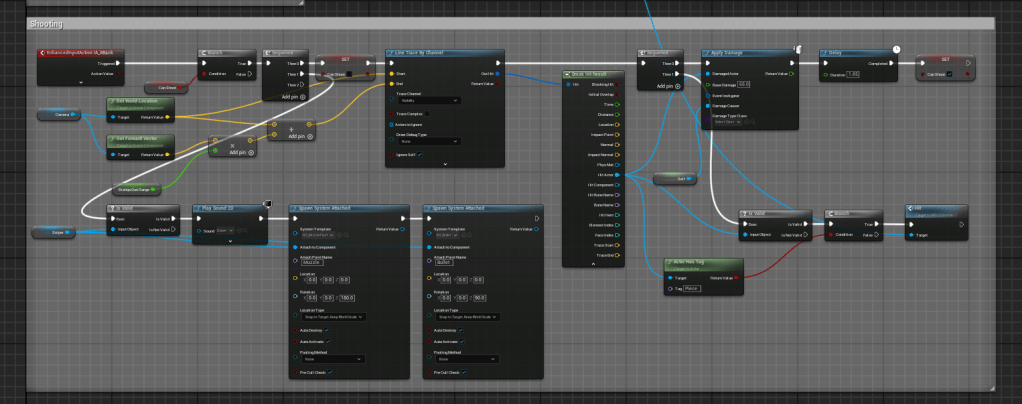
Next, I created the rook’s weapon. Which is a shotgun.
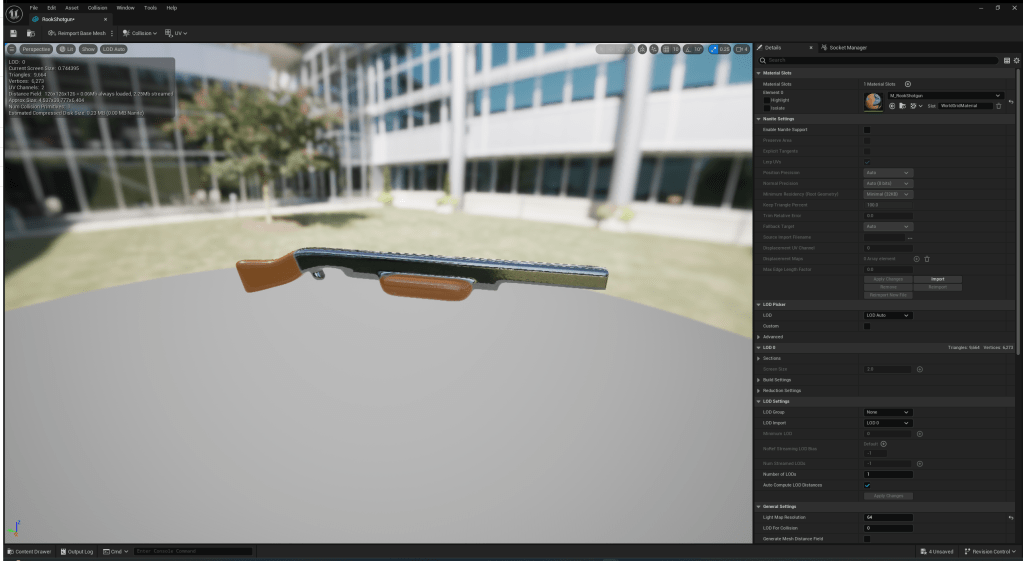
This is what the model I created looks like.
I got another sound effect from pixabay for a shotgun firing.
https://pixabay.com/sound-effects/shotgun-firing-3-14483/
I created a better hitflash for the shotgun which seemed more violent like a shotgun.

This is the method I used to create multiple bullets to recreate a shotgun effect with line traces.

Next I created the Queen’s weapon. Which was a missile.
First, I started with getting the sound effects from pixabay.
https://pixabay.com/sound-effects/cas-missile-launching-with-some-reverb-66630/
https://pixabay.com/sound-effects/explosion-312361/
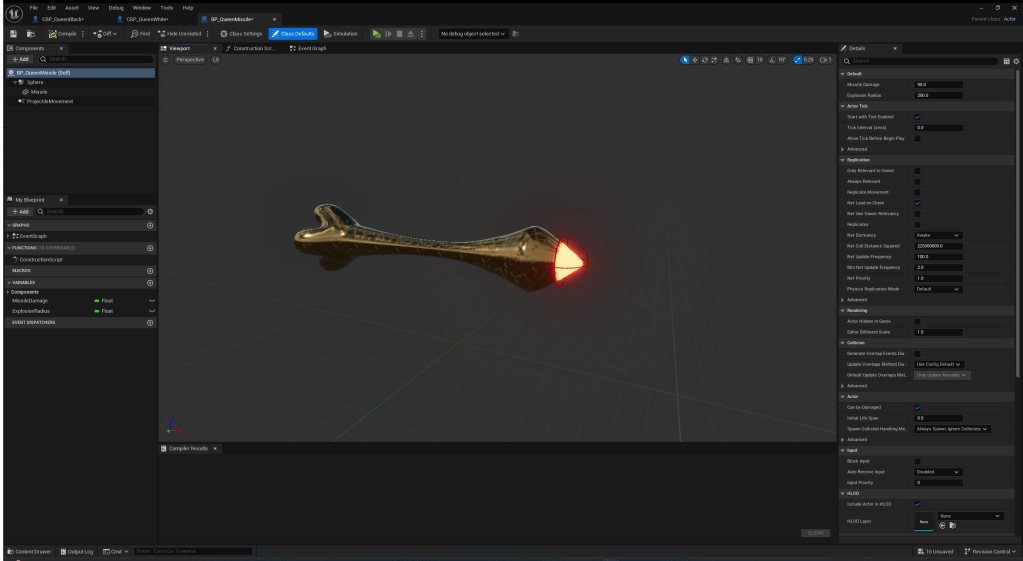
Then I modelled and textured the missile and this is how it turned out. It looks decent but I didn’t spend much time on it because I wanted to focus on the mechanics.
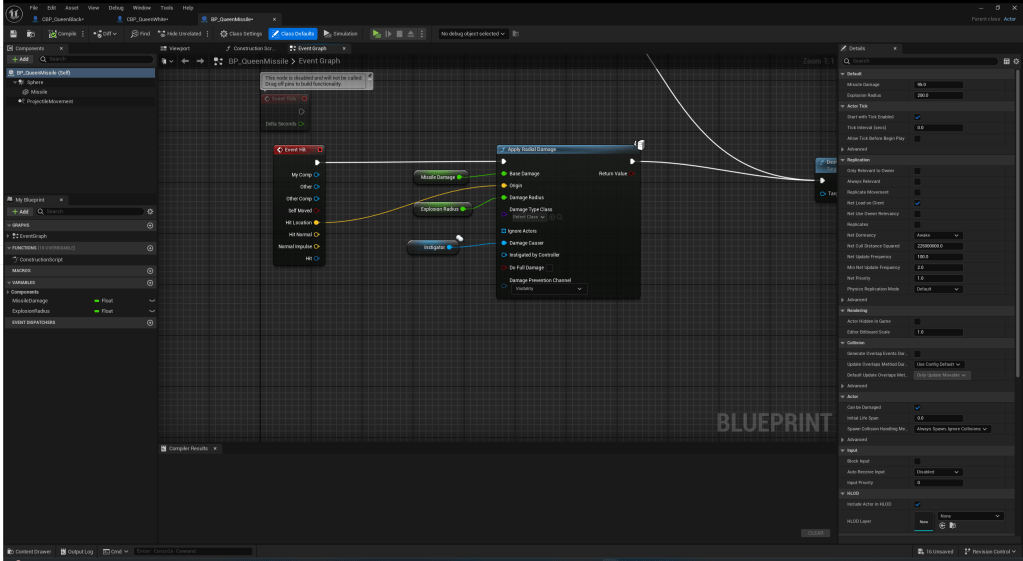
This is the code I came up for the missile. I found this radial damage node which was perfect for what I wanted. It creates a radius from the hit point of the missile and everything in the radius gets damaged. Anything close to the centre of impact takes more damage and further away takes less damage.
This is the code inside the queen to make it shoot the missiles. It is very similar to the knight’s weapon in code.
Here is a quick showcase of the last two weapons that I created:
After watching the video, I realised that the explosion didn’t seem very good so I created a particle effect so that you can tell where you have hit.
This is a quick showcase of the updated queen attack.
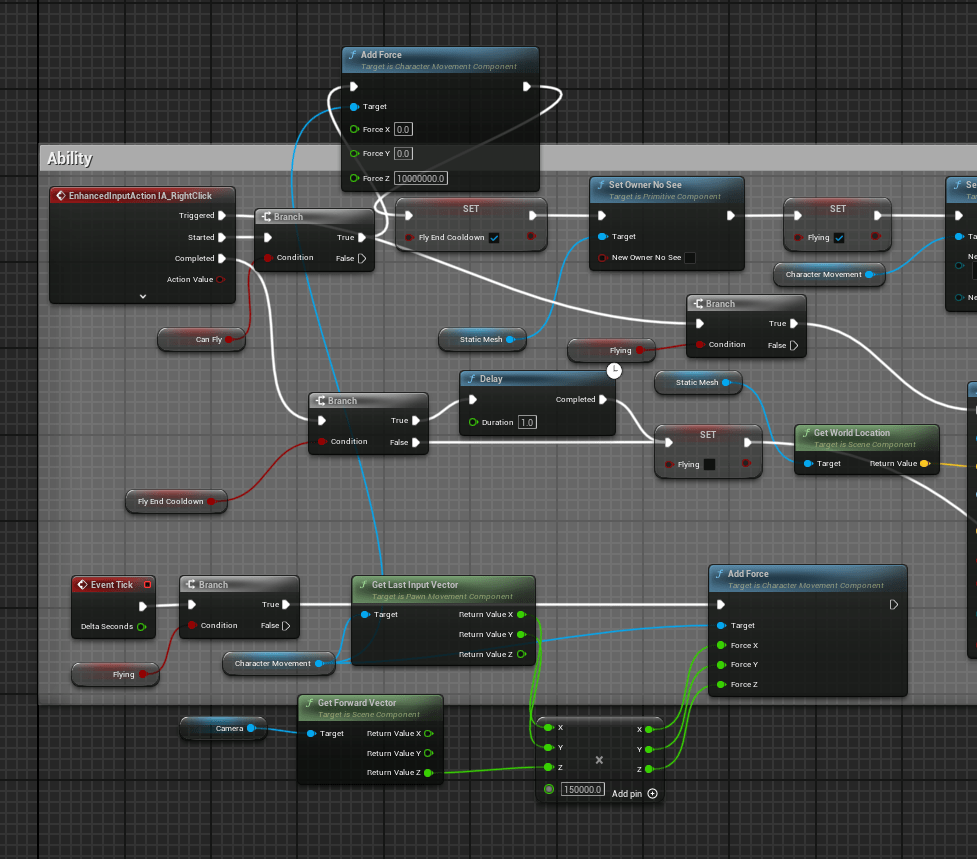
I was feeling a bit burnt out of making simple weapons. So for the king I wanted to change it up a bit so I created an ability for the king first.
This is the code I made for the ability. I just thought of the idea of a movement ability randomly. I made it so when you hold the ability button, you will be launched in the direction you are looking. The longer you hold the button, the further you will be launched. But there is a limit so the player cant just glitch out of the map.
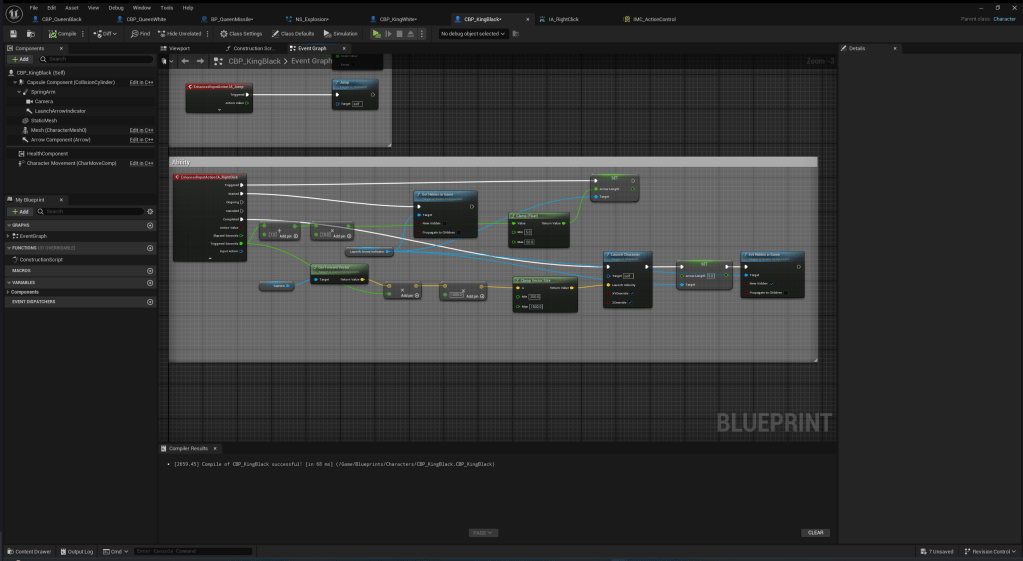
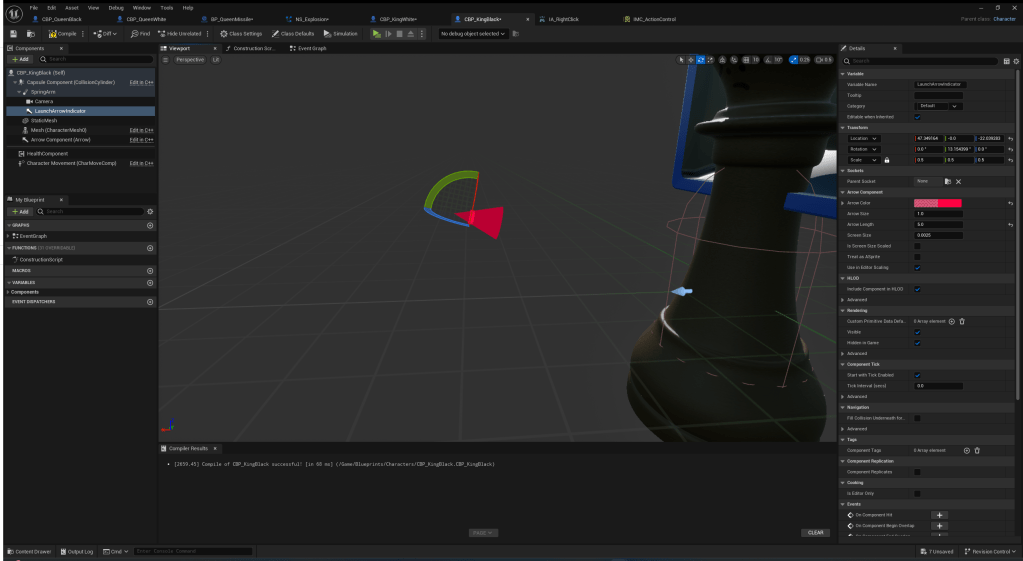
This is the arrow indicator I made for the ability. It indicates how big your jump will be. It grows as you hold the ability button.
I wanted the king to wield a sword but I didn’t want the king to be weak. So I came up with a cool idea for the king’s weapon which involved creating animations for it. Which I learnt quite a lot about animations doing.
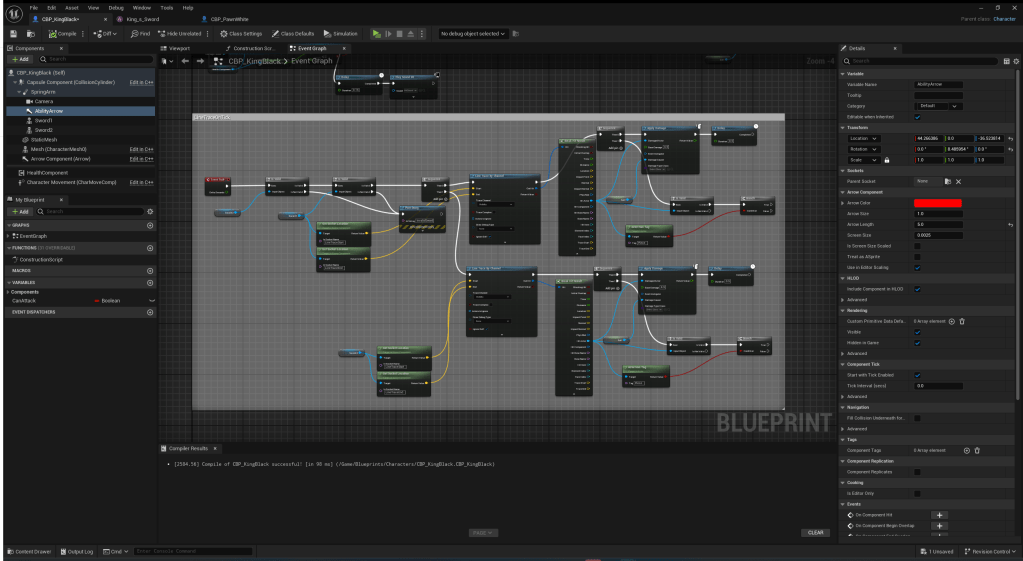
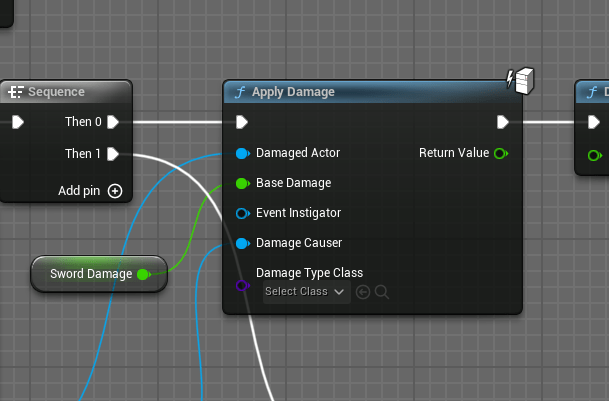
This is the code I made for the king’s sword. Every tick there will be a line trace from both of the king’s swords from top to bottom which deals damage to your opponent. This system works well because now when I make the animation, the line trace will still follow the sword as it’s moving.
This is the code I used to make the attack do the animation.

I also found a free sound effect on pixabay to use for when the king does his attack:
https://pixabay.com/sound-effects/047571-glitchy-robot-scream-64943/
Here is a showcase of the king’s weapons and abilities I have created. I am quite proud of this one.
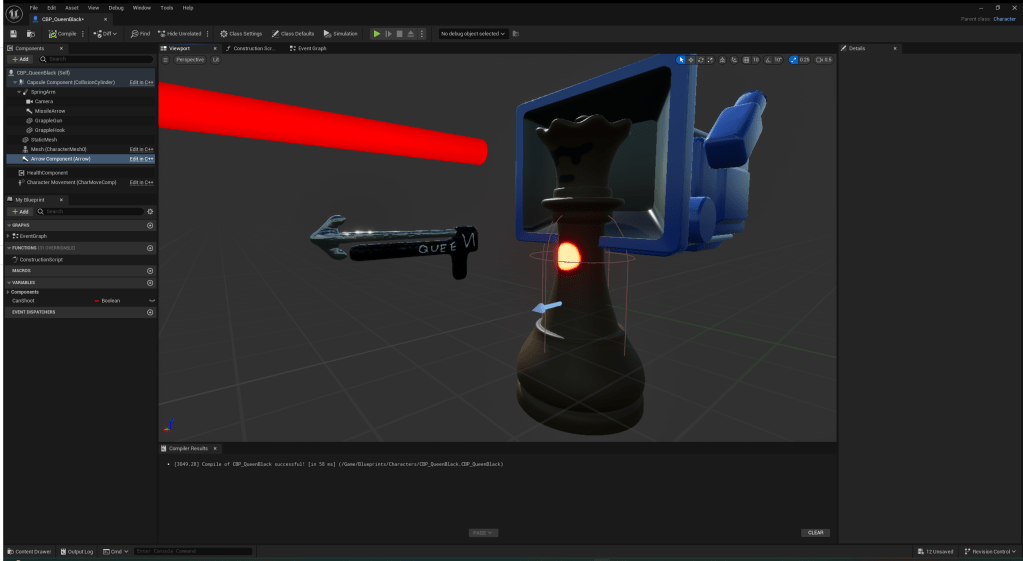
Next I wanted to create another ability for a piece. I chose to create the ability for the queen and I decided to give her a grappling hook.
I started off by just creating simple shapes by extruding and moving around faces. I wanted to create the grapple gun and the grapple hook as separate models so that I could create a better looking effect in game when you grapple.
This is what the final looks like in blender.

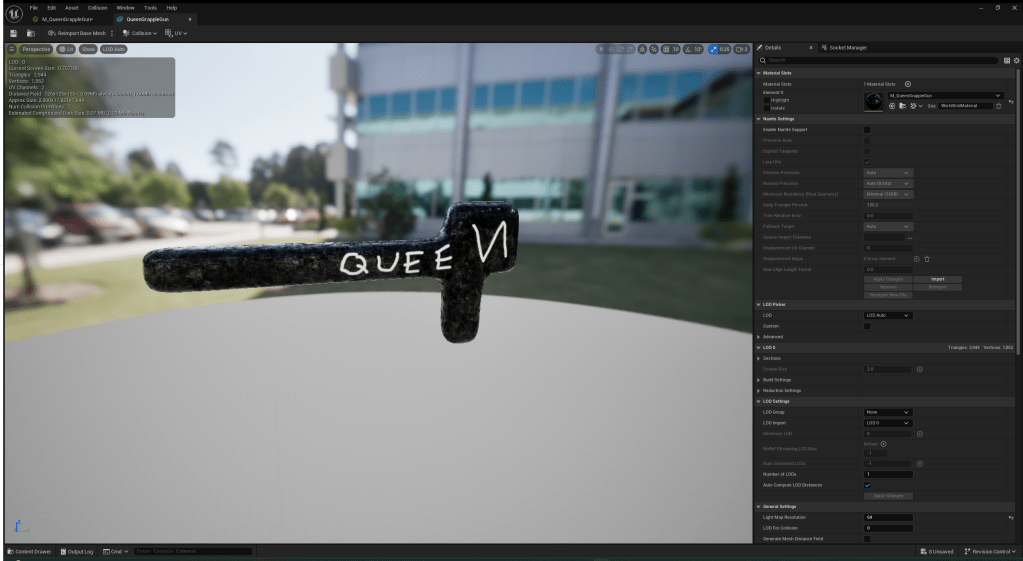
I added some textures in substance painter and exported it into unreal engine. I used the same method as I did for all the weapons.
Now I finally had my grapple hook ready, I needed to figure out the physics on how to make it. I used a YouTube video to help me figure out a method to take while making this ability.
This is the tutorial I decided to follow:
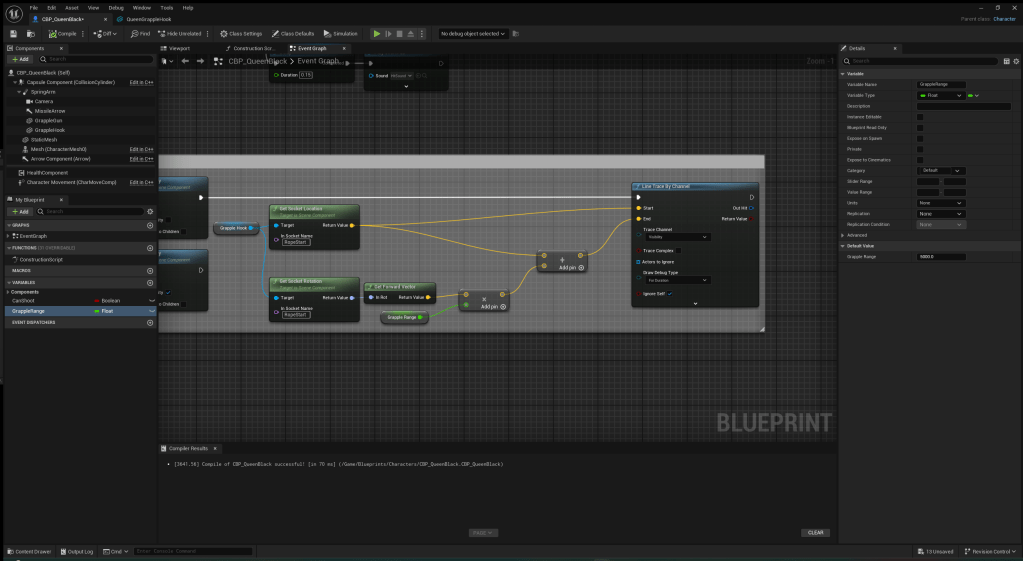
At first, I wanted the line trace to come from the grapple hook. But it ended up with the aim being wrong and inconsistent.
To fix it, I just made the line trace come from the camera, but the rope come from the grappling hook. This still gives the effect I wanted it to.
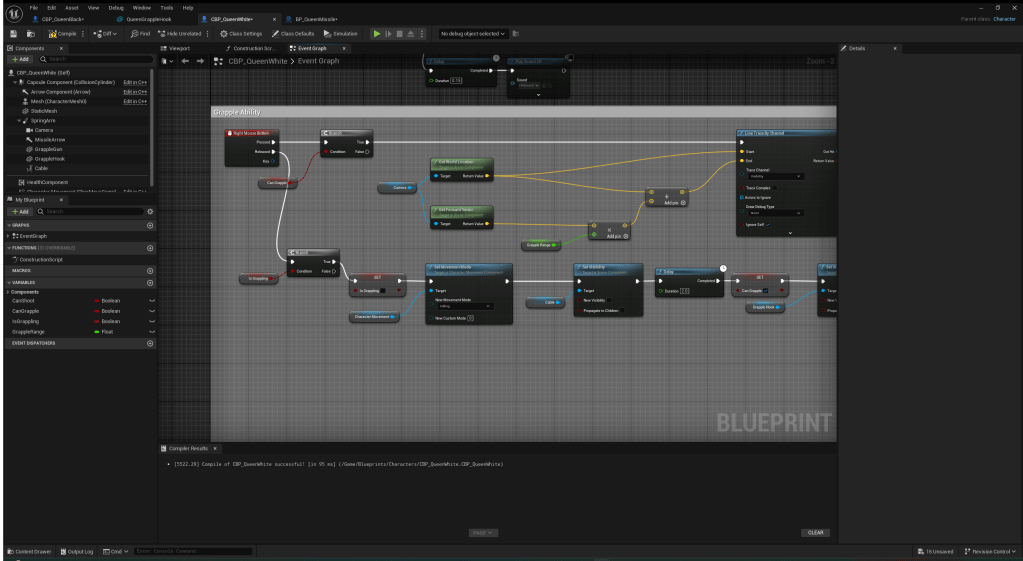
To finish the grappling code, I created a simple delay between being able to grapple. I used a simple method with Booleans and delays. I used this same method with a lot of the weapons for the pieces.
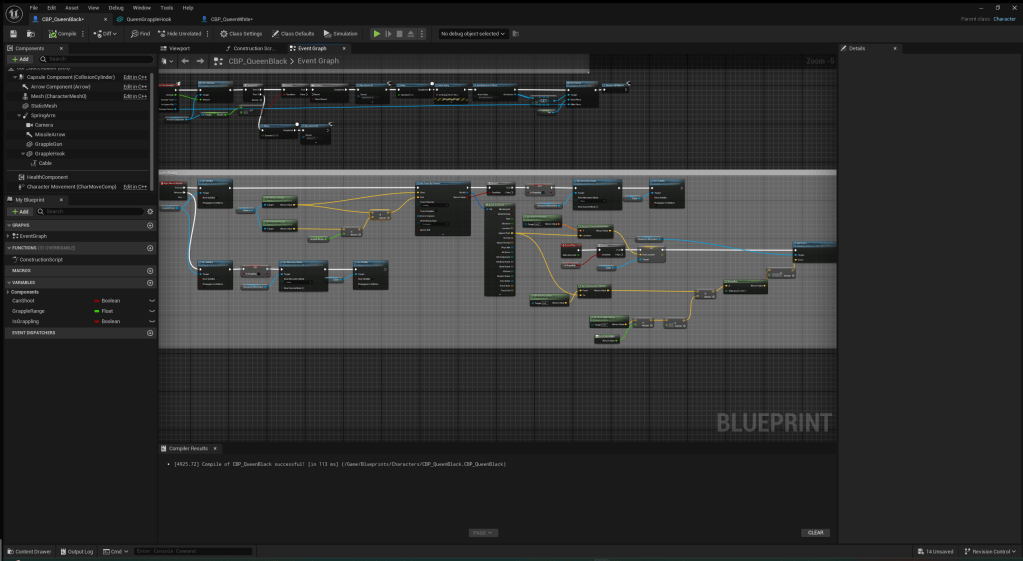
This is my final result for the Queen’s grapple:
Next, I wanted to make the bishop’s ability. I decided on a jetpack-ish type ability. I chose this because I think it will be a fun ability to use and the bishop suits a more fast-paced ability.
I made a new Niagara System which just creates a sphere in a random size and colour within a range. Then it adds velocity going down. I made this first because I was still procrastinating doing the code for the jetpack and trying to figure out how I wanted it to work.
This is the code I came up with for the “jetpack” ability. Its very messy but it makes the camera go to third person and it propels the player in the direction they are facing while emitting the particles from the character.
I also made a sound effect play while the player is using the jetpack. I got it from Pixabay:
https://pixabay.com/sound-effects/good-jetpack-sound-loop-96693/
This is a quick demonstration of how the mechanic looks and works in game:
After testing around with the ability for a while, I realised it was quite hard to use because you were always propelling toward where you were looking. So I changed the code to make it so you just go up if you are looking up and go down if you are looking down. Forward and side speed are based on WASD or thumbstick input.
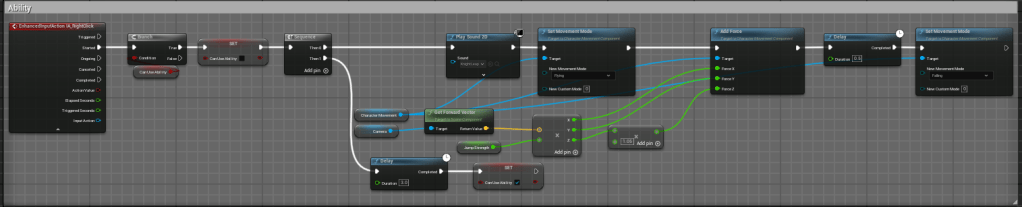
I also created a simple ability for the knight. Its just one big leap in the direction you are looking.

I also used a sound effect I found on Pixabay for the jump:
https://pixabay.com/sound-effects/spring-vibration-229137/
Finally, I just added another cooldown similar to the Queen’s grapple.
I took a clip showcasing the Knight’s new ability and the changed Bishop’s ability:
Next, I created the Rook’s ability. The general idea for this ability was that I wanted a dash mechanic where you can deal damage if you hit a player with the dash.
I got a sound effect from Pixabay for this ability:
https://pixabay.com/sound-effects/sci-fi-weapon-shoot-firing-pulse-dn-05-233832/
To exaggerate the dash, I created a Niagara system. It is very similar to the gun flash one, but I made it randomly coloured with just the cone part.

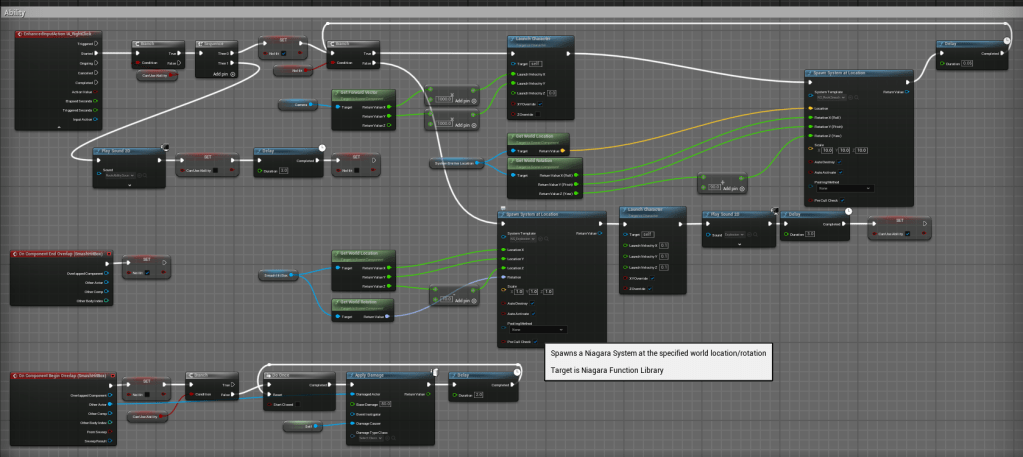
This is the code I came up with for the dash. I made it repeatedly dash for a certain amount of time until you hit a player.
This is a quick clip I took of me testing this ability.
To fix a bug in my game where you could move pieces off the board, I added this code to my TileClicked function.
Finally, I created the pawn’s ability.
I first created a new material for the gun while the ability is active. I am doing this because the ability will be a temporary gun buff and a new material would be a good way to signal to the player that the ability is active.

This is the code for the ability:

And here is a short video showcasing the ability:
After, I also added a sound effect I got from Pixabay:
https://pixabay.com/sound-effects/short-choir-6116/
I wanted to start learning how to create cinematics for when I create a trailer for the game. So I learnt how to use the sequencer in unreal and created a short animation of all of the pieces circling the camera.

I used this short clip in the intro of this short video below. Its a showcase of all of the abilities since I have finally finished them all.

I had to change the location of some nodes from a function to a custom event so I could use a delay. Unreal Engine doesn’t let you use a delay inside of a function apparently.
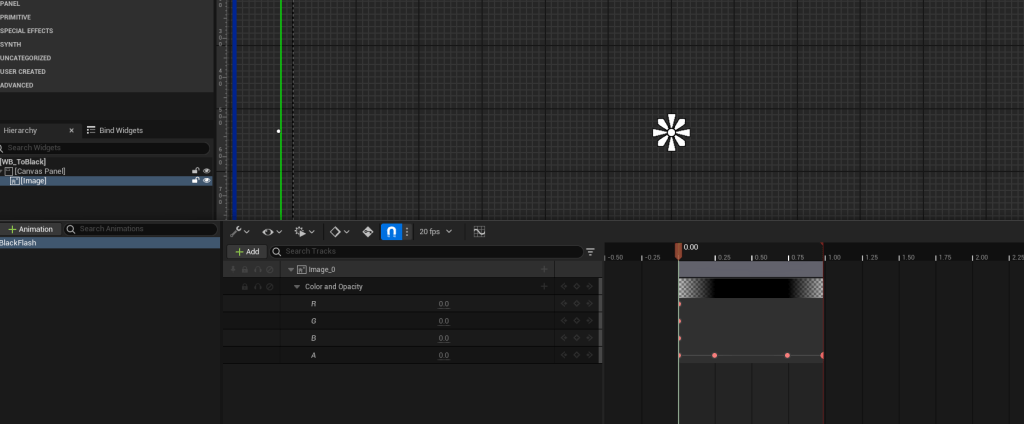
I created a fade in and out to black for when the fight starts. I did this to make the game look better because before it looked a bit glitchy. So this black screen will hide all of the mess before the 1v1 starts.

I also created a red effect around the screen to signify the player is low on health.
This is how I added it to the players’ screen while they are low health:

After some playtesting with a friend, we came to the conclusion that the king needs to be buffed.
So to start, I came up with a secondary attack / ability. I thought of an ability that has homing swords. So I added these arrows on top of the king in his blueprint which will act as the points that the swords get spawned from.
This is the code I made for spawning the swords.
In the code for the sword projectile. I made it so they rise up for a second then lock on to the other player and propel towards them for a couple seconds before disappearing. I each sword do 20 damage each. I chose that amount because 3 x 20 damage isn’t enough to kill a piece in one hit but it can get you low on health.
Next, I also buffed AND nerfed the king’s health. I did this to make the player think / play more strategically.

I made these variables inside the chessboard since it is the one object that stays in the game throughout the whole game.
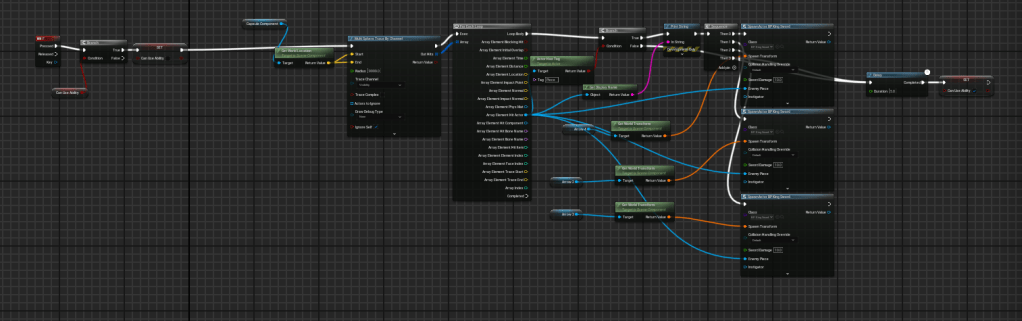
I made it so when the king gets spawned, it gets the health variable from the chessboard and sets it’s own health to that.
Next, I made this code which saves the king’s health to the chessboard every time he takes damage.

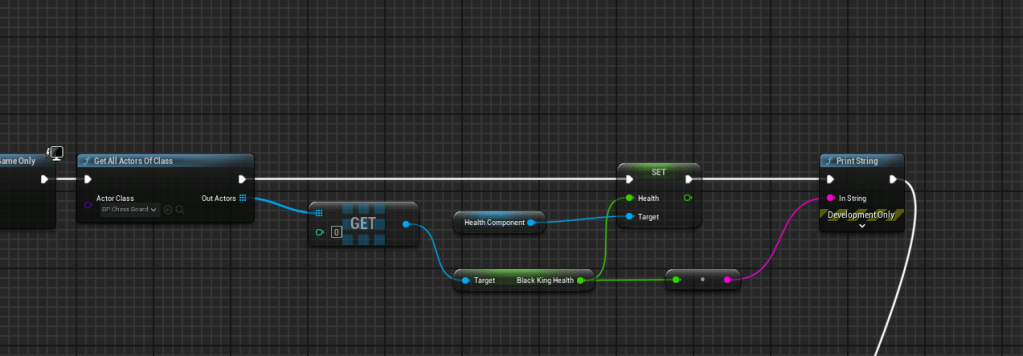
Since I was already working on the king, I thought I might as well add a win screen when the king gets killed. This is the code that does that:

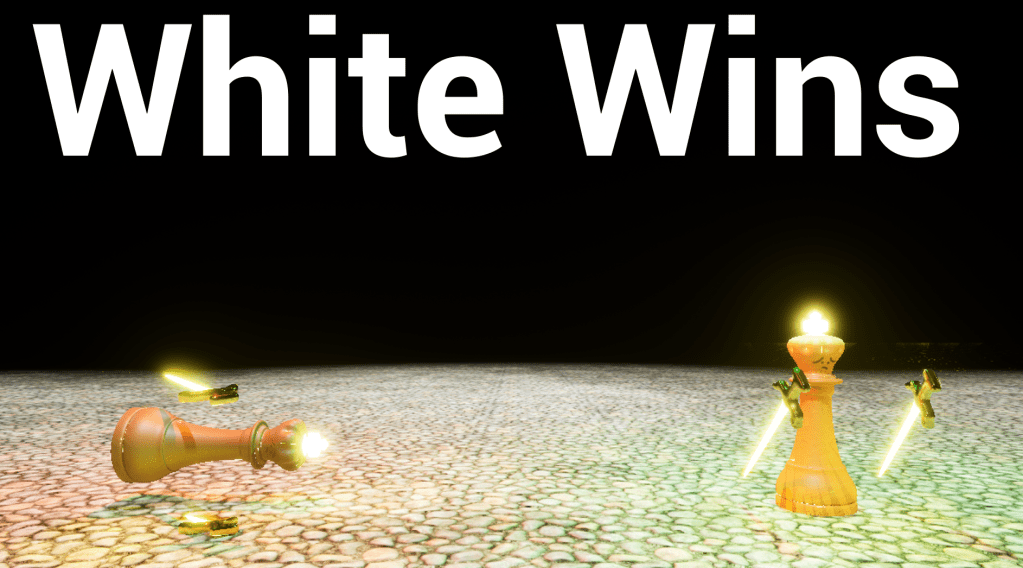
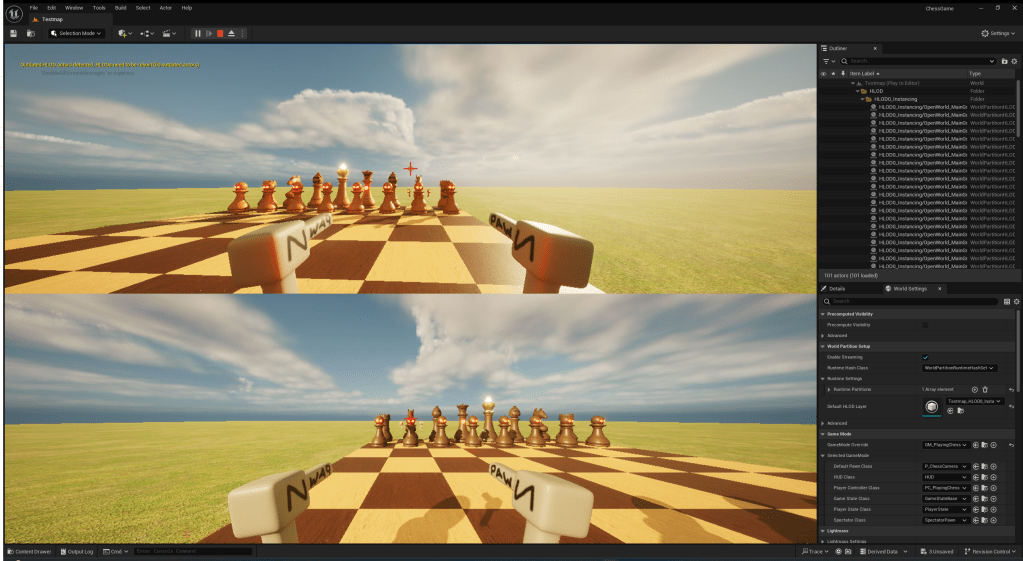
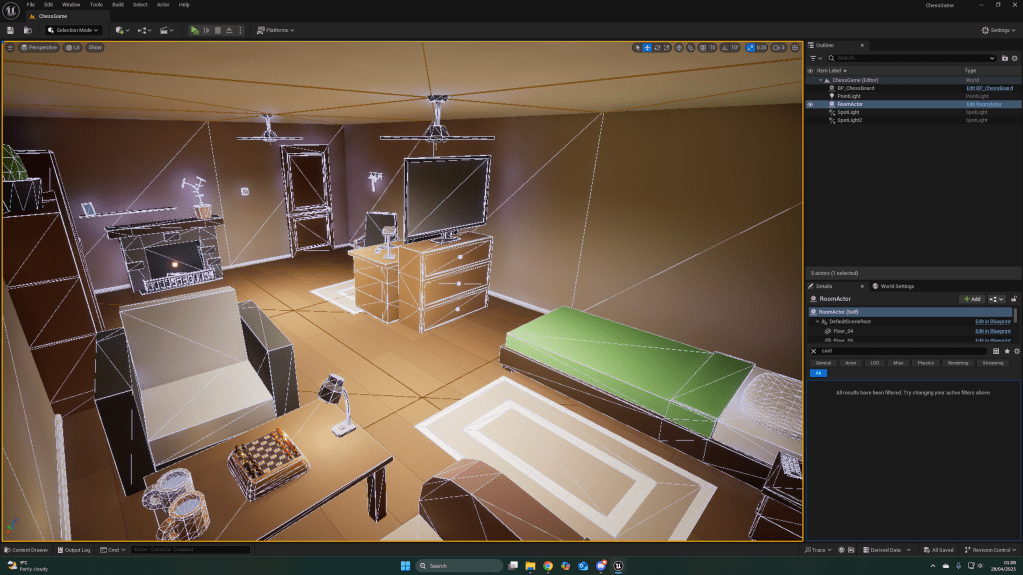
This is the level I made. It is just an empty level with some lights and a floor. It spawns the two kings based on who won and knocks one of them down to show the loser.
Originally, I wanted to model the whole map. However, with the time I have left to finish this project, I don’t think that I could finish this project with all the other things I still have left to do if I model everything.
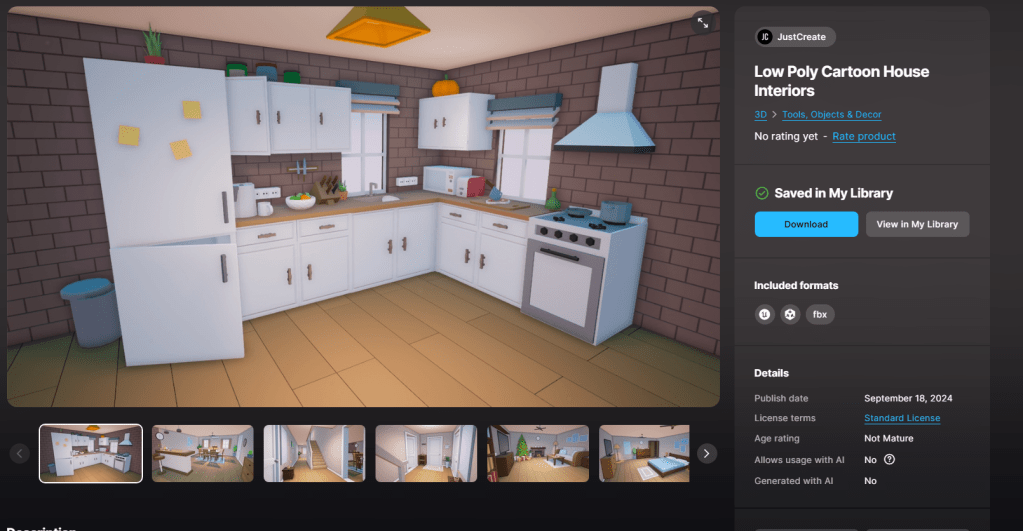
So I compromised and bought this asset pack to use for help creating my map. If I do end up having enough time in the future, I will create my own models for everything and replace them.
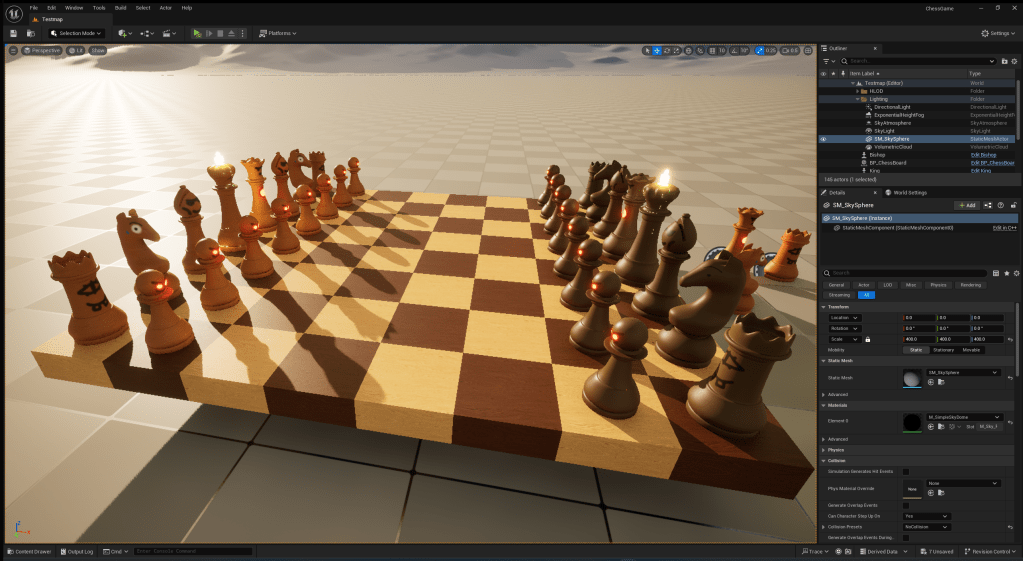
This is the level that I have put together using these assets. I am pretty happy with it because there are a lot of fun fighting locations.
There was also some cascade emitters in the pack. They didn’t work properly because everything else was scaled up so I learnt how to use this system so I could fix the emitter in the game.
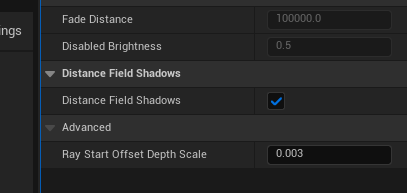
Once I actually tested my game, all of the shadows were bugging around. After looking at some unreal engine forums, all I needed to do was enable “Distance Field Shadows” and it stopped.

I added a lot of point lights throughout my level to keep it well lit.
There was a bug in my game where if you spawned as the king and you were right next to the enemy, they would die practically instantly. I fixed this by making the king’s sword damage into a variable..

Then setting it from 0 to 10 after 2 seconds of play. This gives the other player time to move out of the way.
Next, I worked on a lot of the UI elements. I created a health bar, and an indicator for each ability key bind.

First, I started off with the health bar. I made this in Photoshop
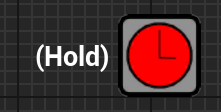
Next, I made a delay icon to show the player when a cooldown is active.

I also created some key bind icons for the abilities.
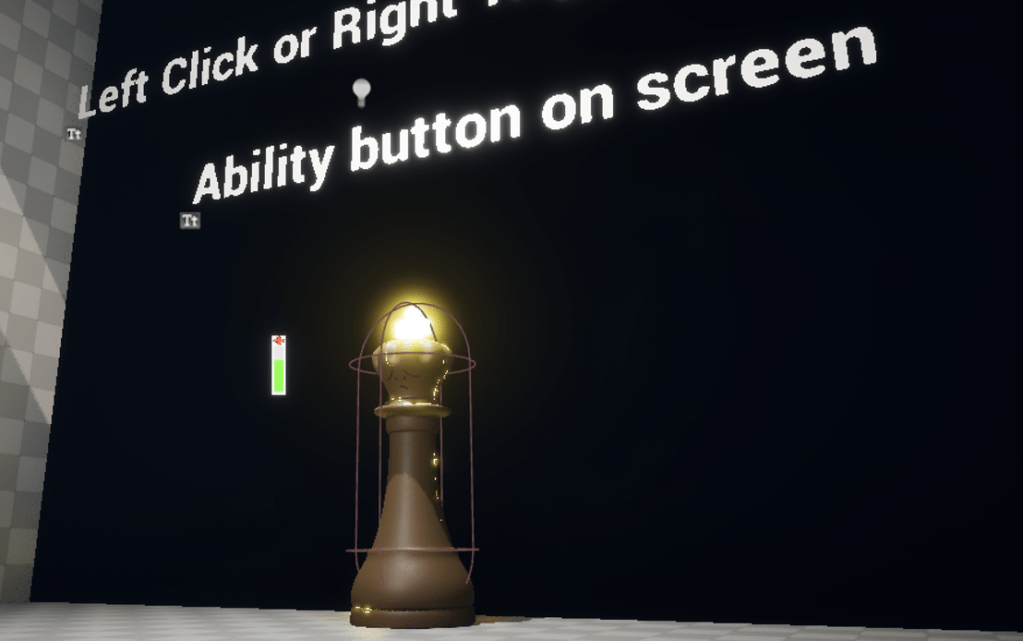
After I had finished creating my UI, I created a tutorial level.

I put this tutorial level together with just basic object and text actors.
At the back of the level I added an enemy you have to defeat to complete the tutorial.
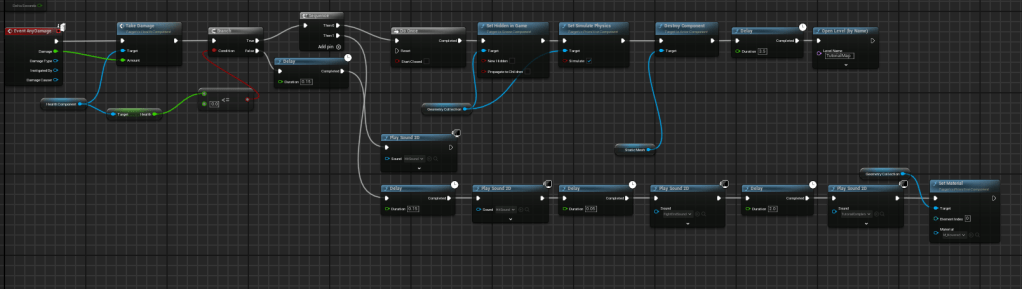
The enemy is only coded to take damage. I used a similar method to the characters to code this but just added some stuff onto the end.
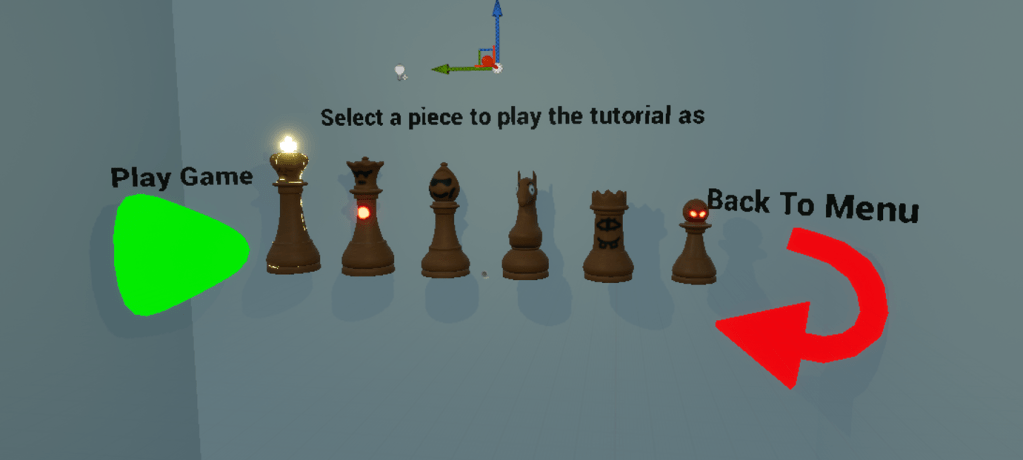
I created a screen where you can select which piece you want to play the tutorial as. I did this by just making this whole thing an actor that you spawn inside of then it destroys when you pick a piece and spawns you in the tutorial as that piece.
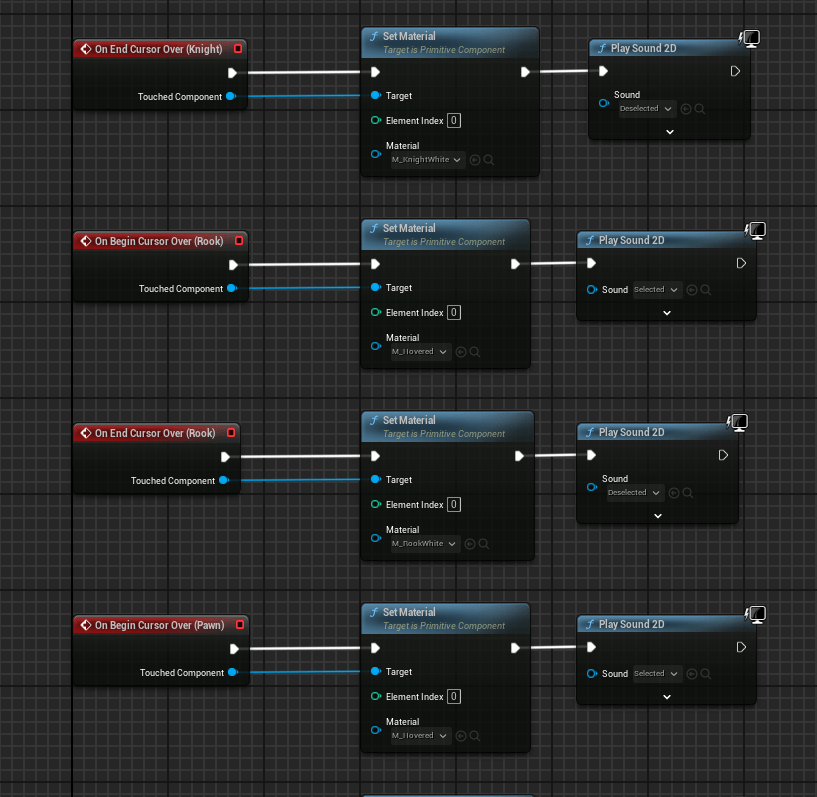
This is the code I made to give the player some feedback while they are choosing a piece. This code makes it so when you hover over something, it glows. It gives a nice effect and makes the game feel more responsive.

I made this code which brings you into the tutorial part when you click on a piece and makes you possess the matching character of the piece you clicked.
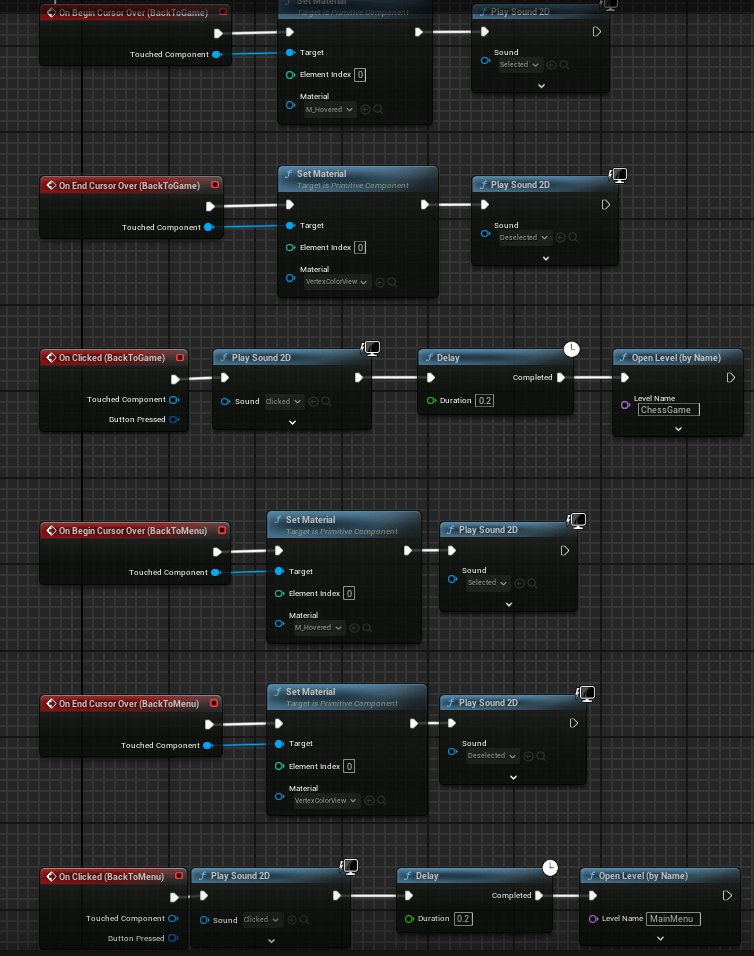
I also added a “Play Game” and “Back to Menu” button so that this tutorial works as a part of the game. Otherwise the player would have no way of getting back from the tutorial. It was very easy to make this because I just made it open the corresponding “level” and the engine handles everything else for me. I also added the hover effect to these buttons.

Next, I made a new level for the actual main menu. This is just the room that you play in with a camera actor that spawns at the Player Start.
Next, instead of the camera actor, I made a main menu pawn and a main menu game mode which will be the only objects inside this room.


This is what it looks like in game, the camera spins around the room with the pieces. The code in this blueprint is practically just the same as in the tutorial with the piece selection.
This is a quick video I made to showcase all of what I have recently added to my game.
After some playtesting on my tutorial with people who don’t really play videogames, they didn’t understand what the icons meant. So I found a free icon pack online and switched them to look like this. These worked better because now the button was in the shape of the trigger and bumper which makes it more intuitive for the player.
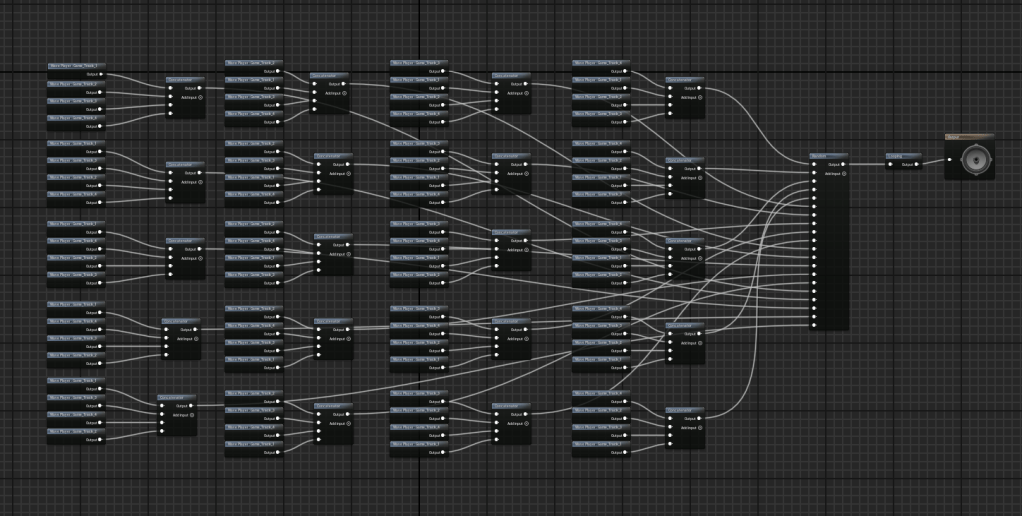
For music in my game, I used Suno AI to create the tracks. The reason I did this was due to time restrictions.

Then I imported the music into my game and created a sound cue for each “level”
I learnt how to use sound cues and came up with this system to randomly play all of the songs for the game I created in random orders. This is the one for the main game and I created another one of these for the main menu and tutorial.
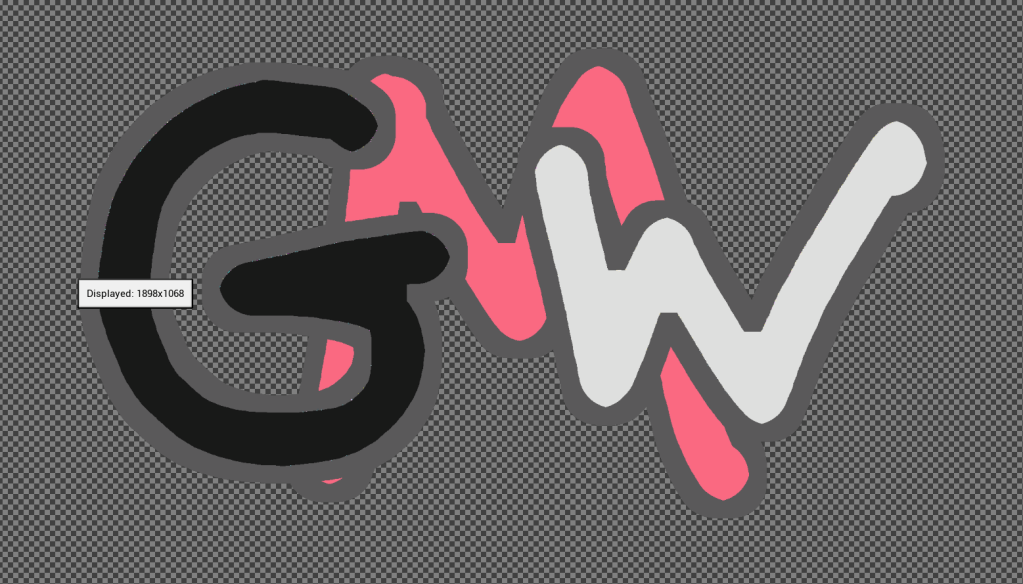
I wanted to upgrade my main menu screen a bit because it felt a bit bland. So I started coming up with logos for my game and this is what I made:
I created it in Krita.
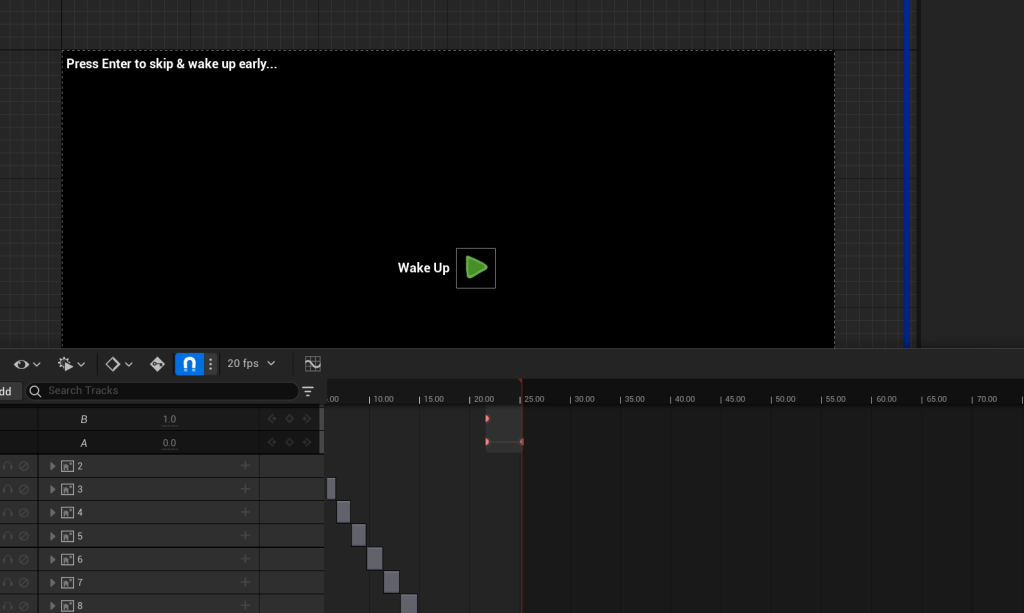
This is the second idea I came up with for my menu screen where the player starts in bed and it turns into the main menu. It functions the same as the other menu but just looks nicer.

This is the code I used to make the camera move up from the bed. It just uses a timeline which moves the camera from one position to another smoothly.
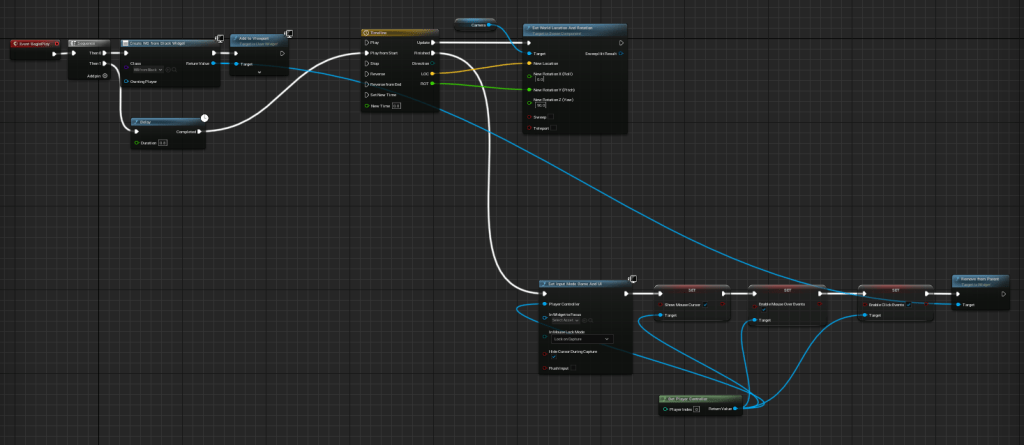
Next, I created a widget with an animation to act as a “sleep mode” which serves as the purpose to be the start screen. I added this so the game doesn’t just start straight away and so the player can press play when they’re ready.
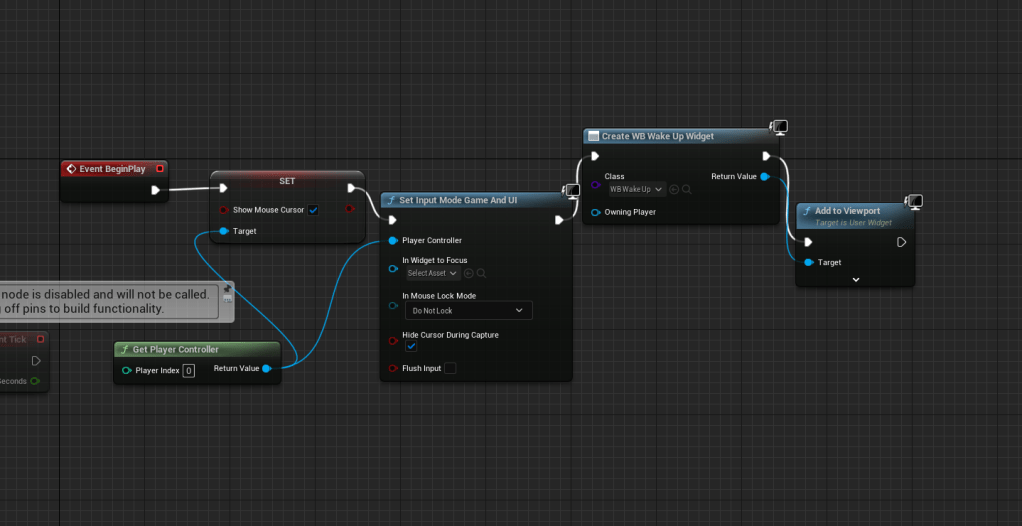
This is the code I made the the Level Blueprint to make the animation of being in sleep mode play as soon as you open the game.
This is a video I recorded to showcase all of the new additions to my game:
