Today, I decided to practice my skill in blender by making a full scene with a Poké Ball. By following a tutorial, these are the steps I took to make it.
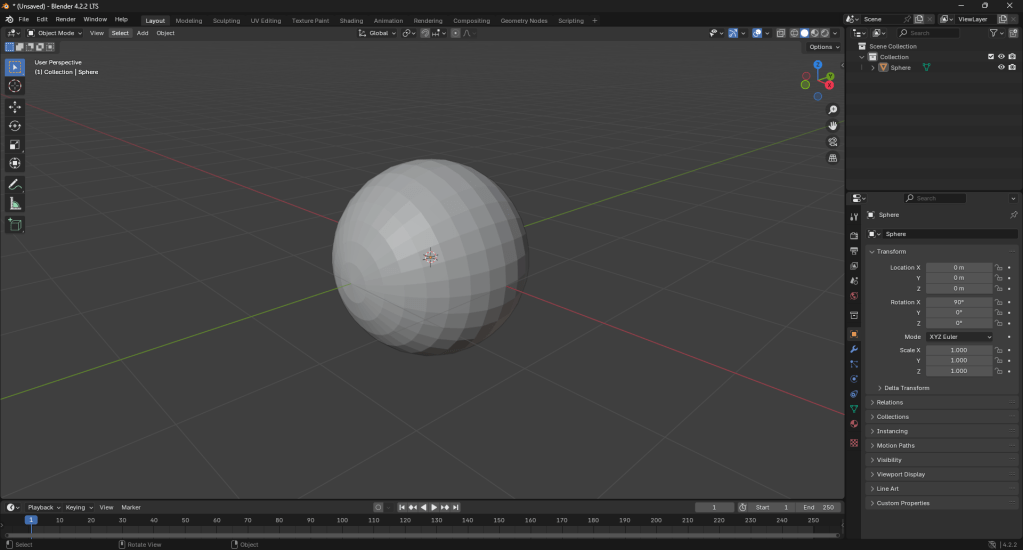
I started by adding a UV sphere to the scene:
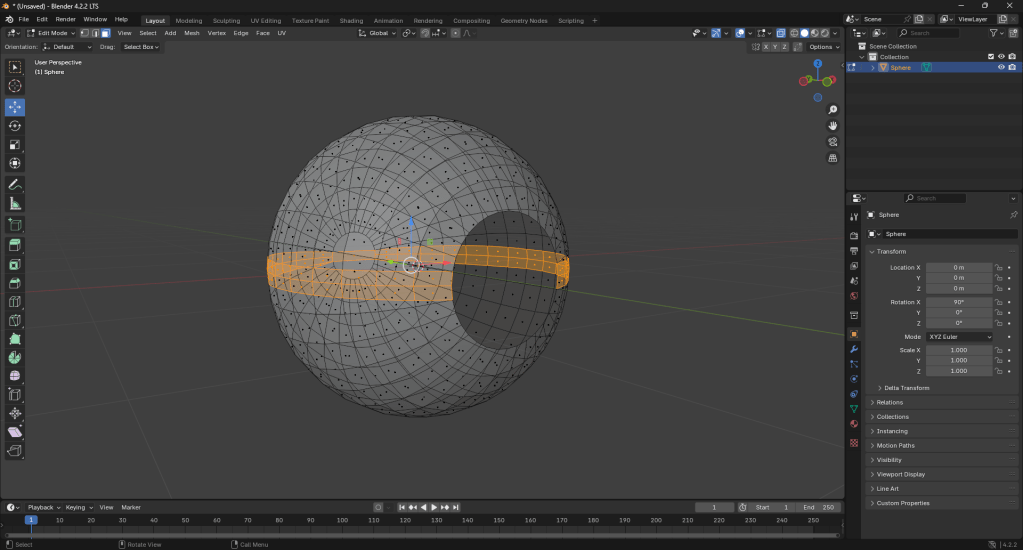
After, I deleted the front faces on the sphere then I learnt how to use the knife tool and I made a cut through the ball for the middle black part of the Poké Ball:
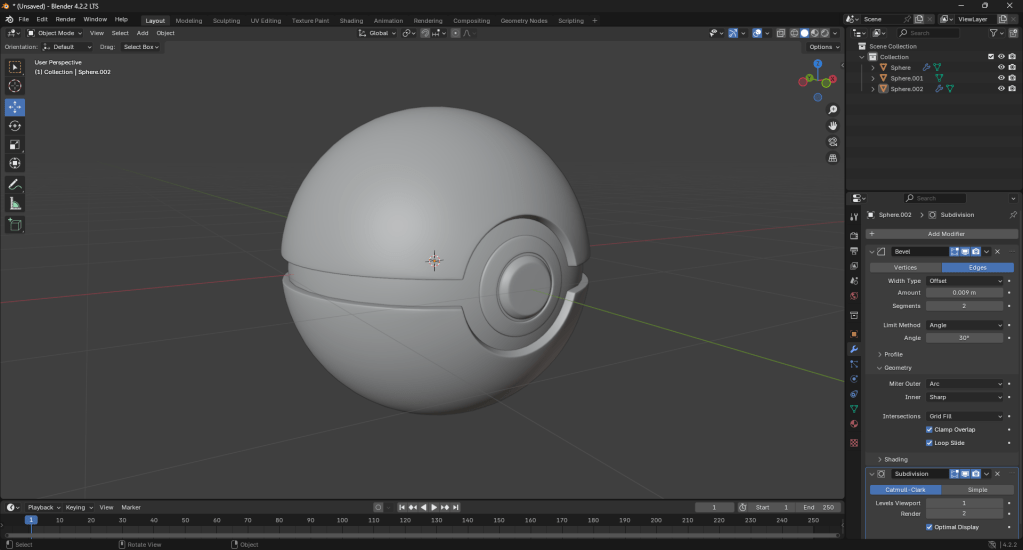
Then, I learnt the shortcut for adding a subdivision surface modifier (Ctrl + 1) and added solidify, bevel, and subdivision surface modifiers. Then I added another UV sphere inside and scaled it to be slightly smaller than the original sphere.

After, I took the front faces of the inner sphere and separated them from it. From those faces, I extruded and used a bevel on them to shape the button of a Poké Ball. I also used Shade Smooth on all the parts of the Poké Ball.
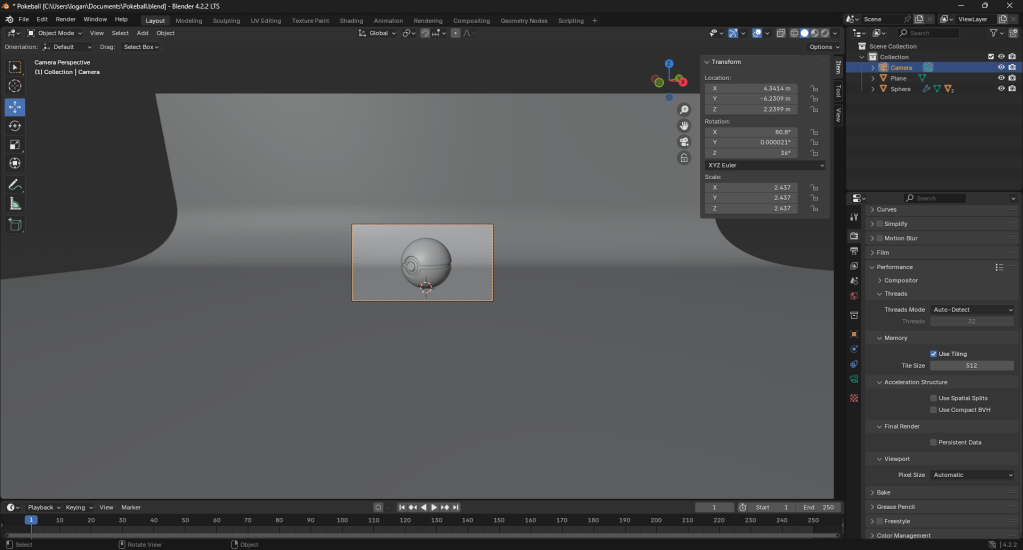
After I finished with that, I learnt how to set up a scene and I added a plane and extruded one of the edges behind the ball and used a bevel, then, I also set up a camera.
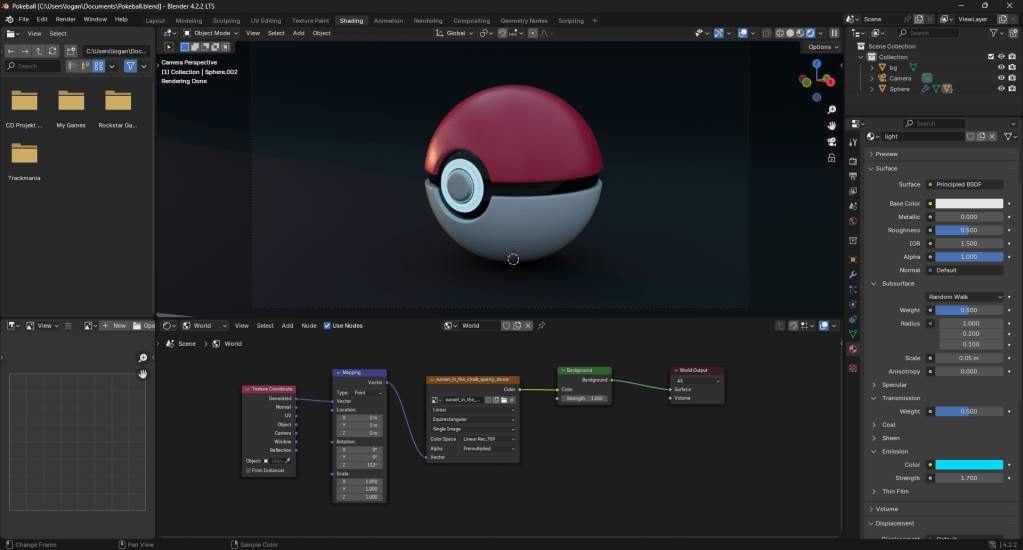
Once my camera was set up, I got to texturing the ball. I got a HDRI texture for the lighting from a website I found online: https://polyhaven.com/a/sunset_in_the_chalk_quarry
After I set it up, I added all the colours I needed for my Poké Ball and learnt how to make materials give off emissive colour.
I also edited the roughness and metallic properties of the material to make the Poké Ball look more realistic.
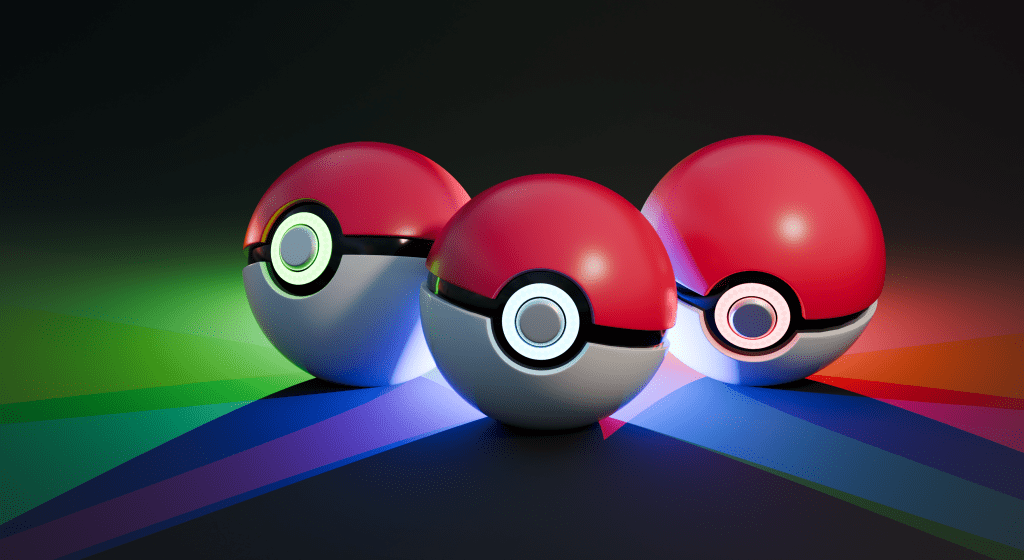
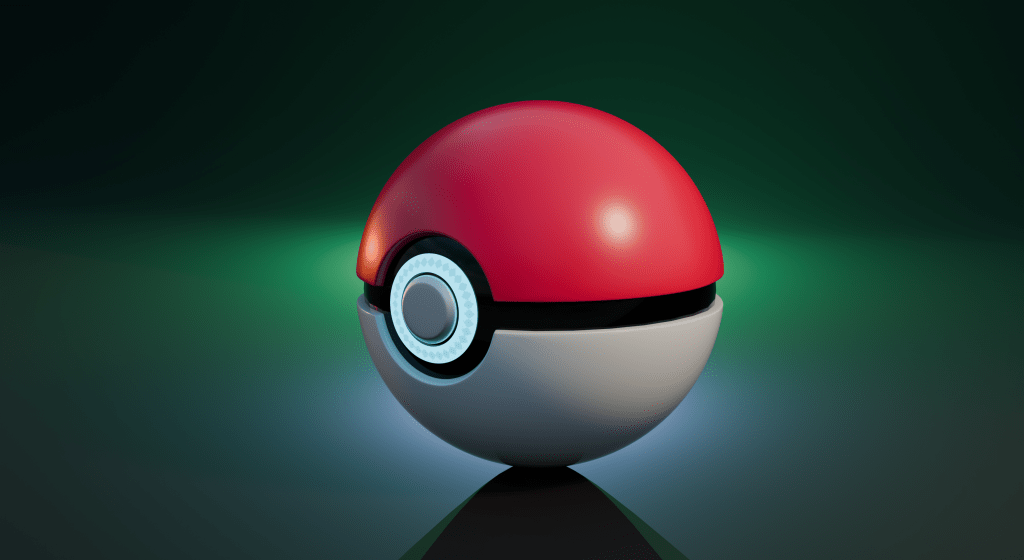
Finally, I set up the lighting with an area light on the top of the ball and bright coloured point lights behind the ball to make a nice shadow

Here are my final renders, I am extremely happy with my results.


Leave a comment